Archive for May, 2010

Thrifty & Chic: Small Frye

20 Comments

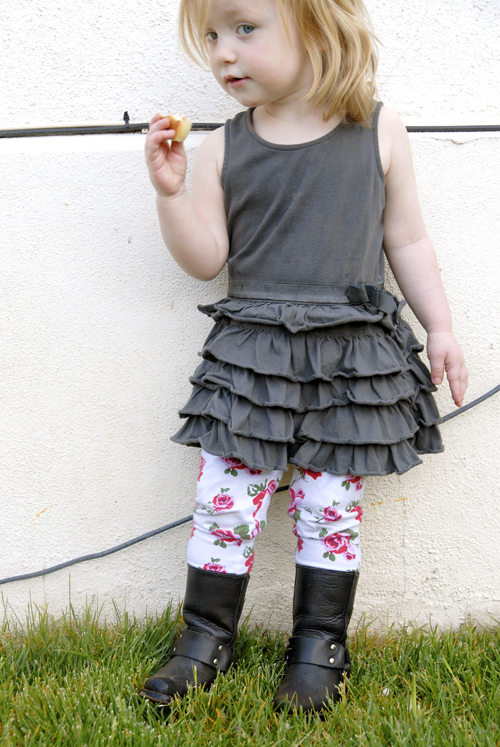
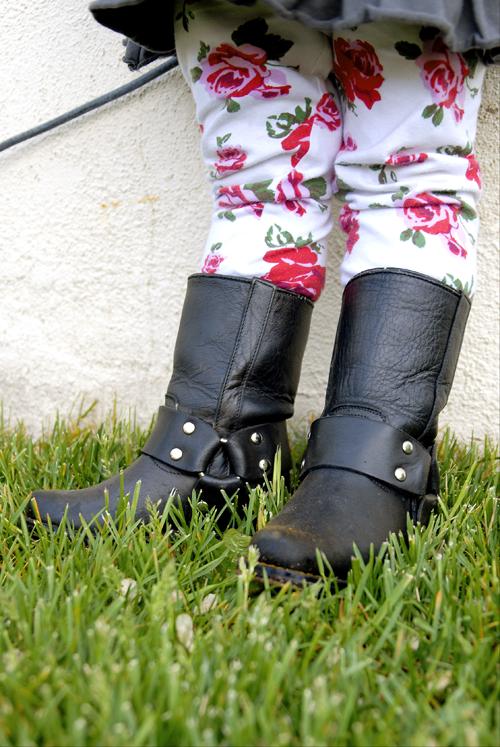
Last weekend I went on a little thrift outing with my cousin-in-law. We had some great success! Natalie found a rad leather sling bag and I found some small Frye-like boots for Penelope! While we were shopping I found a bunch of awesome finds, but really held back. Do I need an 8th pair of boots? Perhaps not, but there was no way I was going to pass up these gorgeous black leather motorcycle boots. They were $10.

Isn’t she a little diva? Penelope wasn’t shopping with me when I found the boots, so it was a gamble whether or not they’d fit on her chubby feet. Luck was on my side because they fit perfectly!! She’ll probably grow out of them in the next month, but we will be having another kid sometime in the future, who could also benefit from my thrifty find.

I have to admit; I’m a little jealous that they’re Penelope’s size and not mine. Oh well. Everything is cuter when it’s micro-sized anyway. I’m not sure anyone else I’ve bragged to has had the same enthusiasm about these boots as I do, but I am more than thrilled about my wallet-savvy find!

Have you found any good deals lately? Leave a comment and tell me about it (links are welcome)!

Penelope the Pomegranate Princess

28 Comments

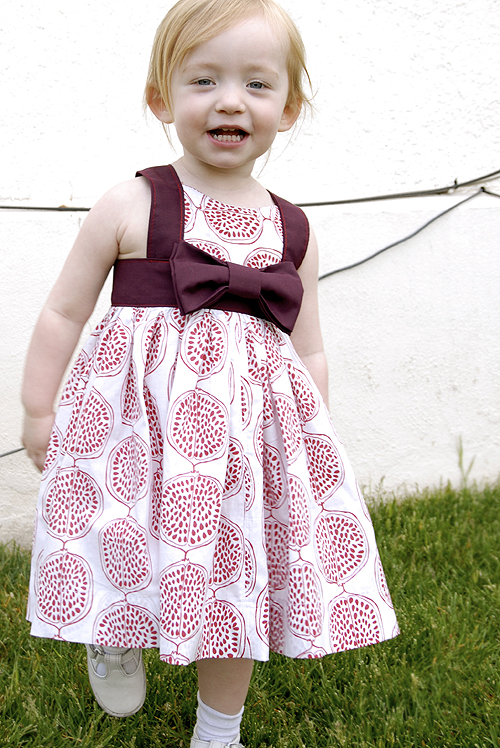
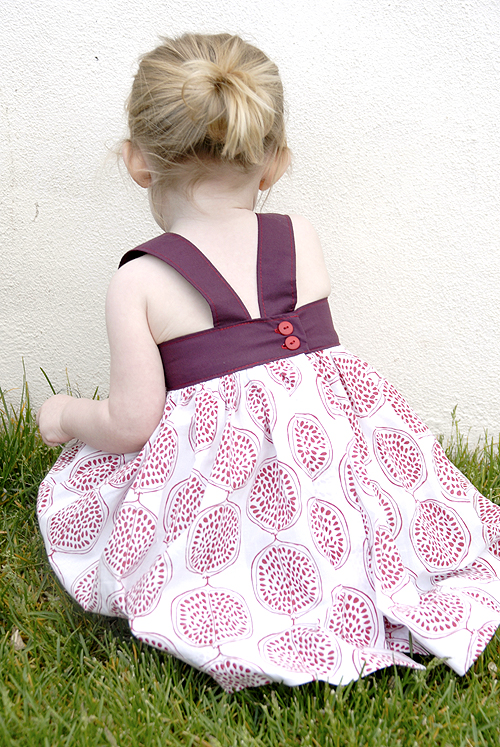
Sara Jensen of Lost Bird Found sent me the most adorable pomegranate print fabric in the hopes that I’d make something fun out of it. I definitely though it was adorable when I saw it online, but when I got it in the mail I got a completely tipsy with delight. I love this fabric! I wasn’t sure which to do first: a skirt for me or a dress for Penelope. Penelope’s dress won. I’m pretty sure I have enough fabric left over to make a sweet skirt for me, so you might see more of this fabric really soon!

I had so much fun working with Sarah’s fabric. The pattern is simple and sweet, printed on a light-weight cotton that is so easy to sew.

I finished the dress right in time for Penelope to wake up from her nap. I showed Penelope the finished dress and the first words out of her mouth were, “OOooOOO! Pretty!” Awww. Penelope! She just made my day. It melts my heart see her appreciate the things that I make for her.

Bows are the new ruffle, folks. I’m serious.

Above is a detail of the back. I sewed two sets of buttons (the second set are hidden), so when she grows she can use the second set of buttons & wear the dress longer! The dress encloses using the two buttons and has an open back. I made some baby shorts in the pomegranate fabric (not pictured) so you don’t see her cheesy Mickey Mouse diapers when she bends over. All in all I think this dress took me two hours to make. Not bad, considering I made the whole thing up as I went along!

Little Sleeve Update

23 Comments

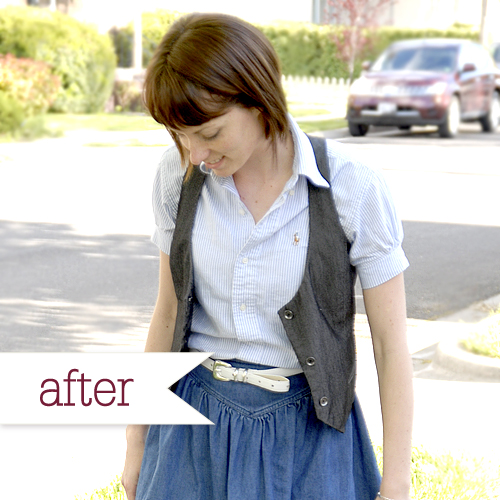
When I go thrift shopping I usually stop by the little boys section to search for button-up shirts. Most of the time I find shirts that fit everywhere but the arms; I guess I have longer arms than the average 12 year old boy. When sporting little boys shirts, I have to go for the nerdy high-water look or roll up my sleeves or refashion them into something that’s a little more fitting. I felt like this shirt needed a little update.

Here’s the before:

To update/feminize this shirt, I:

  • chopped the sleeves
  • added a gather to the outside of the sleeve
  • added a small cuff from leftover fabric

I think it turned out cute, but I’m not really sure if I get more use out of the shirt now that I’ve refashioned it. It’s probably about the same. The cropped/gathered sleeve definitely makes the shirt look more feminine. Which do you prefer? The before or the after? I’m still not quite sure.

Flash!

8 Comments

I bought a Nikon SB-600 flash unit for my camera nearly a month ago. I’m loving it. I feel like a free woman now that I can take decent photos in low-light situations. When I say low-light, I mean practically pitch black. Really.

Can I brag about it for a minute? I love this thing. Let me show you how awesome this thing is:

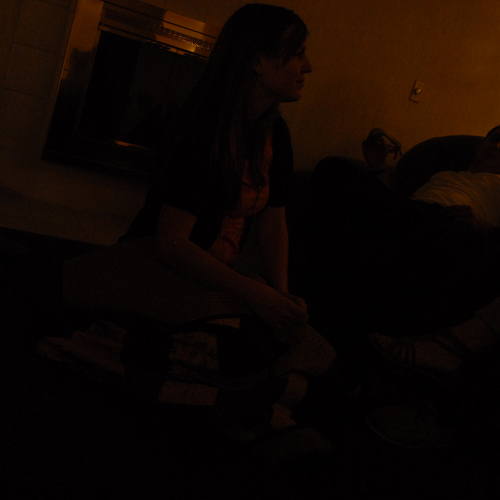
I took these photos at my cousin’s house at midnight. Each photo was taken from the same spot on the couch using the same settings. The above shot was taken without a flash of any kind. So sad.

This shot was taken using my pop-up flash. It’s not horrible, but it looks pretty bad. Right? It’s still really dark.

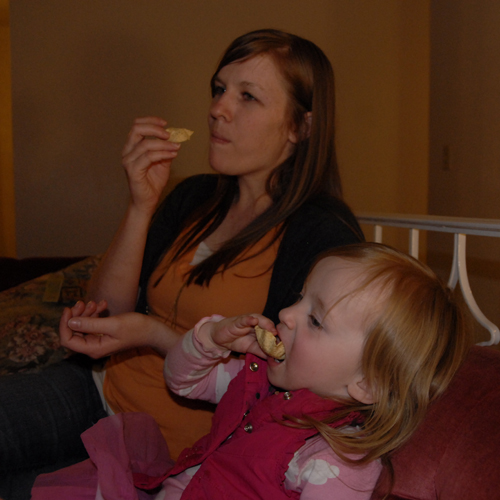
Now this is what I’m talking about!!! The above image was taken using my new flash pointed at the ceiling with a diffuser cap. WOW. Isn’t it nuts the difference between this and the rest of the photos? I love my new toy, I just have to start working out my arms so I can better handle my giant camera/lens/flash set-up.

Thrifty & Chic: Prairie Skirt Refashion

11 Comments

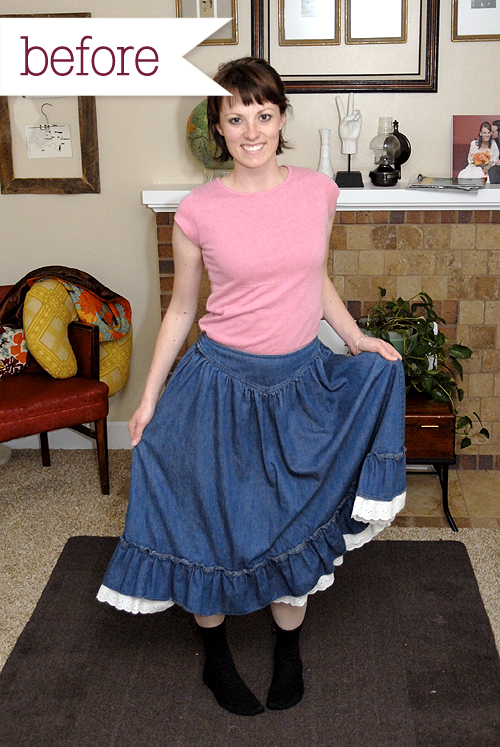
I bought this skirt for $2 my junior year of college at CTR–Community Thrift Relief; a janky old thrift store that occupied an old women’s gymnasium from yesteryear. I loved that place. It’s also where I found this pleated skirt and my husband’s rainbow brite hoodie(it’s really cool, btw). That place was full of all sorts of cheap, cheap gems. Too bad it’s no longer there. *sigh*

In college, I really liked dressing in theme. I would practically show up to class in costume. One day I was a cowgirl, the next I was a lawyer, the next I was a 12 year old girl in galoshes, the next I was a tortured artist. Funny story, my freshman year I vowed to never to show up to school wearing a t-shirt and jeans. The one day I broke my vow, half of the guys and girls in my apartment building wondered what was wrong.

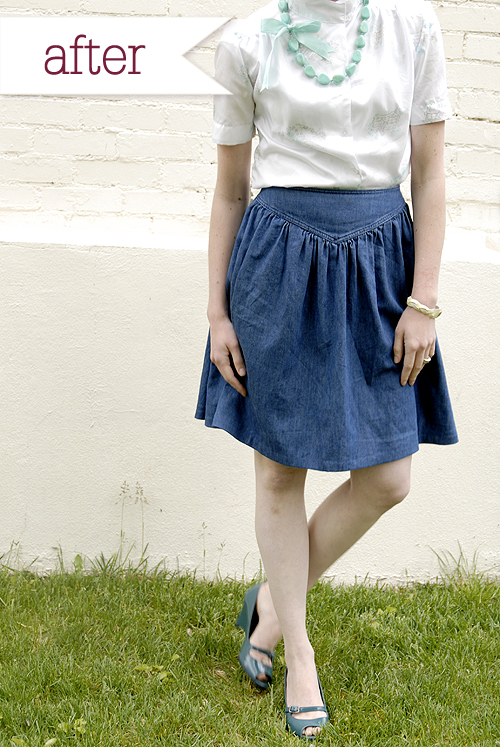
This skirt was what I wore when I dressed up as a pioneer/wrangler girl. I’d show up to class wearing a graphic tee, this skirt & some cowgirl boots. I may have even sported braids. Not sure. Now that my tastes have matured and I’m a responsible mommy, my themed skirt seems a little out of place. So I opted to update! Here’s what I did:

  • Took in the waist by using Susan’s side seam tutorial for jeans. (P.S. Those are my jeans pictured in that tutorial. I LOVE them so much more now that Susan took them in! This tutorial is GENIUS!)
  • CUT OFF THE RUFFLE BOTTOM. Gross.
  • Shortened the skirt by 10 inches.
  • Hemmed the skirt using an adhesive hemming tape.

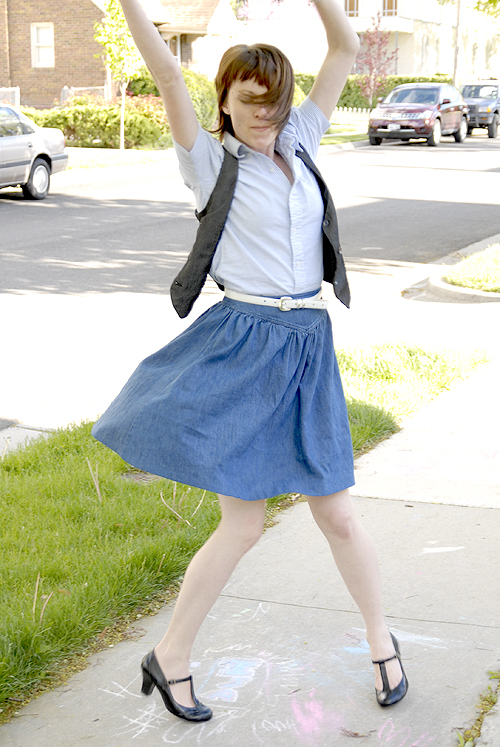
There you have it! This fix was so simple, yet took me about 3 hours to complete since I had to unpick 9 different seams to take in the waist. This skirt has awesome construction. I probably wouldn’t have taken the time to update this skirt had I not been completely in love with the “V” waist band. Those waistbands are so hot right now.

mobile site