Archive for the ‘art’ Category

How to Hang a Gallery Wall Vignette

0 Comments

I’ve wanted to share this with you for some time now. Creating gallery wall vignettes with a wide variety of artwork and found objects is what my house is made of. Just a couple weeks ago, Hayley and I set out to hang artwork on the walls of our entertainment space in the new kitchen. Over the next few months, I’m going to share with you the updates that we’ve made over the course of the last year (still ongoing :/). So to kick it off, I’m sharing with you the process I use for hanging artwork on the walls. 

I love taking medium to small sized blank walls and create little galleries with a wide range of artwork and objects. I hope this can serve as inspiration and motivation to get your creative side going and hanging some artwork!! 

As an introduction, this space is quite the multi-functional spot. We dine and craft and relax in this space. We have no formal dining area, so I wanted to tone down the gigantic black box in the middle with some lively artwork and clean up the bar from the artwork I had piled on there so we could use it as a buffet when company comes over. Getting the art from the counter to the walls really cleaned up the space so much. So let me take you through the space….

So let’s get on to hanging artwork! 

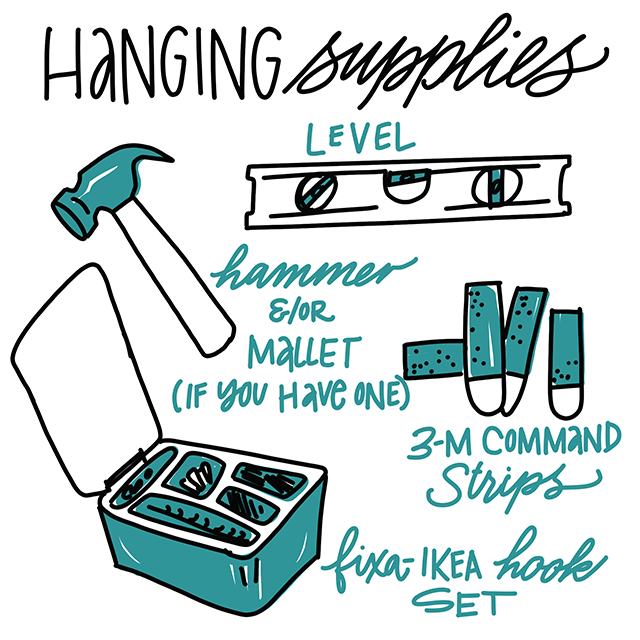
These are my must-have tools for hanging art work. 

I really love the above hangers. They’re really stable and great for heavy pieces, especially if you’re not hammering into a stud. You can find these at home depot, but they’re in various sizes in the Fixa set. Seriously, $5 very well spent there. I’ve had that little set for a couple of years, and it’s well worth it. It’s self-contained which makes it easy to keep from the children “playing” with the materials.  

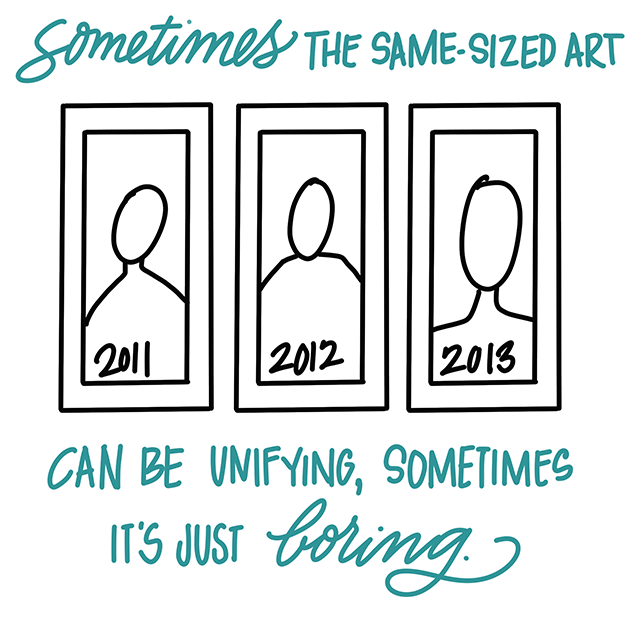
Finding ways to unify pieces is great. Sometimes if you have a variety of styles that you want to bring together (like, for example, family portraits in a wide range of eras and styles). But hanging artwork on every wall in your house in the exact same frames gets really stale. So start collecting art and objects in a wide variety of sizes, shapes and frames! This is where being a little scatter-brained and ADHD comes in handy. 

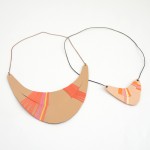
Collecting a variety of prints, original art, found objects gives you lots of variety, texture and depth. But by having a variety, you need to find ways to bring back unity. 

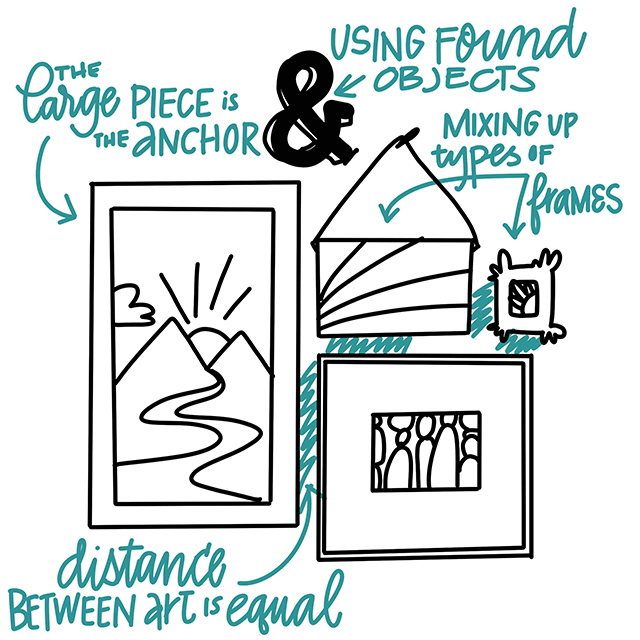
Grouping pieces together that have similar color schemes and making sure that art is spaced evenly brings in consistency that the eye enjoys. 

HOT TIP: if you stand back from your grouping (whether on the wall or the floor as a mock-up), defocus your eye. You’ll see what spots are visually more heavy and where to add pieces. 

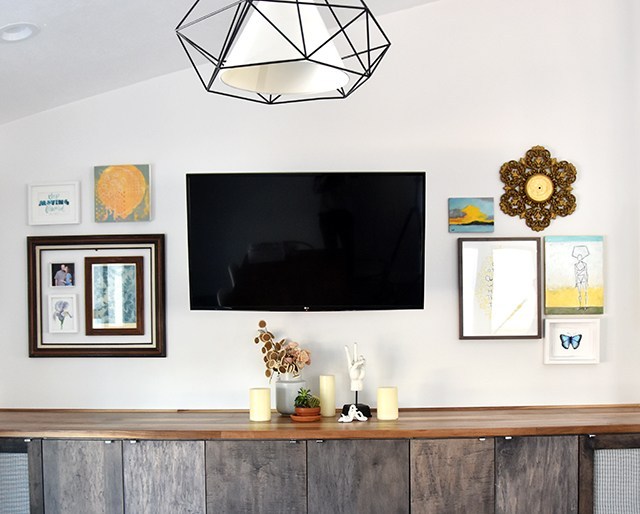
Gallery walls don’t need to fit into a tight rectangular shape. As you’ll see from the grouping on the top right hand side, that it peeks out of the rectangle, but it takes up roughly the same negative space as the tighter grouping on the left. 

So what do you think? Will you be hanging art vignettes on your walls any time soon? 

Watercolor Pencil Ranunculus Tutorial

0 Comments

I’ve had this thing in the queue too long! It’s no secret that I’m a materials hoarder. When I got the chance to score a set of General’s Kimberly Watercolor Pencils, I jumped at the chance. I tried watercolor pencils a long, long time ago (before I really even knew a thing about watercolor painting in general), and didn’t really do well with them. I needed to make up for lost time. 

I really loved how these watercolor pencils turned out. They’re smooth, vibrant, juicy, and blendable. BUT… they aren’t watercolor paints! There’s a real distinction between the two… See? 

I love how I can get very gestural strokes with the watercolor pencils. It adds a lot of movement to the paper. I filmed a quick little tutorial on how to make your own ranunculus in the video below. I do hope you enjoy! 


Add your own calligraphy to your florals, and you’ve got a VA-VA-VOOM piece that your friends and family will love! Don’t know calligraphy yet? Consider taking my online class. It’s THE BEST (if I do say so myself. ;)). 

Embossing Hand-Lettering & Calligraphy

0 Comments

Close To My Heart sent me a sweet care package of embossing goodies to try with calligraphy. I’ve had a blast ever since they showed up on my doorstep! It’s been so fun to make cards and address envelopes with my new gadgets. And now I want every color under the sun to use for embossing! The raised texture is fantastic. And I’ve been able to get reliable results time after time with my pointed pen and my pointed brushes. It’s definitely a worth-while investment. 

Materials used: 
Gillott 404 Nib 
Oblique Holder 
Strathmore Bristol Paper
Size 2 Liner Brush
CTMH Embossing Powder
CTMH Heat Tool
CTMH Watercolors
Glycerine

I found that the Versamark liquid (for refilling stamp pads) was too sticky to use as ink, so I opted for glycerine. I’m glad I was able to find a suitable substitute as the glycerine doesn’t gum up my nibs or brushes. That said, I do like to use my cheaper nibs and brushes for this particular activity. I don’t want to be destroying my sable hair brushes in the process! 

Check out the video or read through the post details to find out how to emboss your own lettering!


  1. Dilute 1 part glycerine and 1 part water to make your ink. It helps to use a pipette to dilute with water so you have good control. 
  2. Pen or brush your words/phrase/name on the paper. Use a nice quality paper so the glycerine doesn’t bleed. Before lettering, make sure to scrape or drip off excess “ink” so you’re not laying down too much glycerine. It can affect how the embossing happens. 
  3. Place your paper over a scrap sheet, I like using a thin sheet of paper so that I can easily clean up excess embossing powder. 
  4. Pour a generous amount of embossing powder over your design. Tap excess off the paper onto the scrap sheet. Set project aside and funnel excess powder back into the embossing powder jar. 
  5. Heat your design with a heat tool. Keep the tool 2-4 inches away from  your work and move the tool as the powder melts. 
  6. Optional: Add a watercolor wash over your work. 
  7. For best results, the watercolor wash should happen after. The watercolor resists the embossed work, so no need to do it prior. If you do happen to do it beforehand, you may find the glycerine bleeds over the wash and your lines will get fuzzy. 

Products from Close To My Heart (CTMH) were provided for this video. All thoughts and opinions are my own. The affiliate links used help support this blog and the tools used for making more tutorials, reviews and content. Thanks for your support!

DIY: Raised Lettering With Glue

0 Comments

I was on local TV show, Studio 5 this week sharing a fun how-to with Elmer’s glue: Raised lettering. It’s really quite addicting and something you can rope your kids into (perfect for a Father’s Day craft). It doesn’t have to be lettering you include on the card, either. Abstract designs really add a lot of depth, too. So any age and skill level could do this craft. But be careful, it could get messy. ;) Here’s the link to the segment if you’d like to take a look!

So here’s what you need: 

Figure out your design. I found the simpler the better. The largest word I was successfully able to write without bleeding and readability issues was “love”. “Hi”, “Hey”, “thx” totally worked. 

Keep your glue bottle about an inch to two inches away. Allowing the steady stream of glue to create smooth curves. Set out in the sun for a couple of hours to dry. I use little porcelain dominoes to keep them from flying away. 

Once the cards are dry, paint overtop! This is super fun because the paint job can be whatever. So include your little ones and do something fun. This is a great way to get them involved in hand-written ‘Thank You’s and perfect for Father’s Day this upcoming weekend. 

Junie got really excited about this project, too. We had a great time disconnecting from screens and making some fun artwork. 

Hope you get around to doing some fun raised cards soon! Feel free to comment below if you did the project. I’d love to see how they turned out. 

This tutorial is free for personal use. Link with love. Thanks! Affiliate links are used.  

Baby Calligraphy

0 Comments

Some time ago, a calligraphy friend of mine had a sweet baby girl, so a bunch of us sent her artwork of her daughter’s name. I’m so happy with how my contribution turned out. 

I went with an upright, modern style with a meandering baseline. I loved adding florals as decor on there, florals I learned from the one and only Heather Held

Materials used: 

Creative things like this where I’m let loose to my own devices is so freeing. It was fun to go to town on this little piece. 

Lately I’ve been telling a lot of people how calligraphy is the perfect creative outlet. It truly is! It’s mobile, you can do it anywhere, you can start with even the simplest of supplies and it’s something that doesn’t require an artistic bone in your body. Because letters and rules are involved, it’s a fantastic left-brained art activity. It’s so meditative and calming for me. When life gets chaotic (which it is that almost entirely right now), I can pop into my studio, or pull out paper while my kids are drawing and draw letters alongside them. It’s so fantastic. 

If you’d like to learn how, definitely check out my online class at Calligraphy.org. It includes great content and personal coaching, so if something goes wrong, you’ve got someone to help you troubleshoot. I’m also available for in-person workshops and private classes. Feel free to drop me a line if you have any questions! 

mobile site