Archive for the ‘crafts’ Category

Off My Creative Game

6 Comments

I’ve been off my creative game lately. I’ll blame it on the fact that life is just getting exponentially busier. I’m not complaining, but making more of an effort to carve out creative time seems to be a must these days.

melissaesplin-silhouette-vinyl-triangle-heart-2

We didn’t celebrate St. Patrick’s Day like I  had hoped: with a trail of candy leading to a warm breakfast. I did it last year and just loved Penelope’s response. This year, it didn’t happen. As disappointed as I was in myself for not making it happen, Penelope didn’t care. I hope that she’ll be surprised and excited when I get around to doing fun things for holidays, but not ever feel entitled if they don’t happen just the way she envisions. I think that’s a hard balance to strike, especially with the driving force of over-celebrating that Pinterest sometimes brings (anyone read this article that’s resurfaced the last few weeks?).

melissaesplin-silhouette-vinyl-triangle-heart-1

This shirt I decorated yesterday would have made for the perfect Valentine’s touch LAST MONTH, but it doesn’t matter. What matters to me most was her reaction when I gave it to her. It didn’t elicit a reaction of “Mommy, I should have worn that for Valentine’s.”, but “WHAAAT?? Mommy!! Is that for MEEEEEE???”. This girl’s reactions to even the smallest gestures are the best thing in the world. They remind me why I longed to be a mom in the first place.

melissaesplin-silhouette-vinyl-triangle-heart-3

  • Shirt: Walmart
  • Heart design: Me, using Silhouette Iron-on material
  • Velvet pants: Walmart
  • Shoes: Amazon

I finally got around to sewing this week! I’ll be sharing those details with you tomorrow.

DIY: Gold and Leather Bolo Necklace

5 Comments

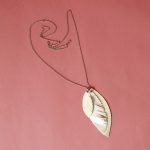
I’m hating the silence over here. We’ve been busy packing up Black Friday orders, driving 700 miles, nursing some serious head colds and doing laundry. Anxious to get some creative time under my belt this week, I made a couple necklaces with Penelope. She rummaged through my jewelry stuff and strung any kind of pendant and bead onto a leather string. I played around with some leather and metal and came up with this. I love how my new necklace turned out. It’s reminiscent of a bolo tie because of the length and windsor knot-like shape of the leather piece.

istillloveyou-diy-jewelry-leather-gold-1

I found this laser cut scale leather in a scrap bin at Michael Levine back in May when I went to LA. It’s such a small piece. It’s so nice to be able to use small scraps for things like this, I feel like there’s no waste that way!

istillloveyou-diy-jewelry-leather-gold-9

Make one with me!

Leather Gold-Dipped Bolo Necklace Tutorial

istillloveyou-diy-jewelry-leather-gold-2

Supplies

  • gold chain 11-18 inches
  • 20 guage gold wire
  • 4 jump rings
  • closure
  • leather strip, 8 x .5 inches
  • scissors
  • jewelry pliers
  • liquid gold or gold foil
  • junk brush

If you’re going the vegan route, go for felt instead of faux leather. Felt will wear and look better over time than faux leather.

Click below to read the rest of the instructions!

(more…)

Hand-Cut Playhouse Silhouette Promo

9 Comments

Anything in miniature is just irrisistable, is it not? Penelope and I found these little miniature plastic toys at the toy store a couple weeks ago. They’re no taller than half an inch, making them the perfect travel play buddies.

istillloveyou-handmade-silhouette-playhouse-trees-1

I’m always trying to find appropriate quiet toys for Penelope and Felix to play with during our church services on Sundays. They can be the hardest 3 hours of the week if I don’t come prepared with ample toys and snacks. Problem is, often times they get bored with the toys they typically play with. The idea struck for Sunday-only toys when I found these little cuties.

They were great last week, but we were missing scenery. The little pouch my friend made is perfect for housing all of the animals and any coordinating accessories so my mind set to work to make something collapsible that would fit inside the little pouch (isn’t it too cute?!?).

istillloveyou-handmade-silhouette-playhouse-trees-2

Making little cut-outs with Silhouette’s chipboard did the trick! Designing the scenery was a breeze, too. It was a fun little mommy-daughter activity for us to decorate the scenery together.

I’m not sure I’ve seen this kind of excitement from her in a while.

istillloveyou-handmade-silhouette-playhouse-trees-3

Now my only hope is that I can hide these little goodies during the week. She wants to play with her toy scene all the time!

istillloveyou-handmade-silhouette-playhouse-trees-4-animated

Yesterday started a huge promotion over at Silhouette. They’re offering huge discounts on not only the machines, but a whole pack of goodies. If you don’t have a machine yet, I advise you get one with this promo. You’ll get so many fun starter goodies you’ll be crafting well into the thick of winter.

Use promo code MELISSA at checkout for this exclusive deal.

Specialty media plus a Silhouette CAMEO® for $269.99 (savings over $120 from retail cost $383.90)

  • 1 cardstock essentials pack (new product)
  • 1 pack printable adhesive kraft paper (new product)
  • 1 pack printable clear sticker paper
  • 1 pack temporary tattoo paper
  • 1 pack printable cotton canvas (new product)
  • 1 pack chipboard
  • 1 pack printable silver foil
  • 1 pack printable magnet paper
  • 1 pack double-sided adhesive

Specialty media plus a Silhouette Portrait™ for $129.99 (savings over $110 from retail cost $263.90)

  • 1 cardstock essentials pack (new product)
  • 1 pack printable adhesive kraft paper (new product)
  • 1 pack printable clear sticker paper
  • 1 pack temporary tattoo paper
  • 1 pack printable cotton canvas (new product)
  • 1 pack chipboard
  • 1 pack printable silver foil
  • 1 pack printable magnet paper
  • 1 pack double-sided adhesive

30% off on all specialty media

specialty-media-blogger-promo

I am a Silhouette affiliate. I wouldn’t blog about their products unless I really loved them. And I do. I receive a portion of sales made with the promotional code MELISSA, so thank you for your support!!


Leather Crafting: Sewing up iPhone Case

8 Comments

We didn’t need much evidence to see that my sister-in-law needed a new case for her phone. While she partied with us this weekend we put our heads together (I see a three-bodied, one-headed monster) to come up with a wallet/case for her. I have a pattern for a phone/wallet pattern and tutorial available for the iPhone 4, but we decided ad-libbing would be more fun for her slightly-different-dimensioned iPhone 5.

istillloveyou-brookes-leather-iphonecase-handmade-2

I didn’t make a pattern for her (I kinda wish I did, I love how it turned out). We ended up wrapping the leather around her phone and punching and sewing as we went.

istillloveyou-brookes-leather-iphonecase-handmade-3

We used a large leather scrap scored from an upholstery shop years ago. It’s thin, but stiff. Perfect for a durable case that will hopefully last years.

The rustic styling and minimal details play into Brooke’s style well.

istillloveyou-brookes-leather-iphonecase-handmade-1

I love the simplicity of this case.

istillloveyou-brookes-leather-iphonecase-handmade-5

And the one line of stitching down the side is a really neat detail, IMHO. ;)

istillloveyou-brookes-leather-iphonecase-handmade-6

Our little “experiment” was a total win. I couldn’t help but get even more excited and anxious to get my new phone and case!!

You are Special Today Silhouette Promo

6 Comments

You know I love me some glass etching. It’s so fun to have an image etched permanently onto such a slippery surface!

istillloveyou-silhouette-etchingglass-2

When I got my kit, I knew exactly what I wanted. A “You are Special Today” plate for birthdays.

Several months ago, Gabrielle had me letter a few versions of the phrase for a story about celebrating birthdays. I love how she approaches each holiday with such simple, yet impactful flair. You can download the plate artwork here (and use the tutorial for a drawn or etched plate!).

istillloveyou-silhouette-etchingglass-1

From now on (I’m sure I’ll forget, but I’m going to try) I am going to pull out this plate for the birthday girl or boy for each meal.

The craft was incredibly easy since I didn’t have to sketch or cut out the design. Since using my cutter, the project went from an idea to done in a matter of minutes.

Since the etched plate would serve food (likely sticky breakfast foods), I opted to etch the underside of the plate. In reverse. Sometimes you won’t need to reverse it. It just depends upon where you need to put it. You’ll want to reverse the graphic if you’re going to etch pans (because you want to etch the outside of the pan and see the design from the inside). No need to reverse it if you’re putting the graphic on the outside of a jar and viewing the design from the outside of the jar.

istillloveyou-silhouette-etchingglass-3

It’s so hard to take crisp, high-contrast photos of etched glass. These lines are a lot more crisp than they photograph. The masking material’s impressive adhesion got me really excited about doing some more intricate abstract patterns on plates. Ideas are coming in droves!

The Silhouette promotion for this month includes a starter kit with all the materials needed for creating an etched craft. Use code MELISSA at checkout for the discount.

glass-etching-promo

I am a Silhouette affiliate. I wouldn’t blog about their products unless I really loved them. And I do. I receive a portion of sales made with the promotional code MELISSA, so thank you for your support!!


mobile site