Archive for the ‘handmade’ Category

Tutorial: Watercolor Poppies Notebook for Journaling and Conference Notes

6 Comments

You new here? WELCOME!! Pop over to Instagram and give me a follow or check out my online calligraphy class!

Over the last few weeks, I’ve made about a dozen or so of these notebooks. I’ve made them for neighbors, family, friends and even a couple for myself. I’ve really enjoyed the freeform aspect of painting the covers as I go. I’ve gotten a few requests for the step-by-step, so here you go!
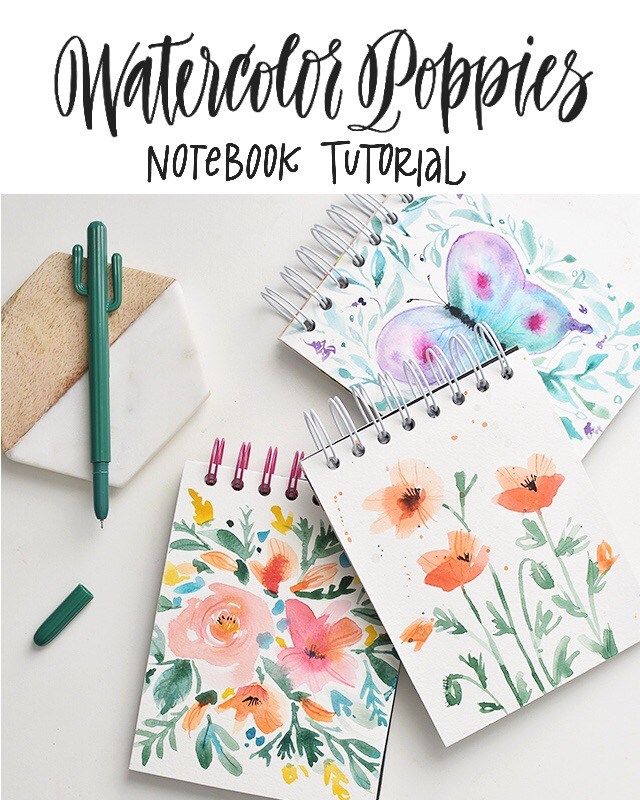
The cover material is Canson Watercolor Artboard. I was given a pad of this artboard and truly have enjoyed the thickness of this paper. It’s actually coldpress watercolor paper that’s mounted on museum board. So you can soak the paper with as much soupy water as you want, it won’t buckle. You may get a slight bow to the board, but it all goes back to its original flat shape once the paint has dried. It’s perfect for book covers!

Shall we make a notebook (or 10) together? Let’s get it going! Affiliate links are used to link to actual materials I own and use. Your support feeds my craft addiction, which feeds more tutorials. So thank you!! 

For supplies, you will need: 

* CLICK HERE TO DOWNLOAD FILLER PAPER FOR GENERAL CONFERENCE FOR THE CHURCH OF JESUS CHRIST OF LATTER-DAY SAINTS (you’ll want to print 5-10 copies of this PDF for one book)

If you’d like to just paint poppies, skip to the bottom. If you’d like to bind a notebook, you’ll want to line the underside of the boards with a decorative paper. You can use wrapping paper (I used Rifle Paper Co wrapping paper) or any kind of scrapbooking paper you choose. 

You can get your favorite paper and cut it into fourths (4.25″x5.5″), or you can download my lined filler paper and have it printed at your nearest print shop. for a .75″ coil bind, you’ll want at least 60 sheets of paper (15 copies, cut in fourths). If you don’t have a good cutter at home, your local print shop can do the cutting for you! 

First, we need to cut down the boards down to size. For a notebook that fills quarter sheets (see here for filler paper download), 4.25″x5.5″, you’ll cut your boards down to 4.5″ x 5.75″. 
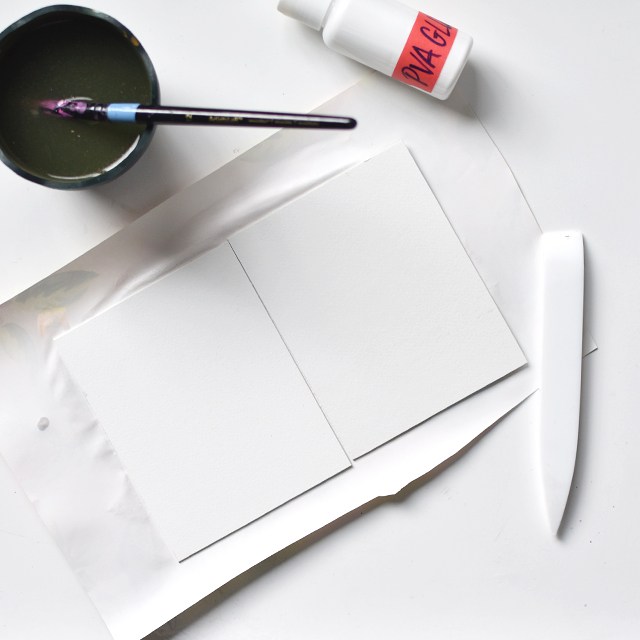
On a larger sheet of decorative paper, apply glue to the backside of the paper. Spread with a watered brush. Press the paper down, be careful to avoid getting glue on the top of your watercolor board or you will have a terrible time painting it. 
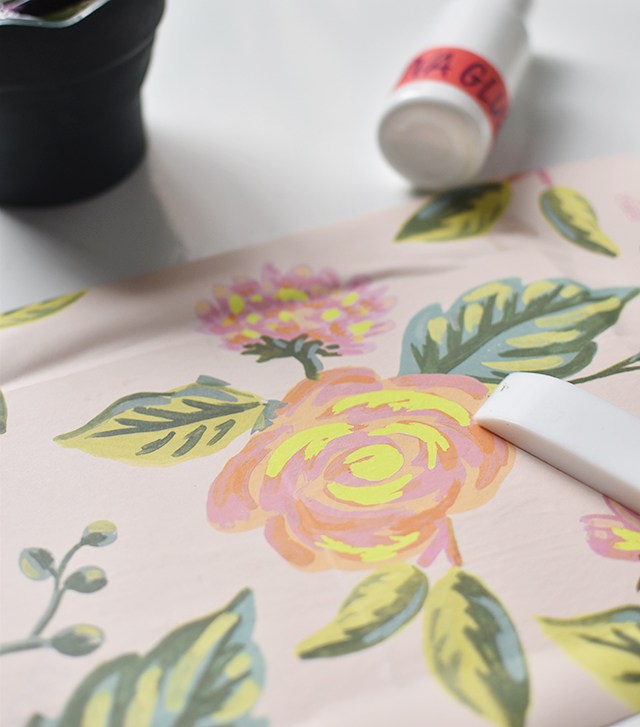
Turn the boards over and with your bone folder, work the bubbles out. 
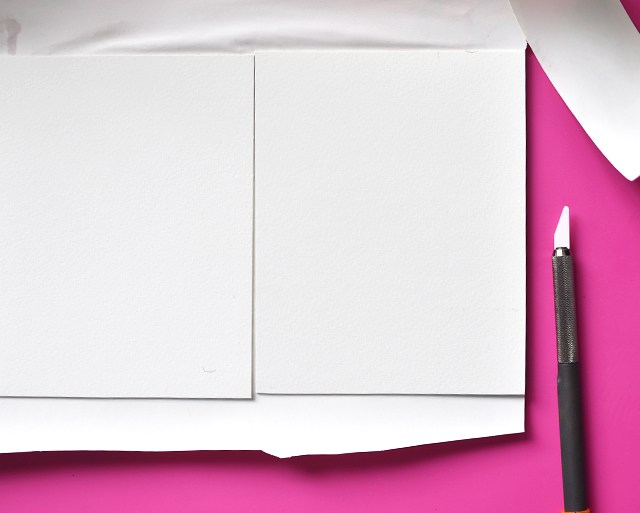
On a protected surface, cut the boards free of the excess paper with a craft knife. I LOVE this craft knife from Slice. It won’t cut skin! See my review of it here.
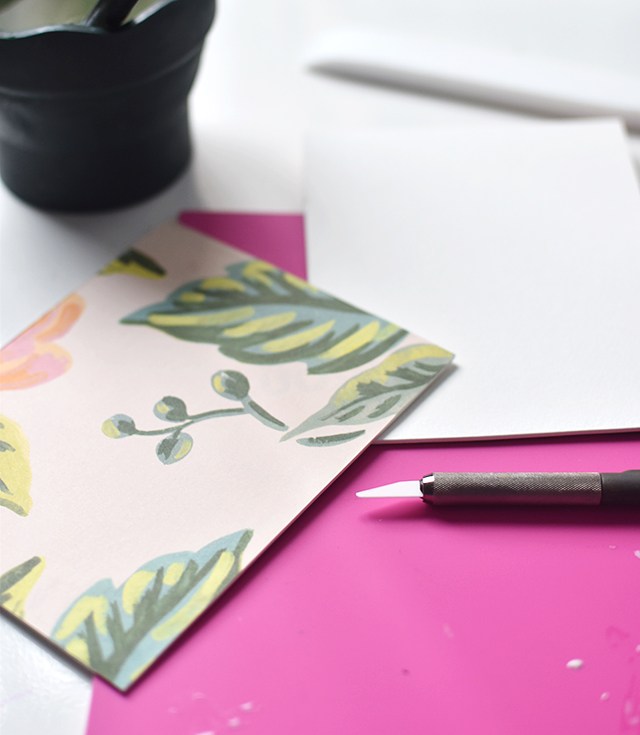
Allow to rest so the glue has time to dry. NOW on to the painting!! 

For this portion, I’m using 2 different brushes. I’m using a red sable brush (a soft, natural bristle brush), size 5 round and a synthetic size 0 round for the little details. You can use whatever brushes you have on hand, but I like the flexibility of the sable brush and how it gives me more organic lines. You can get amazing results from just about any brush, but if you’re investing in watercolor, consider purchasing a sable brush. They’re just so fantastic to paint with. 

Start by mixing 2 types of oranges. A true orange and a reddish orange. Make them soupy. You want lots of water in there to work with. 
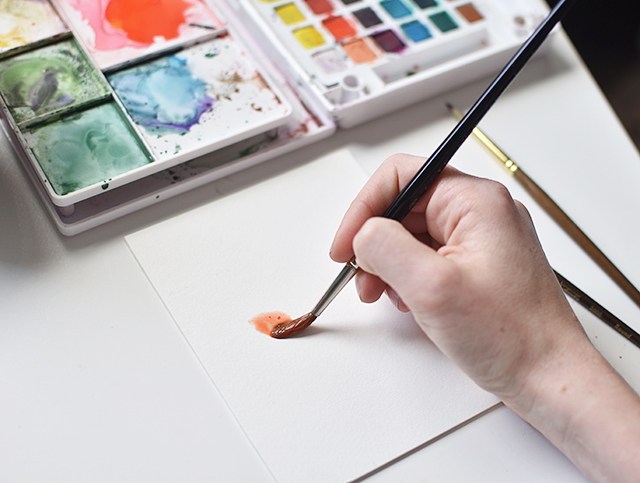
Start by picking up the lighter orange and fill your brush with that pigment. On the middle to top third of the board, I make organic ‘V’ strokes. Start heavy and thick at the top and release pressure so you have a point towards the bottom. It doesn’t matter where you put them. Make about 3. Allow the watercolor to dry. 

If you want an open poppy, scribble a couple of ‘v’s and a rounded bottom. Drop the darker, reddish orange in the wet middle of the open poppy. 
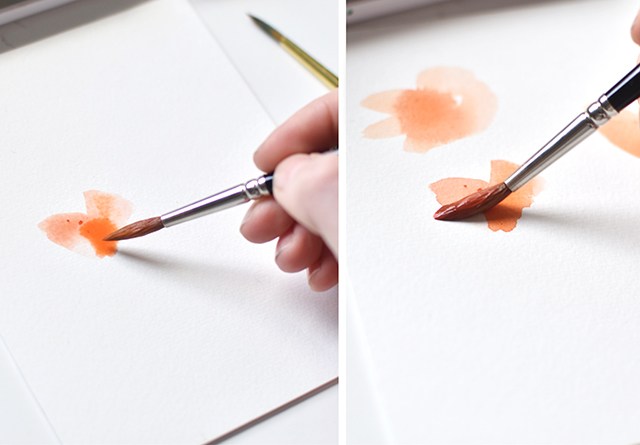
Once the first set of marks have dried, add another ‘V’ stroke, align the bottom of the ‘v’ in the same spot as the lighter pigment, but offset the tops of the ‘v’. 
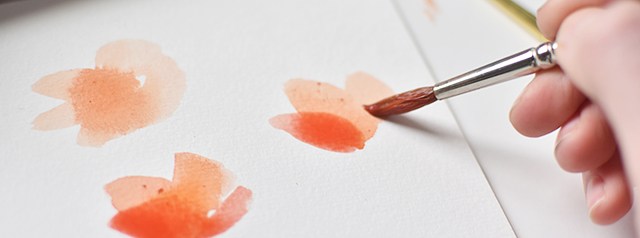
The one on the lower left wasn’t quite dry when I added the darker color, so there isn’t as much of a separation of pigment. That’s totally okay! You can see on the right ‘V’, that there’s more a separation of color. Making them slightly different gives each flower a more organic touch. 
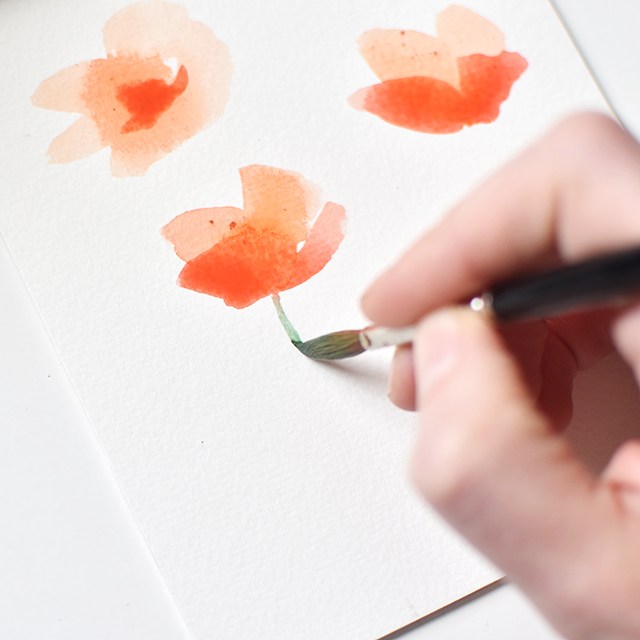
While the bottoms are still a little wet, draw in the stems. I like to create a varied, organic, almost awkward stem. Drop some darker bits of green color in there for some variation. When it comes to mixing the green stems for poppies, I go for a mid-toned, warm green. No jewel-toned greens here, otherwise the orange won’t pop. 
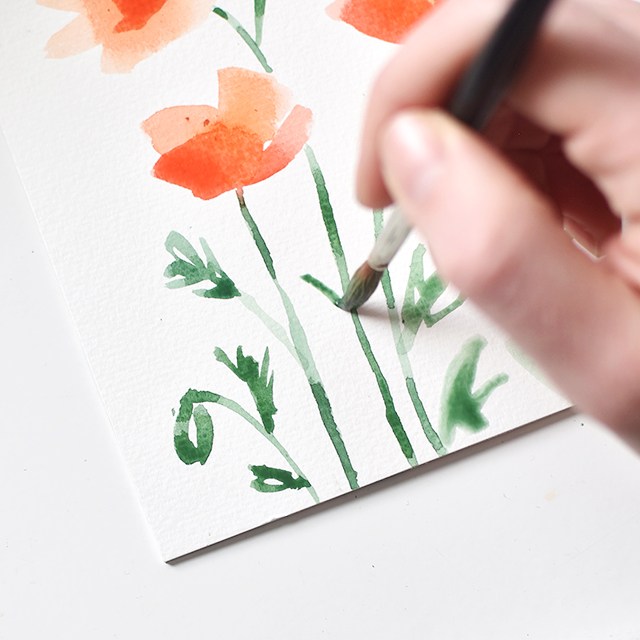
You can leave your painting simple without any leaves and just do the stems, but I love how easy these leaves are. With the tip of your brush, draw little scribbles. Little zig-zags that go into each other for the leaves. I also like including pods, the stems tend to arc downwards and have a cupped ‘c’ shape on either side. You can be quite abstract with those shapes. 
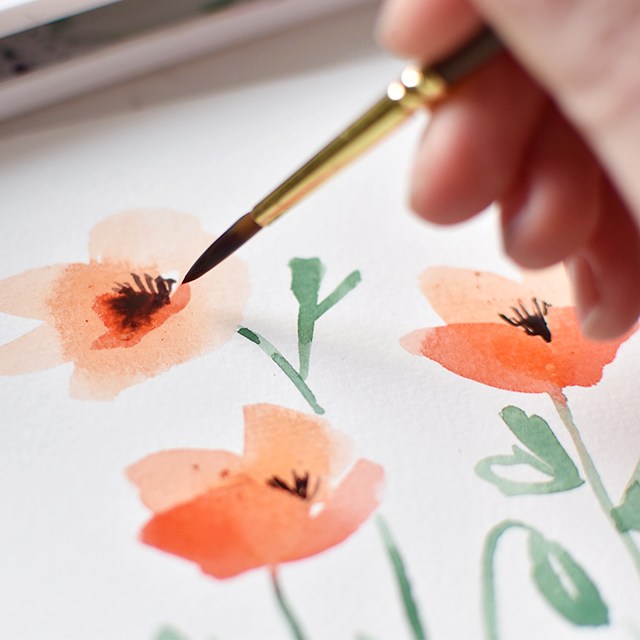
Now that the greenery is done, the poppies are dry enough for the middles. The centers of poppies are black with little bits of yellow pollen. I like getting a muddy blue-ish black to paint the middles. On the open flower, you’ll draw a circular-ish (again, don’t be perfect) shape with black stamens coming out of the black. You can add yellow to the tips. That’s where the pollen lies. For the profile flower, have the stamens coming out between the front ‘V’ shape. 
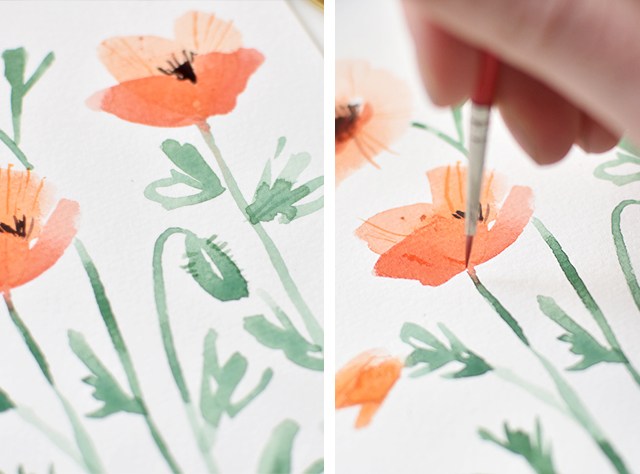
With your #0 brush, grab a yellower orange and make little lines coming out of the ‘V’ shapes. Make them squiggly and imperfect. Then add fuzz in green to the pods. 
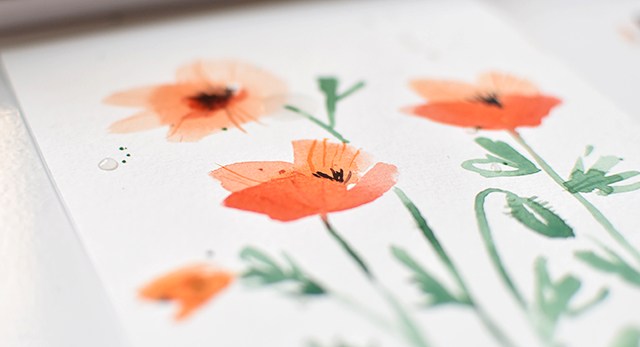
Boom! DONE! So easy, right? I like to add little splatters afterwards. Because it’s fun. 
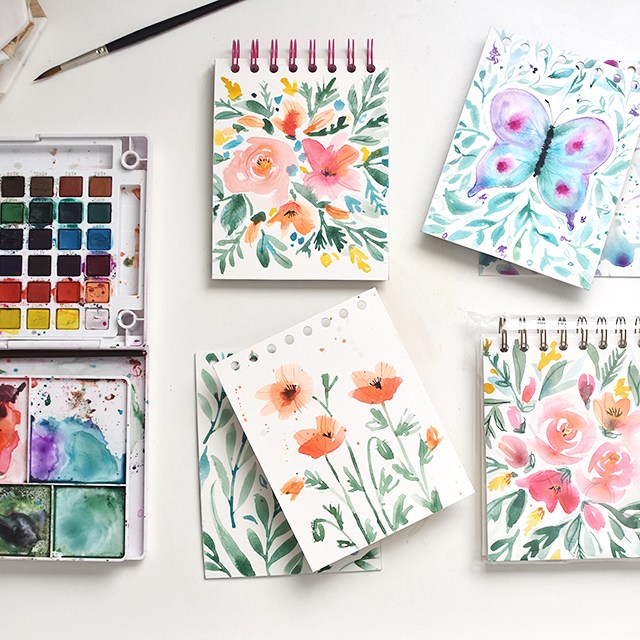
For the back covers, I used complimentary colors and something simple like just leaves or a splatter pattern. Easy, peasy. 

 I used this tutorial from Ink Struck Studio for the butterfly cover and I learned the roses from Natalie Malan.
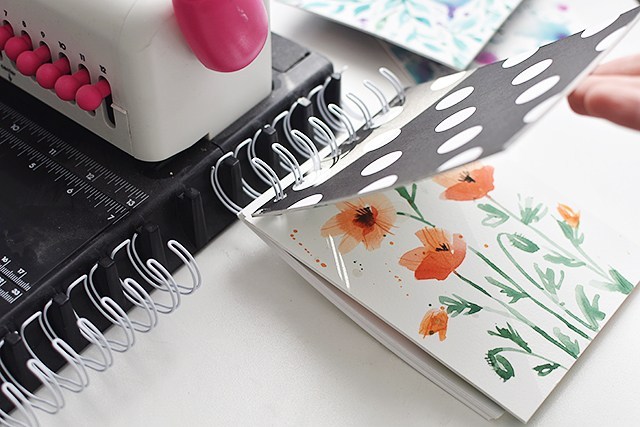
Now for the binding part. You can take the un-bound journals to your local print shop and they’ll do it for you. OR, if you have a tool like the Cinch, punch holes in the covers and filler paper separate. But make sure that the holes are centered. Put the filler paper on the coils, then the front cover, then the back cover (facing the front cover). This will allow the coil edge to be unseen on the inside back cover. Crimp down with your binder tool. 
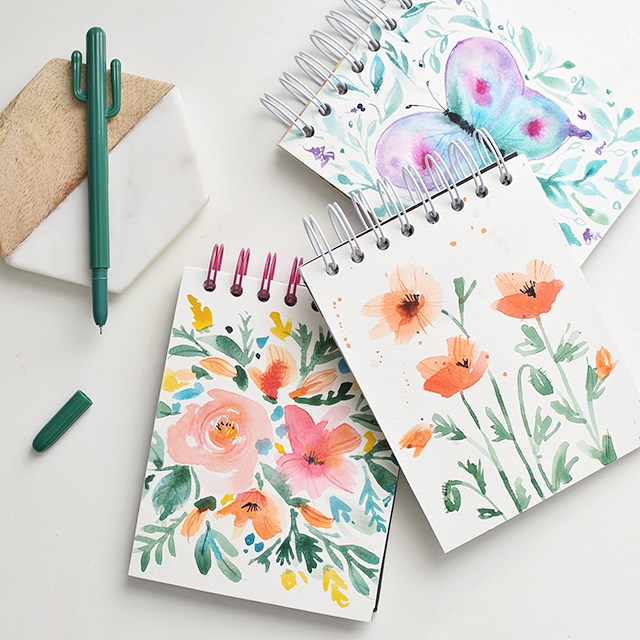
Now they’re ready to gift! Or keep. I like to hoard the things I’m most proud of making. ;)

This tutorial and accompanying printable is free for personal use. 

Free Printable Christmas Tags

3 Comments

Oh gosh, it’s that time of year again! I’m loving how it pushes me creatively to come up with new designs and freebies. It’s such a great time to explore my art.

Interesting note: My grandparents for years and years held a Thanksgiving tradition of painting and a sleepover after our Thanksgiving feast. My grandpa carefully set out a canvas, brushes and a palette for each of us. He had a painting for us to work off of, but we could always do our own thing. I love how my family fostered art together.

melissaesplin-free-printable-gift-tag-4

Instead of the annual Thank You card, I have a gift tag/place card printable. The Thank You is coming soon. You’ll see it in a few days. And don’t worry (not that any of you do), the candy box is also on its way.

Use this printable as a last-minute place card or punch a hole and use it as a tag for a last-minute hostess gift tag. It comes 4 to a page, so you can use them for all sorts of fancy things! Speaking of gift tags, I’m teaching a gift tag brush lettering class next week on DECEMBER 1st in LEHI, UT! It’ll be at Paper Crush in Lehi. CLICK HERE TO REGISTER.

brush-class-register

melissaesplin-free-printable-gift-tag-2

I painted and lettered the graphics. Of course, I couldn’t have done what I did without taking a class from Natalie Malan! A couple of weeks ago I had the chance to go to one of her workshops (a couple of spots opened up and I snatched up it right away). I feel like I really upped my watercolor game after her class. Loved every minute of it.

CLICK HERE TO DOWNLOAD

melissaesplin-free-printable-gift-tag-3

I hope you enjoy and have a wonderful holiday! This printable is free for personal use only. Any alteration or distribution of the artwork without written consent is prohibited.

Food: Best Freaking Tomato Sauce

5 Comments

In the very first cooking class I attended from Tom (he’s the best!) he taught us how to make a rustic tomato sauce. It’s my go-to. I don’t buy store bought anymore. Best of all, no can opener required. I’ve never been a huge fan of the overly-acidic, dump-all-your-food-storage-into-a-pot sauces. They don’t taste like a real tomato grown on a vine. This sauce does. And you don’t have to make it at the height of growing season, either. I can make mine in the middle of winter with 72″ of snow piling in our front yard.

The secret is in the type of tomatoes. Regular cherry tomatoes work fabulously. If you happen to find yourself near a Trader Joe’s, stock up on ALL of their mini tomatoes, especially their Villagio Marzano tomatoes! OMG, so good just plain.
melissaesplin-tomato-sauce-1

This recipe may feel like it’s more work than the typical recipe that calls for cans and Italian seasoning, but this gets more of a rustic, home-grown tomato taste rather than a canned taste. It’s just so. much. better.

melissaesplin-tomato-sauce-2

RUSTIC TOMATO SAUCE

Adapted from Food Made By Tom | Makes 2-3 cups
  • 4 cloves garlic
  • 2 tbs salted butter
  • 1/3 cup coarsely sliced onion
  • 2 cartons grape tomatoes*
  • 1/2 cup chicken stock or broth
  • kosher salt to taste

Peel garlic and coarsely chop. Turn on the stove to medium high heat. Add butter, garlic and onion.

While the onion and garlic are simmering, slice all of your tomatoes in half. Dump tomatoes into the pot once the onions and garlic is aromatic (until onion goes clear, you can go until it browns a little if you’d like). Cover and cook for 30-40 minutes. Check in on it and stir about once every 5 minutes.

You’ll want the bottom of the medium sauce pan to burn just slightly so you get a roasted flavor in there. Timing depends upon how juicy your tomatoes are. Add salt and pepper. Add broth. I eyeball it. Uncover the sauce and reduce at medium-high heat.

At this point you could just remove from heat and put on pizza dough as a rustic pizza sauce. My kids don’t much care for the larger skins, so I’ll allow the mixture to cool and blend it with my immersion blender or I’ll put it in the blender and puree. Garnish with fresh basil.

melissaesplin-tomato-sauce-3

The above image is when it’s about half-way done. You’ll want a soupier consistency. It’ll start bubbling and burning slightly on the bottom. The charred bottom adds a lot of flavor, as if you roasted the tomatoes in an oven. You can add broth or stock to the sauce or leave as-is. It just depends upon how thick you want your sauce to be and how much time you have to let it reduce. If I have time, I’ll add broth and let it reduce a couple of times so the flavor is concentrated. My best batches tend to be the ones I forget about because I get caught up with the drama of after-school studies or who gets the iPad. It’s best to cook at medium to medium/high heat. I tend to go medium/high heat because we’re at altitude. Things take FOREVER to cook otherwise.

melissaesplin-tomato-sauce-5

So this may not be a hard-and-fast recipe, it’s more recipe theory and based on “Looks”, so I hope it’ll be as good for you as it has been for our family.

Style: Easy Marble Pencil Skirt

0 Comments

All those mountains behind me in the below image are marbled with snow now! I took these pics with Sam back in November and I’m just getting around to sharing them with you. I haven’t done much by way of sewing these days and it crushes me! Calligraphy and teaching have taken up the bulk of my free-time these days. I’m itching to get back into sewing before the holidays hit. I’m in desperate need of some cozy sweaters and dresses.

View More: http://piersonphotocompany.pass.us/melissaoutfits

All photos by Sam Pierson

I found this awesome marble printed neoprene at MOOD, so I bought it. I can’t remember if I got one yard or two, but I’ve got plenty left for some leggings, skirts and perhaps a dress for the girls. I’m a sucker for matching outfits. Poor Felix gets left out of my plans for matching. He doesn’t care either way, though.

View More: http://piersonphotocompany.pass.us/melissaoutfits

View More: http://piersonphotocompany.pass.us/melissaoutfits

Want to make one of your own? It’s insanely easy. NO serger required. See my wiggle skirt tutorials below:

Leather and knit wiggle skirt

Color-blocked wiggle skirt

View More: http://piersonphotocompany.pass.us/melissaoutfits

Outfit details–


View More: http://piersonphotocompany.pass.us/melissaoutfits

Sewing Style: Split & Sparkle Kimono

0 Comment

OMG. Prior calligraphy student Marilenne sent me a load of beaded collars she bought from the Philippines and I couldn’t wait to get sewing with them. What was likely supposed to be a beaded waist detail ended up being a popped collar of sorts for this lightweight linen kimono I sewed for myself.

View More: http://piersonphotocompany.pass.us/melissaoutfits

The fabric is a lightweight linen I got from Miriam (turns out she bought it from Walmart – seriously sometimes they have fabulous fashion fabrics!). It’s breezy, which is perfect for the long hem, so it catches in the wind and looks freaking awesome. Paired with the black faux leather leggings, I’m channeling Trinity over here (minus the shiny leather).

View More: http://piersonphotocompany.pass.us/melissaoutfits

Sewing the beaded collar wasn’t as scary as I thought it would be. I ended up relying heavily on my zipper foot and it worked like a champ.

View More: http://piersonphotocompany.pass.us/melissaoutfits

Pattern-wise, I went off Leanne’s Kimono tutorial. I made some adjustments from the previous iteration, but I ended up making the sleeves too tight. So small, that they didn’t fit my shoulders (oops). I ended up unpicking the side seams and adding a gusset in the armpit to accommodate. Worked like a charm. Putting in a gusset wasn’t nearly as tricky as I thought it would be. The trickiest part of the whole thing was unpicking the serger seams (which isn’t so bad with this tutorial).

View More: http://piersonphotocompany.pass.us/melissaoutfits

I love how this blazer/kimono/blazono works with black leggings. I’d like to try it with a floor length chiffon skirt (black or marbled grey?). I’ve been thinking about black tie attire lately. I’d like to have a go-to outfit for fancy stuff. So far I don’t have anything like that.

View More: http://piersonphotocompany.pass.us/melissaoutfits

Outfit Details:

melissaesplin-style-sewing-marble-kimono-8

mobile site