Archive for the ‘diy’ Category

3 Fun Things To Do With Bleach: Tissue Paper

4 Comments

3 fun things to do with bleach. The perfect last-minute craft you can do with your kids in-time for Mother’s day. Wouldn’t an artistic tee or apron be the perfect gift for grandma? Click here to see all the posts in this series.

melissaesplin-3-fun-things-bleach-tutorial-1

Jazz up some plain tissue paper with spritzes of bleach!

melissaesplin-3-fun-things-bleach-tutorial-10

Grab an old toothbrush, dip in bleach and spray onto the ends of the tissue paper. It works best on dark colored papers. I love black tissue paper. It works well for EVERY occasion.

melissaesplin-3-fun-things-bleach-tutorial-11

Allow paper to dry (2-3 minutes) before stuffing in a gift bag. Be sure to spray bleach in a well ventilated area!! If you’re DIYing with kids, make sure at least one adult is supervising at all times!

3 Fun Things to do With Bleach: Gift Tags

0 Comment

3 fun things to do with bleach. The perfect last-minute craft you can do with your kids in-time for Mother’s day. Wouldn’t an artistic tee or apron be the perfect gift for grandma? Click here to see all the posts in this series.

melissaesplin-3-fun-things-bleach-tutorial-2

The great thing about these posts is that you likely have everything you need for this project! It’s super fun to do and it’s exciting to see the message unfold like a polaroid picture. You just might be tempted to shake the tag as you wait for the design to dry.

  • Bleach
  • Round Brush
  • Scrapbooking Paper

You may need to have an assortment of papers to test to see if they’ll react to the bleach. My Mind’s Eye Heavyweight Cardstock did very well.

melissaesplin-bleach-paper

It’s easier to just show you how it works in a quick GIF. Dip the brush in bleach (straight bleach works well*) and write! You’ll see the paper change as it dries. Be sure to rinse the brush in water after you’re done.

melissaesplin-3-fun-things-bleach-tutorial-8

Create a bunch of reasons why you love your mom with a bunch of tags! I love how the color varied with each stroke.

Be sure to create this DIY in a well-ventilated area!! If you’re DIYing with kids, make sure at least one adult is supervising at all times!

*I experimented with different consistencies of bleach. I made the mistake of adding gum arabic to the bleach and created some chlorine gas! I noticed the solution in the jar started to foam at the surface and get warm. I quickly took it outside and watched the mixture boil. After a call to poison control, I realized what I had done. I didn’t make nearly enough to cause damage to my lungs (thank heavens), but I wouldn’t advise doing anything like that. I’ve read tutorials on thickening bleach with corn starch, but that’s still mixing an acid with a base. You may want to try toilet bowl cleaner with water until you reach your desired consistency (an idea I got from my aunt). STILL, use extreme caution and care around bleach.

3 Fun Things to do with Bleach: Tee Shirt Designs

4 Comments

3 fun things to do with bleach. The perfect last-minute craft you can do with your kids in-time for Mother’s day. Wouldn’t an artistic tee or apron be the perfect gift for grandma? Click here to see all the posts in this series.

melissaesplin-3-fun-things-bleach-tutorial-3

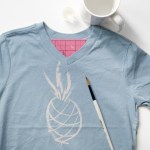
Grab a tee shirt or apron and have fun with bleach! It’s a great and easy way to add a fun design with texture without a lot of clean-up. Just make sure to DIY in work clothes (or pajamas, in my case).

melissaesplin-3-fun-things-bleach-tutorial-4

It’s likely you may have all the materials on-hand.

  • Bleach
  • Water
  • Insert (cardboard works well)
  • Tee/tank/apron (dark colors do best)
  • Round Brush
  • Vinegar (not pictured)

melissaesplin-3-fun-things-bleach-tutorial-9

You may want to do a test-run of your design on a separate piece of paper to make sure that it will translate well in brush and bleach. Test the material with the bleach in a inconspicuous area to make sure the tee does well with the bleach.

Create your design with the brush. Make sure you have ample bleach on your brush and that you rinse the brush thoroughly after you’re done. Having a paper towel handy really helps.

melissaesplin-3-fun-things-bleach-tutorial-7

Rinse tee/tank/apron in vinegar water to stop the bleaching process. Tumble dry. You’re done! I’ve made a bunch of these tees for the kids with random sayings. They’re the perfect playful tee. Make kids and grandma matching tees for double the fun!

Be sure to create this DIY in a well-ventilated area! If you’re DIYing with kids, make sure at least one adult is supervising at all times!

DIY: Love Letters, 3 Ways

0 Comments

This week has just zoomed by so fast. We’ve been struck down with Rotavirus and RSV. The ultimate double-whammy for winter illness, if you ask me.

on Wednesday, I was on Studio 5 sharing 3 fun ways to write a love note. See below for tips and the full segment.

Chris and I don’t exchange gifts on Valentine’s Day. It’s usually a simple love letter. We’d like to try and get out, but usually the day is so crazy it doesn’t end up happening. We keep it simple to say the least.

melissaesplin-love-note-3-ways-1

So how to write a love letter? When it comes to the actual writing, refrain from using “I” first. Is the letter about you? No. Start with “You”. Example:

I think you’re amazing. Really? Does it really matter what I think? 

You are an amazing inspiration to all you know. Ahh, that’s more like it.

I’m no pro at prose, but thinking in that direction has significantly helped me write more interesting letters. On to the crafty fun!

melissaesplin-love-note-3-ways-2

The School Girl

This is a playful note meant for the young or young-at-heart. Fold up an origami heart using your lined paper and seal it with a kiss or some gloriously kitschy stickers. Glitter glue doesn’t hurt, either. I used the below video for folding the heart:

melissaesplin-love-note-3-ways-3

The Heart Attack

Perfect snail mail attack of hearts. Rough cut a bunch of hearts and write things you love about that person. Add confetti or glitter for even more fun. But be sure you’re sending glitter to the right kind of person. It’s kind of like the measles of crafting supplies. Out. Of. Control.

melissaesplin-love-note-3-ways-4

The Romantic Novel

I like to write my man love notes and I like to add a little pizzaz to them! Go for maximum masculine impact with black lined paper and a white pen. Add some silver washi tape for just a little bit of glam. ;)

Sponsored: Symbols of Christmas Printable Book

13 Comments

Disclaimer: I don’t pretend to think that all of you are Christians or even like religion. If you are a Christian, you might really enjoy this post and sharing this printable with friends and family. And I sincerely hope you do! If not, please don’t take offense. This is simply a project that I feel in my heart I’ve needed to make and share here in case others may find it impactful for their holiday celebrations.

If celebrating Christ’s birth at this time of year is not your thing, I would love to hear more about your personal beliefs and traditions for this time of year in the comments below*.

This month has been insane. So many things to do and so little time. I’ve actually had this project completed for weeks, but I haven’t had a chance to photograph and write about it until now. I figure Sunday is the perfect time to publish, since this takes a more spiritual tone.

Unfortunately I haven’t had the chance to do my annual candy box. This project ended up taking its place. I have so many ideas for the candy box, though. I may have to publish a New Year’s or Valentine’s candy box. :)

melissaesplin-christmas-symbols-printable-book-diy-3

At church I’m in charge of the activities for our women’s group. We meet at least quarterly for spiritual, service-oriented, social or creative activities. When we were planning I knew I wanted to make a little keepsake/quiet book for adults and children alike to be reminded of the true purpose in Christmas: Christ’s birth. I’m glad I worked on this project. It’s been a busy time of year with a lot of work (a fabulous problem to have, for that I’m humbly grateful!), so carving out time to research symbols of Christmas and coordinating scripture was a great way to get in the spirit.

This printable by no means includes all of the symbols of Christmas (I realized I left out the wreath – oops), the 7 included simply serve as a prompt for discussion and pondering on the other things around us that remind us of Christ and God.

I wanted it to be something that could be enjoyed by kids and adults alike, so I made little calligraphed illustrations that could be colored and kept the design simple to appeal to adults. It’s all small enough that it can easily fit in a purse to be toted around all season long (even though it’s almost at it’s end).

I printed off a few and plan to give them to my grandparents and parents this year. The ones we made for our women’s group activity were a huge hit. We prepped 30 kits and even though we didn’t have 30 in attendance, all were spoken for! It was a thrill to see women take extras to share with others.

melissaesplin-christmas-symbols-printable-book-diy-5

The book includes symbols on: The evergreen tree, the star of Bethlehem, the candle, the poinsettia, the candy cane, the stocking and holly berries. At the end there are a couple of pages for thoughts so you could use it as a holiday journal or as a way to write your personal thoughts on the season to give to someone else. Or write in some of your favorite holiday traditions/memories.

melissaesplin-christmas-symbols-printable-book-diy-6

Each symbol has a brief explanation and a scripture. Each scripture is taken from the King James version of the Bible. Mostly from the New Testament.

melissaesplin-christmas-symbols-printable-book-diy-4

To assemble, you will need:

  • printed sheets
  • hole punch
  • needle
  • thick thread
  • bone folder
  • 6×9 inch piece of leather or felt**

Download the printable (link at bottom of the post) and print. Print double-sided and DO NOT fit to page (print at 100%). 

Cut the paper in half width-wise so that you have 8.5 x 5.5 sheets. Rearrange your papers so they are in order. I like to go by the odd numbers on the bottom right hand side. Use the blank half sheet on the outside of the title page.

Punch holes in the guides on pages 10-11. Center your pages over the leather, mark the holes on the leather and punch.

Thread your needle and sew the book: Start on the outside front cover in the middle hole. Go to the inside of the book and leave a 4 inch tail. Go through the bottom hole, then thread through the top hole and then back through to the middle hole. Your tails will be coming out of the middle of the book. Tie a knot around the string running up the spine and finish with a bow. Fold in half and crease with a bone folder.

Now you’re finished! If you batch these, you can make 10-20 books in about half an hour. They’re great for gift giving! Enjoy!

CLICK HERE TO DOWNLOAD

This post is sponsored by Mormon.org | check out their video “He Is the Gift“. It so beautifully conveys the nativity with song. All thoughts and opinions are my own.

*This blog is a positive, creative space. Comments that attack any religious faction will not be tolerated or published. 

**Leather provided by Leather Hide Store.

mobile site