Posts Tagged ‘before & after’

XL Shirt Before & After

24 Comments

I’m officially 35 weeks along and I have yet to purchase any maternity clothing. I can’t help but feel proud of that fact and I definitely owe it all to the popularity of jeggings & stretchy tunic tops.

Back in November I stopped by the DownEast warehouse to say hello to some old coworkers & pick up some cheap basics. I was all out of tanks & tees that were long enough to cover my belly. While there I spotted this top:

A whole pile of these shirts have been lurking the warehouse store for well over a year & a half. I kid you not. I gave them a second look only because of their fabric. It’s a two directional stretch knit. PERFECT for a baby bump. I snagged the largest size available & headed to the check out. I believe this shirt cost somewhere around $3, so there wasn’t much of a risk that this thing wouldn’t fit. As soon as I tried it on at home, I threw it in the “to alter” pile in my studio & forgot about it for a month & a half.

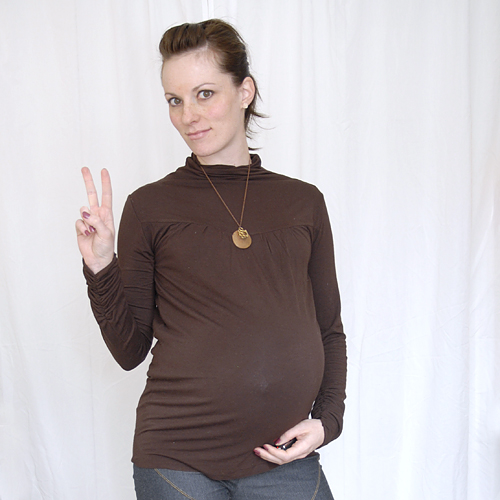
Today it was high time I alter the sucker; after all, I have less than 5 weeks left before this baby bump turns into a jelly lump. Plus I’ve been craving a little more variety in my wardrobe recently. Here’s what I did:

  • tapered the sleeves
  • rouched the sleeves
  • took in the armpits by 4″ on each side
  • tapered the bottom sides of the shirt by 4 inches

I think it turned out fabulously. I was not looking forward to altering the knit fabric, but by aggressively pinning the sides down (like a pin every inch & a half), I didn’t get any puckering. HALLELUJAH! The fix took me about an hour & a half of trial & error.

What do you think? The transformation is quite subtle, but I feel about 20 lbs lighter now that it’s altered. Before I felt like I was hosting a circus underneath my top. Do you see how my belly button is about 2 inches off center? Maybe I’m only noticing it, but I think it’s hilarious. It did the same thing when I was pregnant with Penelope; it’s a drifter.

To see the full outfit, check out my fashion section.

Before & After: Smock to Maternity Shirt

25 Comments

Back in November at the Thrift-A-Thon, I found a fabulous handmade dress (that I neglected to share) for $2. It’s super sweet, like cavities all over sweet. I fell in love with the miniature flocked red polka dots, the hand-smocked yoke and the puffy, uber girly sleeves, but I wasn’t a fan of the length. Nope. It’s too short for me to wear alone as a dress, but too long to pass as a shirt. In 20 minutes I remedied the situation & spent virtually nothing on the update.

Here’s the before:

See how huge it makes me look? Not flattering in the least. Of course, this smock wasn’t likely made for a pregnant woman. My best guess is that a sweet mother made it for her 12 year old daughter way back when metal-toothed zippers were what you could buy at the fabric store, not just the cool thing to use.

Here’s the after:

I trimmed about 4 inches off the bottom, hemmed it & rouched the sides for a more flattering fit. I used the same technique here as I did in my sweetheart ballet tee tutorial. Fortunately the fix was incredibly easy and took hardly any time. I like how it makes my growing bump look when belted. I imagine if belted at the true waist, this top would look great even without a baby bump. We’ll just have to see. Less than 6 more weeks left to go!

Visit my fashion section to see the whole outfit.

Before & After: Butterfly Chair

27 Comments

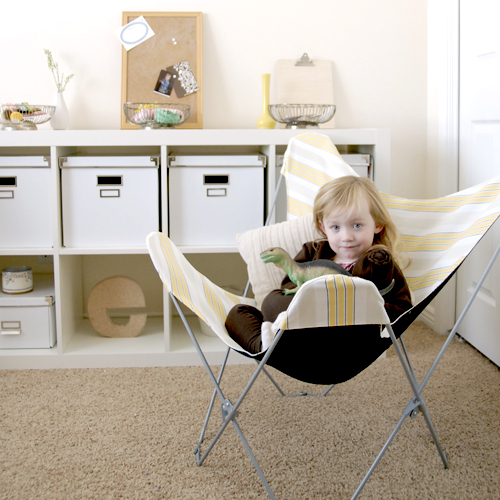
It is finished!! I can’t tell you how elated I am that I finally got around to recovering our nasty butterfly chair. My sister so kindly gifted this lovely chair to me when my parents moved & they were just going to donate it to D.I. or throw it out. Come on. I remember seeing a leather butterfly chair at Urban Outfitters for somewhere around $250, so naturally thought I’d better hold on to this chair – purple fuzz & all – because I may actually recover it in leather someday.

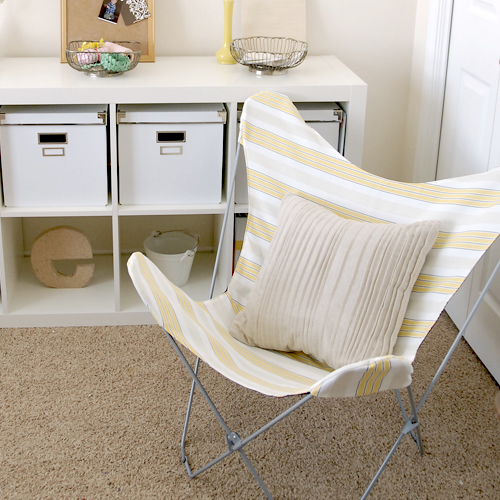
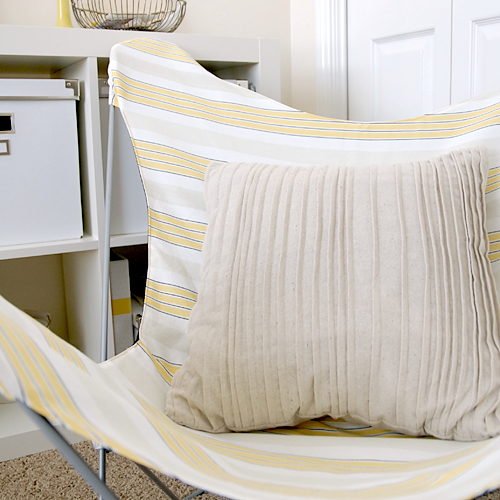
I was incredibly tempted to do a hair-on calf skin, or some sort of antiqued leather, but I kept wussing out because I dreaded sewing the thing. Nearly a year later, I bought some rad striped fabric from Ikea & just did it! It didn’t take me nearly as long to sew it as I had anticipated, but deconstructing the purple fuzzy cover for the pattern took 3 times as long as I thought it would. From start to finish, it took about 2 days worth of Penelope’s naps (about 6-8 hours). Now, if I have to do it again, I’d venture it’d take me under two, since I now have the pattern already made.

I’m really happy with how it turned out, and I’m so excited to show you the results! I feel like it’s much better constructed with much higher quality materials than the last cover, but for some reason, I just don’t feel like Chris should sit in it (yet). Maybe it’s because I don’t trust my own craftsmanship.

For now the legs are going to remain silver. I think it’d really pop with white legs (or perhaps bright yellow?!), but I’m not about to open up the garage & spray paint something in 20º weather. NO thanks. That’ll be a job for next spring or summer.

Here’s what I spent for my chair makeover:

  • Ikea striped fabric: $5
  • black backing: leftover from a previous project, like $2-3?
  • The grand total: Somewhere around $7

NICE. That makes me happy. The best part about this chair is that it’s perfect for my studio. It folds up tightly so I can have it out of the way, but if Penelope’s hanging around while I’m crafting, or I need to take a little break, BOOM! I can just pull it out. I love the portability! So, what do you think? Do you like it?

You can purchase the butterfly chair pattern here.

Before & After: Floral Dress Refashion

14 Comments

I’ve been looking in my closet these days & not finding anything interesting. Well, nothing interesting that I haven’t worn in the last 5 days at least. On Monday, one of my sweet neighbors kindly offered to watch Penelope as I ran some errands; naturally I couldn’t help but pop into a thrift store while out & about. It’s a real treat to go to thrift shopping without Penelope. It means I can actually try on clothes that I find! Look at the gorgeous dress I found for $6:

I’m a huge fan of this print. I’ve been seeing all sorts of bold florals around this season and I fell in love with the shape of the skirt. The skirt has pleats & pockets in the front & buttons going all the way down the back (so Victoria Beckham, but with buttons). I wasn’t a fan of the bulky sleeves & loose top, but that’s never stopped me from buying anything.

As soon as I got home, I snapped the ugliest before photo ever & started fixing up the dress. Here’s what I did:

  • I took in the sides from the waist up by about 1-2 inches on each side
  • I took in the sleeves by about 2 inches on each side
  • I shortened the sleeves & added a cuff
  • I removed the breast pocket (it was making me feel all sorts of lop-sided)

Ah. So much better! The shortened sleeves make the dress feel 20 lbs lighter. I’m a big fan of it now. All I need to do now is find some hot gladiator heels and I’ll be rocking and rolling in NYC at the SocialLuxe party next week!

Fashionable Bike Safety Before & After

16 Comments

Bike safety is no joke. I see SO MANY hipsters around Salt Lake cruising on their uber hip fixies sans helmet. It may look better to cruise without the helmet, but it’s stupid.

Don’t mind me & my soapbox, I’ll get down eventually. ;)

My senior year of college, Chris and I rode our bikes all over the place and never wore helmets. The last day of class, Chris got on his bike to ride to campus, the chain detached and threw Chris off his bike. In slow motion he fell and knocked the back of his head on the asphalt. It was a slow speed accident with pretty low impact, but Chris’s head was hurting for days. NOT cool. I was worried he had a concussion, but thankfully he didn’t.

After that, Chris took wearing a helmet seriously. It took me another 6 months before I unwillingly complied to buy a helmet and wear one – and I only agreed to wear one if it matched my bike. You think I would’ve taken wearing a helmet more seriously, because my brother (bicycle daredevil) has broken a helmet in half before from his crazy awesome bike tricks.

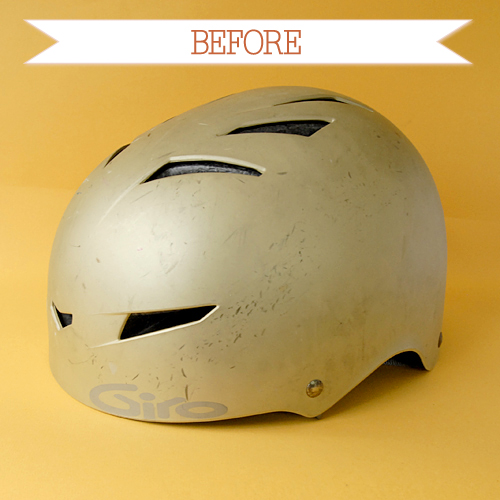
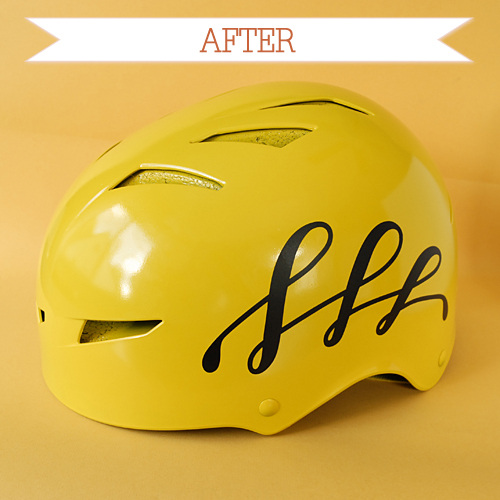
Long story short, the bike helmet I bought to match my cruiser doesn’t match my fixie, the bike I ride most often. It’s also seen better days. I felt like it was time for a facelift.

I used Krylon Fusion spray paint in yellow. Krylon’s fusion brand is awesome. It’s made to adhere to any smooth surface, especially plastic. It went on my helmet so easily & the finish looks beautiful. After I painted the helmet yellow, I made the decals for the sides to add a little more flair. This helmet is SO much hipper than it was before &  matches my bike perfectly. I need to go on a ride soon!

If you’re looking for some hip helmets to wear, try NutCase helmets (found via Kitsune Noir), they’ve got some rad designs. Stylishly protecting your head for $40-$50 isn’t a bad deal, either.

Do you wear a helmet? What kind of helmet do you prefer?

mobile site