Posts Tagged ‘Christmas’

Give Thanks this Christmas

11 Comments

As promised the 2016 “Thank You” printable is here. It just had to stay under wraps until after Thanksgiving. This year I teamed up with Mormon.org to create a printable in-line with their #LIGHTtheWORLD campaign. Scroll to the bottom if you want to just download the freebie. I’m about to talk religion for a hot second.

I’m a Mormon. I keep it incognito most of the time, but I am a practicing member of the Church of Jesus Christ of Latter-Day Saints. We’re Christians, and this time of year I feel so much kinship with other Christian religions as we celebrate the core of our faith: Jesus Christ. This is one of the seasons of year where I readjust my focus and try to be just a little bit better. A little bit kinder. A little more Christ-like. Because, baby steps. right?

melissaesplin-mormon-give-thanks-printable-1

I’m passionate about gratitude. I love writing out Thank You cards to friends and family. I love sending out snail mail!! It’s a favorite of mine. So I’ve created a printable Thank You suite for the whole family.

melissaesplin-mormon-give-thanks-printable-3

The first (from left, see above) is a fold-over card for grown ups and longer sentiments. The middle is a guided card for younger writers, giving them only a little bit of space to write something. Even a couple of words. The third (which could be use for a short Thank You) is designed for emerging writers, encouraging a child to just make a mark. A picture or a scribble allows him/her to take ownership of the sentiment.

melissaesplin-mormon-give-thanks-printable-5

Included in the Thank You set is a printable envelope. Print, cut and tape together. It’s pretty quick. If I have time, I’ll send the Silhouette Studio file here so you can cut it with your Silhouette machine.

melissaesplin-mormon-give-thanks-printable-6
melissaesplin-mormon-give-thanks-printable-8

Last, but not least, I painted and lettered a phrase from D+C 59:7 (some of our modern scripture). I hope that if you’re not of my same faith, you might find this reminder encouraging to get on your knees and give thanks to Him.

melissaesplin-mormon-give-thanks-printable-9

I hope you use this printable!! It’s a real pleasure to make these designs and publish them out to the world. I love seeing them in real-life situations, too. If you use it, tag me (@melissapher) so I can see how you’ve incorporated it into your Christmas.

CLICK HERE TO DOWNLOAD

Want more Thank You’s to print and download? See this list:

Artwork is free for personal use. Distribution and alteration of files without written consent is prohibited. Contact me if you have any questions of the terms of use.

pinterest-melissaesplin-mormon-lighttheworld-printable1

Calligraphy-Lover’s Gift Guide

0 Comments

Happy Cyber Monday! Good grief the year is flying by so quickly. I’ve been meaning to write the reprise to my first gift guide for over a year now. Here it is. If you’ve got a calligraphy/letter lover in your family, hold on to your pants. My online class at Calligraphy.org is 10% off with code CYBER2016 from now until 11/30/2016. Discount available on gifts (hint: gift it to yourself, it’s always a good idea).

cyber-monday

gift-guide

If you yourself are a calligraphile, forward this to your family and friends. Clue them in to the hottest, awesomest stuff to gift this year. I’ve broken it up into 3 price tiers: budget-friendly, mid-range and SPLURGE! All tools are great for all experience levels. They’re tools that I have in my own studio (or ones that I’m lusting after myself). If you have any questions at all, give me a shout-out in the comments below. I’m happy to reply.

melissaesplin-budget-friendly-calligraphy-gift-guide

BUDGET FRIENDLY

  • Ruler: This rolling ruler allows you to easily make parallel lines! It’s awesome. I use it constantly.
  • Gold watercolor inks: Add water and apply to the underside of the nib to make gold ink. These come in separate containers that are tiny and portable.
  • Adjustable oblique holder: Your loved one looking to graduate from the speedball universal? This is a fabulous holder that works with a wide range of nibs, even crowquills.
  • Zig twin brushes: These brushes have a foam cone, so they don’t fray or dull. They’re great for beginners, heavy-handed letterers or the busy mom & pop that have mischievous children.
  • Copic Gasenfude: It’s a nylon brush marker that has a springy touch and juicy ink that won’t quit.
  • Copperplate nib sampler: Give your calligrapher the option to explore nibs he/she hasn’t tried before.


melissaesplin-midrange-calligraphy-gift-guide

MID-RANGE

  • Sakura Koi watercolor set: It’s compact, comes with a fabulous water-brush. The pigments are brilliant and archival. Great for your artist on-the-go.
  • Calligraphy.org Gift Kit: I’m biased, but these kits include one-on-one coaching for brush and pointed pen calligraphy. So if your letter-lover has no idea what he/she is doing, we can help. Or we can push him/her farther with off-script challenges.
  • really nice brush for watercolor: I think everyone should have at least one sable brush in their supplies.
  • A leather blotter: it helps get finer, smoother hairlines to write with a blotter underneath your work. or you can customize it for a little extra splurge. Mike Ward makes the most beautiful signatures.


melissaesplin-splurge-calligraphy-gift-guide

SPLURGE

Printable: Vanilla Labels (Easy Neighbor Gift)

0 Comments

I’ve had this brilliant idea since the beginning of September, but leave it to me to wait until the last minute to actually finish it off and post about it! EEP! This is quite possibly the easiest and most brilliant neighbor gift you can give this year (or next!).

melissaesplin-printable-vanilla-bean-paste-label-1

So, vanilla bean paste has become a staple in our home, so much so that we buy it in bulk. It’s mine and Chris’s favorite thing to add to our whipped cream (we have that “on tap” with our cream whipper
). The other thing I keep thinking about with holiday gift-giving is that there’s an overload of sweets that will spoil. Why not give the gift that’s gluten-free, vegan, won’t spoil and EVERY foodie will LOOOOOOOOOOOOVE!

melissaesplin-printable-vanilla-bean-paste-label-3

Vanilla bean paste marries the convenience of vanilla extract and the potency of vanilla beans. Mr. FoodMadeByTom taught me the glories of this stuff way back when I took a class of his on making chocolate mousse, steak and veggies. But we didn’t use it for the steak and veggies. Although I’m sure there’s some universe where vanilla bean paste has been used in making a fancy-pants steak.

melissaesplin-printable-vanilla-bean-paste-label-4

melissaesplin-printable-vanilla-bean-paste-label-5

I bought some small vials/jars from Specialty Bottle and a giant bottle of vanilla bean paste and filled each one. It’s just a sampling of vanilla bean paste, just enough for an extra potent recipe of vanilla whipped cream. Here’s the recipe for our whipped cream:

Ultra Vanilla Whipped Cream

  • 2 cups heavy cream
  • 2 teaspoons (pretty sure Chris puts a full tbsp) vanilla bean paste
  • 1/4 cup powdered sugar

Put all ingredients in the cream whipper and charge. If you’re doing it the old fashioned way, put heavy cream into a chilled bowl and whip with a stand or hand mixer. Whip until firm peaks form, fold in sugar and vanilla.

melissaesplin-printable-vanilla-bean-paste-label-6

See below to download the vanilla labels. I’ve made two versions, one for home made extract the other for vanilla bean paste. Enjoy!

CLICK HERE TO DOWNLOAD

Sponsored: Symbols of Christmas Printable Book

13 Comments

Disclaimer: I don’t pretend to think that all of you are Christians or even like religion. If you are a Christian, you might really enjoy this post and sharing this printable with friends and family. And I sincerely hope you do! If not, please don’t take offense. This is simply a project that I feel in my heart I’ve needed to make and share here in case others may find it impactful for their holiday celebrations.

If celebrating Christ’s birth at this time of year is not your thing, I would love to hear more about your personal beliefs and traditions for this time of year in the comments below*.

This month has been insane. So many things to do and so little time. I’ve actually had this project completed for weeks, but I haven’t had a chance to photograph and write about it until now. I figure Sunday is the perfect time to publish, since this takes a more spiritual tone.

Unfortunately I haven’t had the chance to do my annual candy box. This project ended up taking its place. I have so many ideas for the candy box, though. I may have to publish a New Year’s or Valentine’s candy box. :)

melissaesplin-christmas-symbols-printable-book-diy-3

At church I’m in charge of the activities for our women’s group. We meet at least quarterly for spiritual, service-oriented, social or creative activities. When we were planning I knew I wanted to make a little keepsake/quiet book for adults and children alike to be reminded of the true purpose in Christmas: Christ’s birth. I’m glad I worked on this project. It’s been a busy time of year with a lot of work (a fabulous problem to have, for that I’m humbly grateful!), so carving out time to research symbols of Christmas and coordinating scripture was a great way to get in the spirit.

This printable by no means includes all of the symbols of Christmas (I realized I left out the wreath – oops), the 7 included simply serve as a prompt for discussion and pondering on the other things around us that remind us of Christ and God.

I wanted it to be something that could be enjoyed by kids and adults alike, so I made little calligraphed illustrations that could be colored and kept the design simple to appeal to adults. It’s all small enough that it can easily fit in a purse to be toted around all season long (even though it’s almost at it’s end).

I printed off a few and plan to give them to my grandparents and parents this year. The ones we made for our women’s group activity were a huge hit. We prepped 30 kits and even though we didn’t have 30 in attendance, all were spoken for! It was a thrill to see women take extras to share with others.

melissaesplin-christmas-symbols-printable-book-diy-5

The book includes symbols on: The evergreen tree, the star of Bethlehem, the candle, the poinsettia, the candy cane, the stocking and holly berries. At the end there are a couple of pages for thoughts so you could use it as a holiday journal or as a way to write your personal thoughts on the season to give to someone else. Or write in some of your favorite holiday traditions/memories.

melissaesplin-christmas-symbols-printable-book-diy-6

Each symbol has a brief explanation and a scripture. Each scripture is taken from the King James version of the Bible. Mostly from the New Testament.

melissaesplin-christmas-symbols-printable-book-diy-4

To assemble, you will need:

  • printed sheets
  • hole punch
  • needle
  • thick thread
  • bone folder
  • 6×9 inch piece of leather or felt**

Download the printable (link at bottom of the post) and print. Print double-sided and DO NOT fit to page (print at 100%). 

Cut the paper in half width-wise so that you have 8.5 x 5.5 sheets. Rearrange your papers so they are in order. I like to go by the odd numbers on the bottom right hand side. Use the blank half sheet on the outside of the title page.

Punch holes in the guides on pages 10-11. Center your pages over the leather, mark the holes on the leather and punch.

Thread your needle and sew the book: Start on the outside front cover in the middle hole. Go to the inside of the book and leave a 4 inch tail. Go through the bottom hole, then thread through the top hole and then back through to the middle hole. Your tails will be coming out of the middle of the book. Tie a knot around the string running up the spine and finish with a bow. Fold in half and crease with a bone folder.

Now you’re finished! If you batch these, you can make 10-20 books in about half an hour. They’re great for gift giving! Enjoy!

CLICK HERE TO DOWNLOAD

This post is sponsored by Mormon.org | check out their video “He Is the Gift“. It so beautifully conveys the nativity with song. All thoughts and opinions are my own.

*This blog is a positive, creative space. Comments that attack any religious faction will not be tolerated or published. 

**Leather provided by Leather Hide Store.

Sponsored: 6+ Ways to Address an Envelope

7 Comments

This post is sponsored by Tiny Prints. They provide excellent quality printing and amazing printing options to make your holiday cards stand out this year.

I’ve got 6+ easy ways to embellish your envelopes this year. Don’t get stuck with boring print labels or chicken scratch! Make your snail mail pop with a few tips that require little to no technique. :)

If you want to get some technique under your belt, check out 5 Easy Steps for Improving Your Handwriting, or take my calligraphy class!

melissaesplin-tinyprints-6-ways-to-address-an-envelope-8

Getting fun snail mail is possibly one of my favorite aspects of this time of year. I love getting something other than business offers and bills! Colored envelopes will certainly help make those invites pop.

I went through Tiny Prints for my Christmas cards this year and got one of their laser-cut designs (See all of their offerings here). It’s unique, well designed and I didn’t have to spend a million hours getting it squared away. Major win! I’m dedicated to having enough time to enjoy the holidays this year. No chicken with her head cut off over here, please!

I’m incredibly partial to Kraft envelopes (greengrocer kraft is fabulous). They work well with both light and dark pens and they stand out in a pile of mail. The envelopes featured in this tutorial are from Tiny Prints. I’ve been incredibly impressed how well they handle ink and how easily I can write on them with my super sharp calligraphy nibs.

melissaesplin-tinyprints-6-ways-to-address-an-envelope-7

Next up, gather all random scrapbook supplies you own. Heck, head over to Walmart and browse their crafty section. You’ll find some great stuff for next to nothing.

melissaesplin-tinyprints-6-ways-to-address-an-envelope-6

To do the techniques seen above, you’ll want to collect a few things:

You’ll want a few different patterns of washi tape, and perhaps a few different widths, too. When in doubt, collect all the black, white, gold and silver washi tape you can get your hands on. It goes with practically everything and every season.

You can use any kind of pen for these techniques. I used dip pen and ink for many of these samples, but just use any kind of pen you have. Ballpoint pens, however? NO. Throw all of those out of your house right now. They’re terrible. Shame on you for having them around. :)

Learn how to use a pointed pen with my online calligraphy class: IStillLoveCalligraphy.com. I’m happy to teach you! Side note: our kit makes for the perfect gift. 

So let’s get going, shall we?

melissaesplin-tinyprints-6-ways-to-address-an-envelope-1

When doing your addresses on a straight line, use the chalk pencil and the clear ruler to mark out those lines. Otherwise:

DECORATIVE GUIDELINES

Use washi tape as a decorative way to keep your lines straight.

Tape a vertical and horizontal strip and write in the bottom right section OR use it to slant your baseline. Layer multiple strips of tape for more depth.

melissaesplin-tinyprints-6-ways-to-address-an-envelope-2

RANSOME NOTE

Use alphabet stickers to draw attention to different letters.

For a cursive style, use block letter stickers for the first letter of each name. For block style writing, replace a random letter with a sticker.

I found these stickers at Walmart for about $1-2 each. I’m sure you can find them at just about any craft supply store as well.

melissaesplin-tinyprints-6-ways-to-address-an-envelope-3

AROUND AND AROUND

Use circular sticker labels (I used Avery 2 1/2″ labels) to structure your envelope’s layout.

Print or letter just the address within the label (this is great if you want a hand-lettered touch, but you have LOADS of addresses to do) and write the name outside the sticker.

In the top version, I used the border of the label as a baseline and wrote the name around the diameter. It looked a little empty so I drew a little holly berry illustration on there. You could draw something there, or keep it simple and stick the circle in the center of the envelope.

Wrap the label around the back and write the name on a large scale all the way across the envelope.

melissaesplin-tinyprints-6-ways-to-address-an-envelope-4

GLITTER GLUE DETAILS

Glitter glue is my best friend. It’s all the sparkle of glitter without the mess of loose glitter everywhere (I swear that stuff multiplies). My favorite brand is Stickles. Sparkliest of them all.

Pipe out a wavy line in glitter glue. Use that line as your guide for the baseline of the recipient’s name.

Or Letter out your address and use glitter glue to add accents on hairlines and at the terminals of each line.


melissaesplin-tinyprints-6-ways-to-address-an-envelope-5

LARGE-SCALE NAME

Grab a marker and go to town! Write out the first name as large as the envelope will allow. Cursive styles work best. I used a Tombow dual brush marker here. You can use a casual, grungy style nicely. Then letter the rest of the address in a normal style, save for the ZIP. Make the ZIP huge.

ADD SOME BLING

Letter the address as you would prefer then stick some rhinestones on it. Yup. Simple. But it’s so fun go get in the mail! I like to use PVA glue to fasten them on. It’s a strong glue that dries clear.

melissaesplin-tinyprints-6-ways-to-address-an-envelope-7

I hope you have some fun sending out mail this year!

*This DIY is free for personal use and should not be distributed/republished without my consent. Altering any files is NOT ALLOWED. If you would like to use this freebie for commercial purposes, please email me. Thanks!
learn-calligraphy-pen

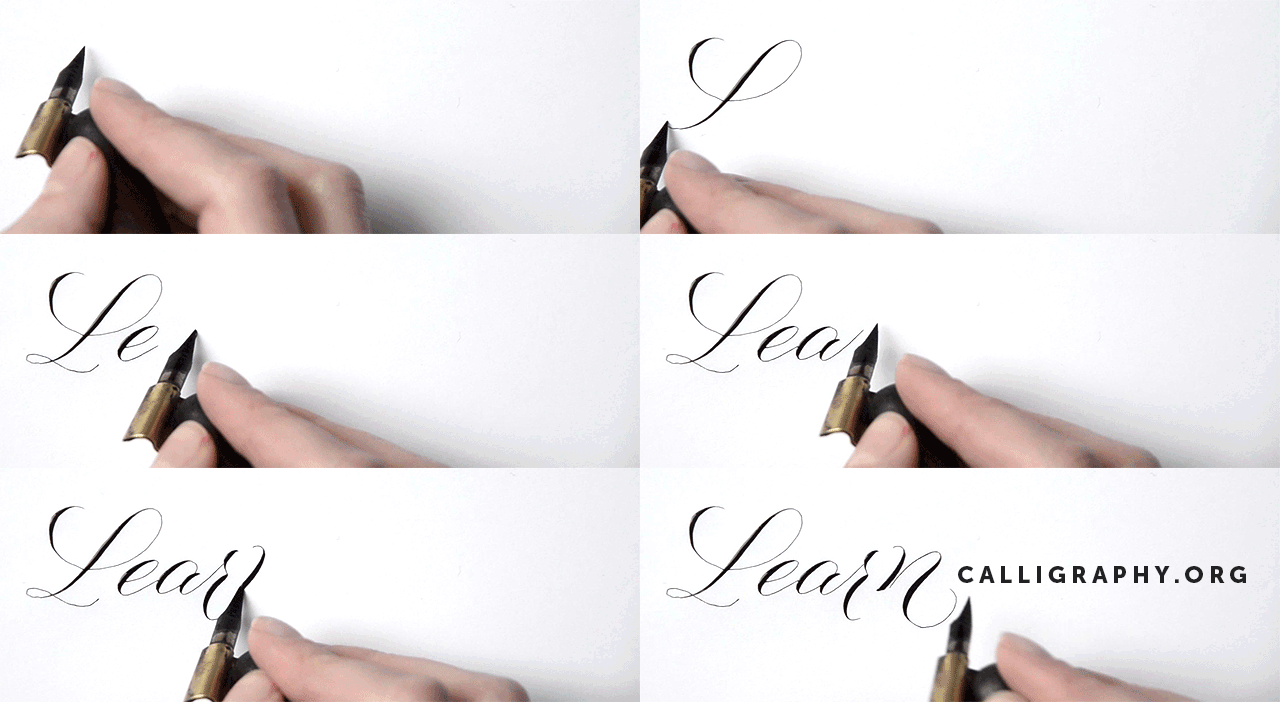
Learn calligraphy online at istilllovecalligraphy.com. You’ll learn the basics of pointed pen, flourishing, addressing envelopes and developing your own style. The course comes complete with a beginner kit of supplies and personal coaching from calligraphy experts Melissa Esplin and Erika Paulsen. Click here to find out more.

mobile site