Posts Tagged ‘style’

Sponsored: How to Wrap a Turbeanie

4 Comments

Inspired by Ford’s Fiesta Movement, let’s talk about accessories and styles that we have yet to conquer. For me. . .

It’s hats.

In the last 10 years there have been one or two times when I’ve worn a hat for fun. And It’s been off in about 30 minutes after a lot of scratching and adjusting. Perhaps it stems from the bowl cut of my youth. I went from long locks to my buns to an early 90s girlish boy-cut at 8 years old. From then until I was 11, much of my day-to-day was focused on dressing like a girl. Several times strangers mistakenly called out “Young Man!” in my general direction. Dressing like a girl didn’t include wearing hats. At least none of the hats I found interesting.

Just over a year ago I found myself needing some head coverage in downtown SF. All I had was a scarf on-hand, so I worked magic and made a turbeanie (a turban-like beanie). I loved it, but couldn’t seem to replicate it. Until now.

What styles do you struggle with? High-low trends? Boxy tunics? Leggings? Ankle boots?

istillloveyou-howto-wrap-a-scarf-turban-11

The turbeanie feels much more feminine than a regular beanie, but so much less work than the oh-so-popluar turban headbands. I don’t have to do my hair in order to make it look done!

One of the best parts? I have everything I need on-hand. I bet you do, too. Let’s do wrap a turbeanie together!

How to Wrap A Turban Beanie

istillloveyou-howto-wrap-a-scarf-turban-1

Supplies

Your scarf or fabric – a simple cut of some lightweight knit would be perfect – should be 2 yards by about 18 inches or so.

istillloveyou-howto-wrap-a-scarf-turban-2

If you have an extra wide scarf, fold it in half.

istillloveyou-howto-wrap-a-scarf-turban-3

If you’re going for a beanie look, tie your hair into loose piggy tails to keep your hair from going all over the place. You could alternatively tie this turban with a topknot or any other hairstyle.

istillloveyou-howto-wrap-a-scarf-turban-4

Instructions

Find the center of your scarf and line up the hem along the nape of your neck.

istillloveyou-howto-wrap-a-scarf-turban-5

Pull both ends so the line at the nape of the neck is tight. Cross ends over.

istillloveyou-howto-wrap-a-scarf-turban-6

Cross ends again.

istillloveyou-howto-wrap-a-scarf-turban-7

This creates the popular turban look you see in headbands everywhere.

istillloveyou-howto-wrap-a-scarf-turban-8

Take the ends to the back and cross over to the front.

istillloveyou-howto-wrap-a-scarf-turban-9

tuck remaining tails into the fabric. Be sure to keep any corners on the inside of the folds of fabric.

istillloveyou-howto-wrap-a-scarf-turban-10

Adjust the turban as needed.

istillloveyou-howto-wrap-a-scarf-turban-11

Remove the hair ties and style your hair as needed. I like how this stays on my head, but isn’t as restricting as a regular beanie. Hope you like it, too!

Alternatively, you could watch my little how-to to see it done in real-time.

This is a sponsored post and I was compensated for my participation. The opinions expressed are my own.

This tutorial/freebie is free for personal use and should not be distributed/republished without my consent. Altering any files is NOT ALLOWED. If you would like to use this tutorial for commercial purposes, please email me. Thanks!

Draw It Sew It: Chiffon Raglan Tee

10 Comments

This week the summer colors won out. Again, it seemed to be split almost down the middle. It was a tough decision, though. I couldn’t decide which one I was rooting for.

draw-it-sew-it-melissaesplin

So I made both. I didn’t initially intend on making both, it just happened that way. Just as I was cutting fabric, I realized that I didn’t have enough pink fabric to make the top. BUMMER!!

istillloveyou-sewing-chiffon-raglan-baseball-tee-5

I had some left over orange fabric from my circle dress so I was able to cut out a back piece from it. Good thing there’s both orange and pink in the chiffon fabric! It was a pretty easy fix.

istillloveyou-sewing-chiffon-raglan-baseball-tee-2

Do I feel a little shame for how this shirt inspiration came about? Yes. I’ll tell you why. I’ve wanted to make a raglan tee for a long time. I think they’d be easier to sew than regular tee shirts (no inset sleeves, and I’m right on this point). I just have been either too lazy or too cheap to buy a pattern.

At church a few weeks ago, my neighbor was wearing a very cute raglan tee with chiffon shoulders. I loved how it looked on her; a bit slouchy but perfect for sunday dress. After I complimented her on how awesome she looked, she offered to let me borrow the shirt so I could copy the pattern. And copy I did. It’s an American Eagle shirt that I straight up duped. I know, I know. Y’all can judge me. At least I’m not selling them. You can just buy them straight from the source.

istillloveyou-sewing-chiffon-raglan-baseball-tee-1

There are a few details that AE didn’t do on theirs – they didn’t use a floral print and they didn’t do my favorite curved hem. I love how curved hems hit my hips.

istillloveyou-sewing-chiffon-raglan-baseball-tee-6

Unfortunately, both the pink and orange fabrics are pretty stiff, creating more of a boxy look for this top. Since I have a straight figure, I just don’t think it flatters that much. I might try to take in the sides at some point, but I thought I would leave it as is for comparison sake.

Outfit Details:

  • necklace: Forever 21
  • top: handmade
  • bracelet: Wet Seal (eeons ago)
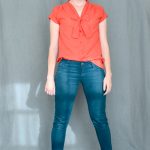
  • jeans: TJ Maxx
  • shoes: H&M

istillloveyou-sewing-chiffon-raglan-baseball-tee-7

Because I made both. I used the same pattern here (although I did lengthen the sleeves just a bit on this one), just different fabric. This jersey has great drape.

istillloveyou-sewing-chiffon-raglan-baseball-tee-8

I’m still undecided as to which one I like better. I think this one is a little more versatile and goes better with my coloring than the other one. I’m more of a fall personality anyway.

istillloveyou-sewing-chiffon-raglan-baseball-tee-9

Make yourself a similar top! Raglan PatternDrapey JerseyPrint Chiffon

Outfit Details:

  • cement earrings: c/o Ardor
  • top: handmade
  • bracelet: wet seal (eeyons ago)
  • pants: Target
  • shoes: thrifted (from Sarah)

@melissapher: What should I sew next? #fashion #style #sewing #diy


If the decision isn’t coming up for you, hit shift command (control) r to hard refresh, or click on the image to take you to the decision on Seesaw’s website.

Draw it Sew it: Swim Coverup/Dress

21 Comments

I am completely exhausted. Keeping up with work and blog posts means that I get about half the sleep I need to function and my house is a complete disaster.

Over the last 5 years I’ve struggled on and off with anxiety and depression. I’m now managing it successfully without drugs, but I have to be aware of my triggers. The lack of sleep and falling behind on my to-do list is triggering my anxiety. For the next few weeks I’m going to be paring down to 3 posts a week rather than 4 or 5 mediocre ones.

draw-it-sew-it-melissaesplin

Last week’s results were neck and neck, the subtle hemline winning out by 6% of the votes. Short it is! Thinking that this dress would be much easier to sew up than it was, I didn’t really allot myself much time to make it. I started cutting around 9pm Wednesday night. Big mistake.

istillloveyou-sewing-swim-coverup-1

Turns out, this fabric is evil. It’s cursed or something. I bought it from Michael Levine loft, it was in a crumpled mess, all wrinkled and kinked. I thought that was part of the design. Not the case.

This fabric wrinkles easily and does not iron well. Naturally. It’s a synthetic. Usually synthetics are slow to wrinkle though.

istillloveyou-sewing-swim-coverup-2

As I was cutting out this fabric, I was fighting to keep it from shifting around and kinking. While sewing, I was fighting to keep the edges lined up together.

It was 3:30am before I threw in the towel and went to bed. I had everything done except for the ties, the button hole on the side and a little fit detail I needed to fix on the neckline. It was going to take me another 2 hours before I could call it complete.

istillloveyou-sewing-swim-coverup-3

I finally finished it today, spending about an hour just ironing out all those kinks. GAH, this stuff is annoying!

On the bright side, I love the color and I love the drape. It flows really nicely as I walk around. I just need to remake this dress in a different fabric. A real silk perhaps?  It’d be a lot more expensive. I got this fabric for something like $3-4 for 5 yards. I used about 3 1/2 yards.

istillloveyou-sewing-swim-coverup-4

Drafting up a pattern for this dress was simple. I shortened the high-low on Megan Nielsen’s cascade skirt and I used my basic scoop tee pattern (actually had to draft up a new version since I couldn’t find my physical pattern anywhere) for the top. I needed a curved ruler in order to do this. Otherwise it was simple.

istillloveyou-sewing-swim-coverup-5

If you look really closely, you can see marks from the steam and my iron (it didn’t burn or melt the dress, but it did make random marks in some spots).

Outfit Details:

  • necklace: Ardor
  • dress: handmade
  • bangles: thrifted, gifts and c/o Apricot Lane
  • earrings: H&M
  • shoes: thrifted

istillloveyou-sewing-swim-coverup-6

I’m looking forward to wearing it to the pool. I also made it long enough so I can wear it out and about as a dress. I love how it turned out despite the nightmare of working with the material. I’ll definitely make another one.

Which combination of fabric should I choose for this raglan tee?

@melissapher: Which color scheme? #sewing #fashion #diy

Sewing: Vintage Bikini

50 Comments

I felt heartbroken when I tried on a much anticipated swimsuit order and there was a 1 inch gap between my little girls and the bralette cups that were marked at size “A”. It’s frustrating not being able to find something that fits. I’m happy with my body, but my body’s small “features” are hard to fit. Sometimes I think it would be easier to just augment my body so I can actually buy a swimsuit and feel feminine in it. Of course that’s ridiculous. Sewing is way cheaper than plastic surgery. And I should embrace my body the way it is. I love this NY times article all about the small-chested.

sewingthetrends-summerseries

One of the things I haven’t tackled with my sewing machine is the bathing suit. I haven’t been interested or confident enough to even think about it until I was on a complete sewing high in LA with some crazy talented ladies. Justine was actually the one to give me the boost I needed to take this on. We were in Michael Levine and I was asking her about swimwear and she showed me the “good stuff”. I couldn’t back down.

It’s fitting that I’m showcasing this swimsuit in her sewing the trends series, is it not?

istillloveyou-sewingsummertrends-vintage-bikini-1

I’m in love with the vintage bikini, the one that shows only a couple of inches of stomach. I’m in love with the bralette trend as well. The bralette isn’t a kind of look that I would  wear on a day-to-day basis, but it’s perfect for swimwear. You can see all of my swim inspiration here.

istillloveyou-sewingsummertrends-vintage-bikini-2

This bathing suit cost just over $10 for materials. About $400 in my time, though. I often get asked if I’ll ever open an etsy shop and sell my sewn creations. I always say no. I’m the sole breadwinner now, and I couldn’t charge enough for my sewn creations to make ends meet. I would love to work with a clothing company to create a limited line of clothing. And maybe someday I’ll be part of the design process, but never the manufacturing process.

If this swimsuit basically cost me $410 in materials and time, why did I do it then? Why not just commission a girl like Bev to make one for me? It boils down to happiness. I love a challenge. We all need challenges to feel happy. Besides this being great blog content, I pushed myself so much farther on this project than any other one I’ve done to date. Drafting up that top, and sewing muslin after muslin took a lot of discipline. And that discipline paid off big time.

The bottoms fit me like a glove. Everything is fully lined. Do you see how smooth those bottoms are? The lining makes such a big difference.

istillloveyou-sewingsummertrends-vintage-bikini-3

I drafted everything from scratch. I had a ton (like 5 yards) of lining fabric, so I could mess up as much as I wanted on the muslins. It took 4 muslins to get the bottoms just perfect. 1 for the top. I totally winged the top based on a bra I was planning on using for support. When I fitted the muslin, it fit me perfectly so I opted for soft cup inserts instead.

I took the flat shapes I wanted for the bralette, and with the slash and spread method, I made them into pattern pieces that would form perfectly around my girls. It’s nothing short of a miracle that this fit on the first try. That NEVER happens.

istillloveyou-sewingsummertrends-vintage-bikini-4

I did mess up on the waistband of the bottoms, but it wasn’t too bad. They were really high waisted, so instead of unpicking the waistband, I just cut off the old one and put on a new one. Surprisingly not much time or material was wasted here.

istillloveyou-sewingsummertrends-vintage-bikini-5

I still can’t believe I made this swimsuit! It fits better than any swimsuit I’ve ever worn. We’ll see how it does at the pool today.

Outfit Details:

  • swimsuit: handmade
  • sunglasses: c/o BYUTV
  • shoes: Ruche (seychelles)

istillloveyou-sewingsummertrends-vintage-bikini-6

I’ll see if I can come up with a tutorial on how to draft your own vintage bikini, but it’s kind of daunting to think of all of the steps I would have to explain.

I have found similar patterns available for download. Burdastyle has one and so does Oh Lulu.

istillloveyou-sewingsummertrends-vintage-bikini-7

The bottoms were easy enough with basically two pieces and a band. I just drafted them up from a pair of swim bottoms that fit me well enough, then I tweaked and tweaked until they were perfect.

istillloveyou-sewingsummertrends-vintage-bikini-8

I’m glad I used a print for the top. If you look closely you can tell where I wasn’t perfectly precise with the bralette, but it’s masked by the pattern. I thought I would need boning to keep the top in place, but so far it hasn’t been necessary. I can always add it on afterward.

istillloveyou-sewingsummertrends-vintage-bikini-9

You can see here the lining. Seriously, if you’re going to sew your own swimming suit, I can’t stress a high-quality lining enough! It makes all the difference!

Here’s the schedule for the Sewing the Trends series. There are some remarkable sewers in the line up, I’m thrilled to be part of it. Be sure to check them all out.

Fabric provided by Michael Levine’s LowPriceFabric.com.


Tutorial: Galaxy Print

12 Comments

I’ve noticed that if I can’t do something in my studio (if it makes a huge mess), I rarely muster up the motivation to start it. This was one of those rare occasions. I made this galaxy print from scratch. It was fun and painterly, I think I may actually do it again sometime.

istillloveyou-sewing-constellation-peplum-top-1

This fabric was originally a painful juvenile raspberry color. I could have made it work, but it wasn’t me. I had a few items piling up that weren’t quite the right color so I had a dyeing party in my wash room. I didn’t care what colors came out as long as they weren’t the same colors that went in. I threw this knit and a couple of others into the wash with a high concentrate of teal dye and let it do its thing. It was awesome to see how different each piece came out!

istillloveyou-sewing-constellation-peplum-top-2

The purple that came out of the dryer was just begging to become a galaxy print. I read a few things on spot dyeing, but just went for it. I ended up having to do it all over again, but I figured it out in the end. It wasn’t terribly time consuming once I figured it out. Full explanation after the jump.

istillloveyou-sewing-constellation-peplum-top-3

Sewing up the peplum didn’t take much time at all. I basically used the block I made from my high-low circle dress, but drafted up a new circle piece on the bottom.

I didn’t want the peplum to be too flouncy, so it’s not a full circle. Long explanation short, I used a slash and overlap method I learned from Carrie in a pattern making class I took at Sewing Summit last year. I can provide a full step-by-step tutorial if y’all are interested. Just pipe up in the comments.

istillloveyou-sewing-constellation-peplum-top-4

Constructing this top took about an hour and a half. I feel like I’m getting much faster when I use patterns that fit me already. It definitely helps make sewing “cost” less.

Outfit details:

  • necklace: Forever 21
  • top: handmade, hand dyed
  • belt: thrifted
  • pants: Pac Sun
  • shoes: Target

istillloveyou-sewing-constellation-peplum-top-5

I’m so happy with how this peplum fits! I think they’re such a flattering silhouette for any body type. At some point Chris and I will add another baby to our family. It’s nice to know I’ll have a few pieces in my wardrobe that will work for the first and fourth trimesters.

Speaking of the awesome pooch-hiding superpowers of peplum tops, I’m over at Über Chic for Cheap sharing the things I’ve learned about dressing a postpartum bod. It’s got some funny illustrations so you’ll want to head over.

Get the instructions how to make your own galaxy print after the jump.

(more…)

mobile site