Posts Tagged ‘printable’

Printable: 2015 Thank You Cards

8 Comments

I’m so excited about this year’s Thank You Printable. Or should I say PrintableS, because I’ve teamed up with the fabulous Natalie Malan. We were in the same vender area at Pinners Conference two weeks ago when we came across this great idea. She’s amazing at watercolor florals and I can do some calligraphy, so we put our creative minds together and here we are!

melissaesplin-nataliemalan-2015-thankyou-floral-calligraphy-5

The first design is a simple wreath with warmer colors. I played around with various banner ideas, but ultimately I liked the simpler text.

Each card can be printed as a postcard, double-sided (like above) or single-sided for a flat card to be mailed in an envelope.

melissaesplin-nataliemalan-2015-thankyou-floral-calligraphy-3

Seriously, aren’t these florals beautiful!? Natalie sells prints in her shop and on Minted.com. You can also find a sweet watercolor kit (hello Christmas!) available in her shop.

melissaesplin-nataliemalan-2015-thankyou-floral-calligraphy-4

The second one was screaming for an organic brush script so I played around with different styles. I chose this version of the text for the way the ascenders, descenders and flourishes play with the floral border. I like how the organic lines of the letters compliment the flourishes.

melissaesplin-nataliemalan-2015-thankyou-floral-calligraphy-2

You can download one below and the other on Natalie’s Blog.

CLICK HERE to DOWNLOAD

*By downloading the above material, you agree to terms of use: This tutorial/freebie is free for personal use and should not be distributed/republished without my consent. Altering any files is NOT ALLOWED. If you would like to use this freebie for commercial purposes, please email me. Thanks!

Check out past designs here:

Freebie: Inspirational Quotes

8 Comments

Back in January, I had the joy to design a little print series for Bing for their lounge at Alt Summit. They wanted inspirational quotes to support the concept of their cloud-based services. I made a series of 4 prints that could be tiled together to create an abstract cloud, or they could stand alone.

melissaesplin-inspirational-dream-calligraphy-quotes

I’m happy with how they turned out, despite my limitations with the design and time.

Screen Shot 2015-04-27 at 7.30.35 AM

See above how I tiled them.

melissaesplin-always-more-creative-calligraphy-quote

I was very limited on the design as I didn’t have much time to execute. I was given the official ‘go ahead’ while I was flat on my back with strep throat. The next day I created the designs. By the time I had work ready to print we were less than a week away from the deadline. Obviously no time for fun stuff like letterpress, gold foil, laser-cutting, etc.

melissaesplin-look-up-at-the-stars-calligraphy-quote

melissaesplin-if-you-can-dream-it-calligraphy-quote

Of the local digital print services I tried, no one wanted to touch this job. We needed 500 of each design (2000 cards total). I sent it off to overnight prints and they pulled through for me (granted, it required a substantial rush fee).

melissaesplin-dreams-dont-work-unless-you-do

I would love to re-work these prints and get them completed with off-set and silver foil printing. I just don’t see that happening though.

As far as the design process goes, I painted the starry scene on watercolor paper with dry gouache. Added gold and glitter touches then scanned in. I lettered the quotes separately and placed them over the background.

desktop-freebie

Click the image above to download the free desktop background quote “Dreams don’t work unless you do.” By downloading you agree to the Terms of Use below. Stay tuned for more fun stuff with the other three quotes!

Are you new here? Check out the “printables” tab at the top of the page for more freebies! Interested in learning calligraphy? Let me teach you how! Click the image below for more information.

learn calligraphy online with melissa esplin

*This tutorial/freebie is free for personal use and should not be distributed/republished without my consent. Altering any files is NOT ALLOWED. If you would like to use this freebie for commercial purposes, please email me. Thanks!

Sponsored: Symbols of Christmas Printable Book

13 Comments

Disclaimer: I don’t pretend to think that all of you are Christians or even like religion. If you are a Christian, you might really enjoy this post and sharing this printable with friends and family. And I sincerely hope you do! If not, please don’t take offense. This is simply a project that I feel in my heart I’ve needed to make and share here in case others may find it impactful for their holiday celebrations.

If celebrating Christ’s birth at this time of year is not your thing, I would love to hear more about your personal beliefs and traditions for this time of year in the comments below*.

This month has been insane. So many things to do and so little time. I’ve actually had this project completed for weeks, but I haven’t had a chance to photograph and write about it until now. I figure Sunday is the perfect time to publish, since this takes a more spiritual tone.

Unfortunately I haven’t had the chance to do my annual candy box. This project ended up taking its place. I have so many ideas for the candy box, though. I may have to publish a New Year’s or Valentine’s candy box. :)

melissaesplin-christmas-symbols-printable-book-diy-3

At church I’m in charge of the activities for our women’s group. We meet at least quarterly for spiritual, service-oriented, social or creative activities. When we were planning I knew I wanted to make a little keepsake/quiet book for adults and children alike to be reminded of the true purpose in Christmas: Christ’s birth. I’m glad I worked on this project. It’s been a busy time of year with a lot of work (a fabulous problem to have, for that I’m humbly grateful!), so carving out time to research symbols of Christmas and coordinating scripture was a great way to get in the spirit.

This printable by no means includes all of the symbols of Christmas (I realized I left out the wreath – oops), the 7 included simply serve as a prompt for discussion and pondering on the other things around us that remind us of Christ and God.

I wanted it to be something that could be enjoyed by kids and adults alike, so I made little calligraphed illustrations that could be colored and kept the design simple to appeal to adults. It’s all small enough that it can easily fit in a purse to be toted around all season long (even though it’s almost at it’s end).

I printed off a few and plan to give them to my grandparents and parents this year. The ones we made for our women’s group activity were a huge hit. We prepped 30 kits and even though we didn’t have 30 in attendance, all were spoken for! It was a thrill to see women take extras to share with others.

melissaesplin-christmas-symbols-printable-book-diy-5

The book includes symbols on: The evergreen tree, the star of Bethlehem, the candle, the poinsettia, the candy cane, the stocking and holly berries. At the end there are a couple of pages for thoughts so you could use it as a holiday journal or as a way to write your personal thoughts on the season to give to someone else. Or write in some of your favorite holiday traditions/memories.

melissaesplin-christmas-symbols-printable-book-diy-6

Each symbol has a brief explanation and a scripture. Each scripture is taken from the King James version of the Bible. Mostly from the New Testament.

melissaesplin-christmas-symbols-printable-book-diy-4

To assemble, you will need:

  • printed sheets
  • hole punch
  • needle
  • thick thread
  • bone folder
  • 6×9 inch piece of leather or felt**

Download the printable (link at bottom of the post) and print. Print double-sided and DO NOT fit to page (print at 100%). 

Cut the paper in half width-wise so that you have 8.5 x 5.5 sheets. Rearrange your papers so they are in order. I like to go by the odd numbers on the bottom right hand side. Use the blank half sheet on the outside of the title page.

Punch holes in the guides on pages 10-11. Center your pages over the leather, mark the holes on the leather and punch.

Thread your needle and sew the book: Start on the outside front cover in the middle hole. Go to the inside of the book and leave a 4 inch tail. Go through the bottom hole, then thread through the top hole and then back through to the middle hole. Your tails will be coming out of the middle of the book. Tie a knot around the string running up the spine and finish with a bow. Fold in half and crease with a bone folder.

Now you’re finished! If you batch these, you can make 10-20 books in about half an hour. They’re great for gift giving! Enjoy!

CLICK HERE TO DOWNLOAD

This post is sponsored by Mormon.org | check out their video “He Is the Gift“. It so beautifully conveys the nativity with song. All thoughts and opinions are my own.

*This blog is a positive, creative space. Comments that attack any religious faction will not be tolerated or published. 

**Leather provided by Leather Hide Store.

Printable: 2014 Thank You Cards

23 Comments

2013 Thank You Printable2012 Thank You PrintableFloral Thank You Printable2011 Thank You PrintableDino Party SuiteStyled. Party Suite2010 Thank You Printable • 2009 Thank You Printable

It’s that time of year again! Here’s another ‘Thank You’ card printable. I had a lot of fun with this one. I love the idea of making a wheat-inspired bouquet. Kind of reminds me of the fall harvest. Very indicative of the time of year around here.

melissaesplin-2014-free-calligraphy-printable-thankyou-1

I’ve been making lots of ‘Thank You’ cards for family and friends lately (so many things to thank them for!), so I thought I would make a printable that was in-line with the off-hand flourishes that I’ve been making lately.

melissaesplin-2014-free-calligraphy-printable-thankyou-3

The printable is a simple double-sided post card design that could be sent as a post card, or printed single-sided and used with an envelope for more formal sentiments.

melissaesplin-2014-free-calligraphy-printable-thankyou-2

I kept the design simple with just black and white line work. Embellish with sparkly pens, colored pencil, markers and more! Print out a bunch and let kids color and decorate at the Thanksgiving table! A great Thanksgiving-themed activity, if you ask me.

melissaesplin-2014-free-calligraphy-printable-thankyou-4

CLICK HERE TO DOWNLOAD


*This tutorial/freebie is free for personal use and should not be distributed/republished without my consent. Altering any files is NOT ALLOWED. If you would like to use this freebie for commercial purposes, please email me. Thanks!

Last-Minute Happy Easter Printable

23 Comments

How did Easter creep up so quickly? I can’t believe it’s already here. Our celebrations this year (as with everything this year) are going to be simple. An easter basket filled to the brim with candy that Penelope and Felix have to find. No dresses, no decor, just keeping it simple.

There’s something to be said for that. I love the idea of going all out for celebrations; but when mental health lies in the balance it’s all about simplifying.

CLICK HERE TO DOWNLOAD

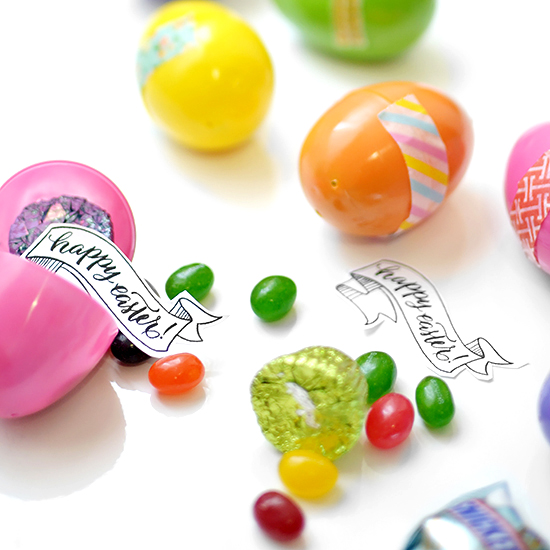
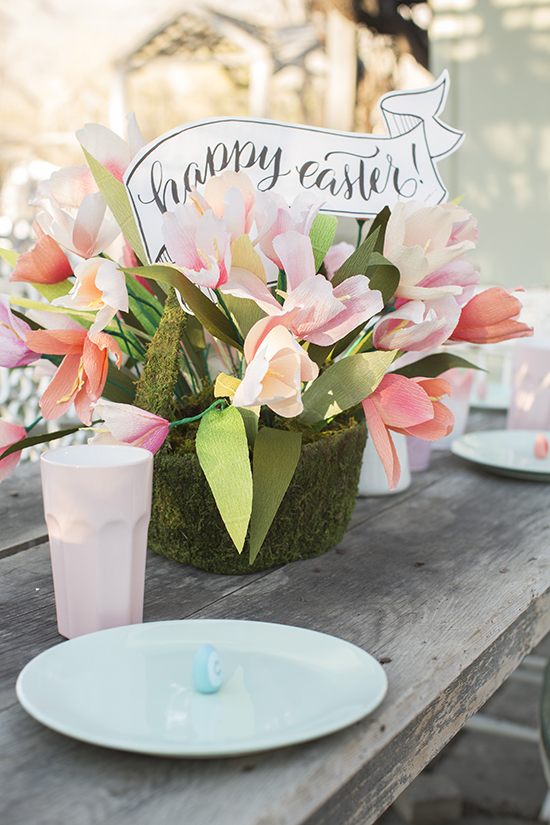
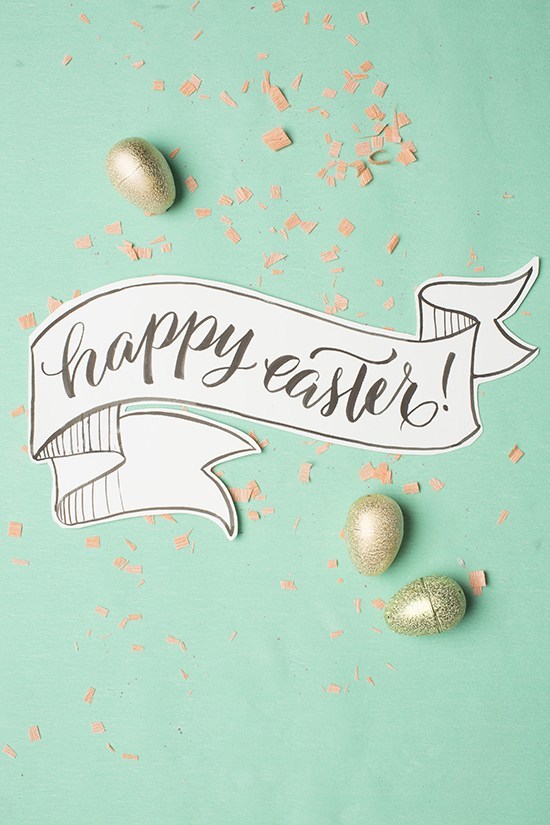
In collaboration with Brittany of House that Lars Built, I made a little printable easter banner. The printable is available in three sizes: 2″ wide (above), 10″ wide and 16″ wide. You can use the banners as inserts in candy-filled Easter eggs, as a little banner above Easter baskets or as a decoration at the breakfast table.

Photo by Trisha Zemp

Brittany styles the banner with a mossy basket and paper flowers. To learn more about how to make Easter Awesomeness like this, check out her awesome DIYs here and here.

Want to learn how to do your own calligraphed banners? Take my brush lettering class online right here.

Photo by Trisha Zemp

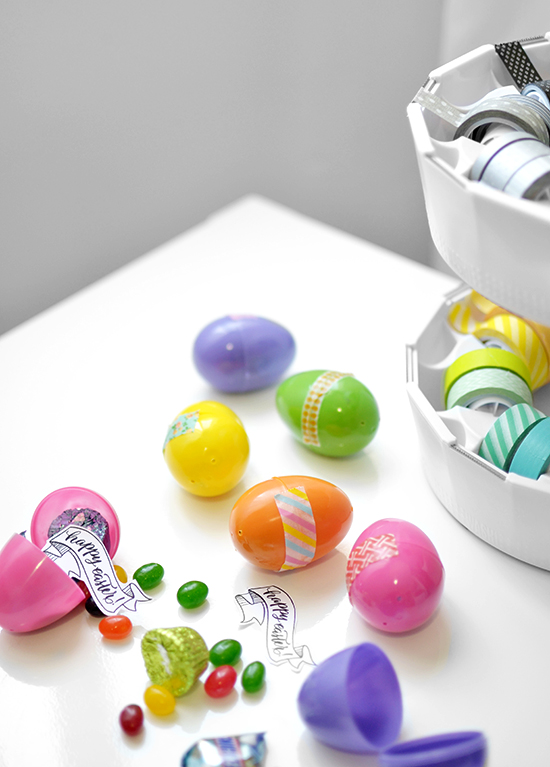
I ended up using the artwork as a little printable for an activity I co-hosted for the ladies at church. We had a simple devotional about the real meaning of Easter with a little social afterward. The candy-filled Easter eggs were a sweet takeaway. The event was very simple, but just what I needed.

Lately, I’ve been enclosing my Easter eggs with washi tape to make sure they don’t randomly split open. I’ve gathered quite the collection of washi tape over the years (which I’ve now finally organized in a cute dispenser!), so it’s great to put it to good use. My mom and grandma used to tape Easter eggs shut with regular tape which was perhaps a little too effective. The sticky residue of clear tape lingered year after year. The washi tape is a nice solution because it’s easier to remove and doesn’t leave any stickiness behind.

So what will you do with the Easter banner? I’d love to hear/see what you plan on doing with the artwork!

Click the button above to download. If you enjoy the download, make sure that you follow along via feedly, instagram, facebook and/or twitter!

*This tutorial/freebie is free for personal use and should not be distributed/republished without my consent. Altering any files is NOT ALLOWED. If you would like to use this freebie for commercial purposes, please email me. Thanks!
*Tape dispenser provided by We R Memory Keepers.


mobile site