Posts Tagged ‘recipe’

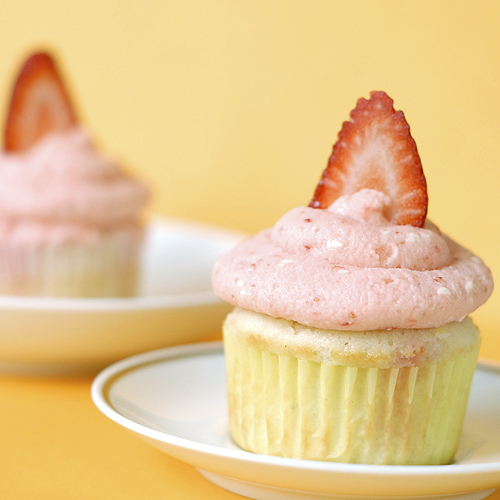
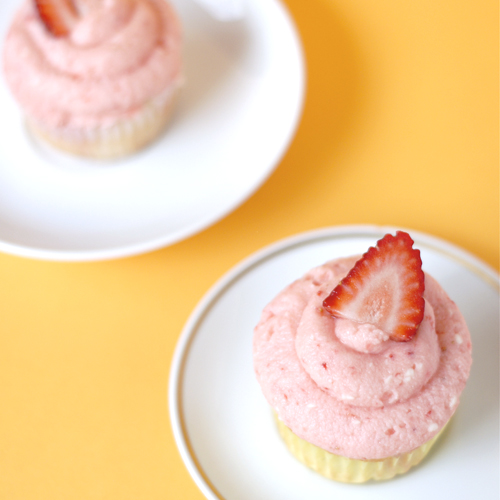
Strawberry Lemonade Cupcake Recipe

26 Comments

Monday night I made the most delicious cupcakes ever. They were so delicious, some folks in the tweetiverse even asked for the recipe. I was very flattered to see the response. So here it is.

How to Make Strawberry Lemonade Cupcakes:

  • Make the fluffy white cake from epicurious. (this makes over 3 1/2 doz cupcakes, so you may want to half the recipe). I’m sure any white cake recipe would do, but I really like this one.
  • Fill cupcake cups with a heaping spoonful of batter and bake at 350º for 15-17 minutes.
  • Allow cupcakes to cool. Put the cupcakes in an airtight container and allow to rest for a few hours or overnight. If you don’t cover the cupcakes, they’ll dry out!
  • Make the lemon curd recipe from epicurious. You’ll want to half the recipe if you don’t want loads of leftovers & even if you’re making the full 3 1/2 dozen cupcakes. You could always just buy the curd if you wanted to.
  • Poke a hole in the middle of each cupcake using the back of a fork or knife.
  • Fill pastry bag with lemon curd & fill each hole with curd.
  • Make strawberry lemon icing (recipe below).
  • Fill pastry bag or plastic bag with frosting and frost each cupcake.
  • Garnish cupcakes with sliced strawberries just before serving.

Strawberry Lemon Icing
from the kitchen of Melissa Esplin
makes enough to frost about 1 1/2 dozen cupcakes

1 tablespoon lemon juice
4-6 fresh strawberries
1 cube or 1/2 cup butter, softened
2 cups powdered sugar

Puree strawberries & lemon juice in a blender. Allow strawberries to macerate for about 10 minutes; it helps with the flavor. With a hand mixer beat strawberry mixture, butter and sugar until consistency is smooth. You may want to add more sugar or more lemon juice to get your preferred consistency. Frosting is perfect for sugar cookies, cupcakes, cakes, etc.

Hope you like them! Let me know if you have any questions about the recipe. I used the fluffy white cake recipe for Penelope’s birthday cake. It was really good, but I think this recipe works better as a cupcake. I don’t know what it is, but that’s just how I feel about it. Enjoy!!

March Sweet & Savory

5 Comments

3 Cheers for Saint Patrick’s Day and BANOFFEE!! My brother, Jake Scott, picked this recipe up while living in Ireland, it’s an Irish and English favorite. Jake has modified the recipe over the years, so he’s made this UK favorite one of his own. It’s literally banana and toffee with a cookie crust. It’s rich, it’s over-the-top, and everyone seems to like it. My one suggestion is to keep the serving size small, because this might overpower a lesser sweet tooth.

doublebanoffesm

Banoffee Pie

From the kitchen of Jake “the great” Scott
Makes 12-16 servings
Prep: 2 (incredibly low-key) hours  Chill: 1
14 ounces crunchy chocolate chip cookies
1/2 cup Butter, softened
2 -14 ounce cans of Sweetened Condensed Milk
3-4 Bananas
1 pint of heavy whipped cream
1/2 cup of confectioner’s sugar
1 teaspoon of vanilla (optional)
1 bar of chocolate

Filling:

Place two cans of sweetened condensed milk in a saucepan deeper than the height of the cans. Fill the sauce pan about 3/4 full of water. Cover and place over medium heat. Boil the sweetened condensed milk for 1 and 1/2 hours. Periodically add water to the saucepan to maintain the water between 1/2 and 3/4 full. The sweetened condensed milk will cook to a toffee state. Remove from heat.

Pie:

In a medium-sized mixing bowl, smash the cookies into pea-sized crumbs, and mix thoroughly with butter. Press mixture into the bottom of the 9×13 pan (or 2 standard pie pans) to form the cookie crust. Bake at 350ºF for 8 minutes. Cool. Whip cream and add confectioner’s sugar and vanilla. Remove the sweetened condensed milk cans from the saucepan and open. Be sure to place a tea towel over the top of the can opener while opening to prevent spills and/or burns. Pour most of the toffee over the cookie crust and spread evenly. Chill. Just before serving: slice bananas and distribute evenly over top of the toffee, spread whipped cream on top and serve. Garnish with grated chocolate and remaining toffee and bananas.

Jake’s notes: I used the Chips Ahoy cookies that have chocolate and peanut butter chips.
My notes: I opted out of adding the confectioner’s sugar and vanilla to the whipped cream, since the toffee filling is so sweet. I halved the recipe and it all fit perfectly into a standard pie pan. I also used the Peanut Chunky Chips Ahoy cookies, and it was delicious.

•     •     •     •     •     •     •     •     •     •     •     •     •     •     •     •     •     •     •     •     •

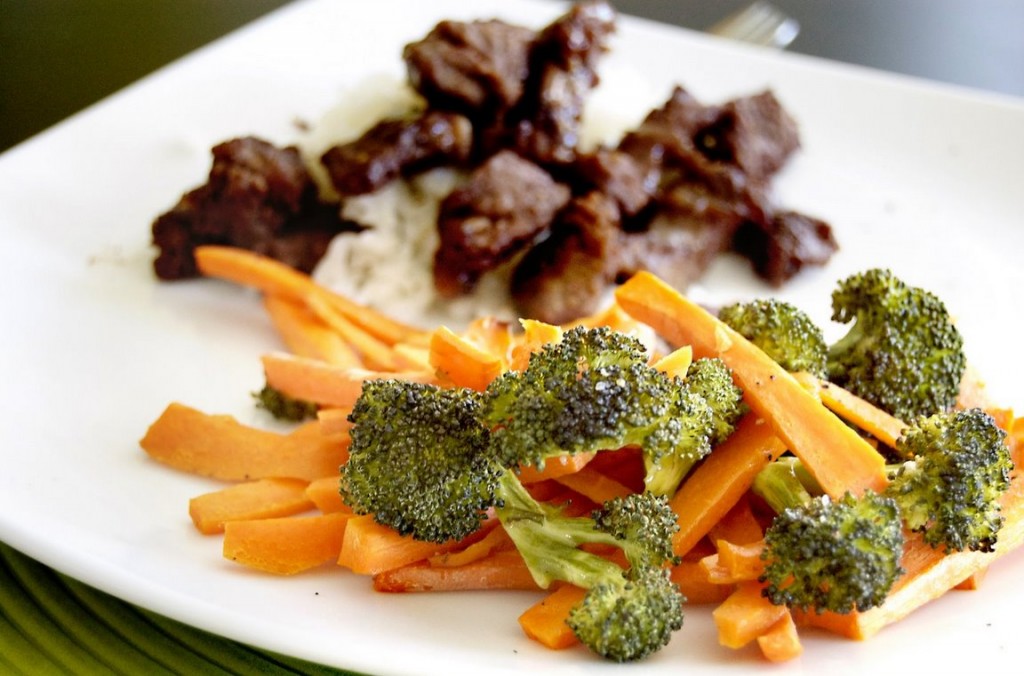
The savory (while a huge favorite) wasn’t nearly as exciting to make as the Banoffee, but a great way to spruce up dinner vegetables. Nearly a year ago, I came across an article in Cook’s Illustrated magazine that has revolutionized my dinner plate. Roasting vegetables brings out a richer flavor by caramelizing them and revitalizes fridge-old produce.

dsc_1154

Roasted Veggies

4 servings
Prep time: 5 min Cook time: 30 min

2 generous cups of vegetables, sliced or julienned*
1-2 tablespoons olive oil or butter
garlic salt, to taste

Preheat the oven to 425ºF. In a large bowl, toss vegetables with oil and garlic salt. Spread evenly on a cookie sheet and place in the middle rack of the oven. Cook for 30 minutes turning the vegetables every 10 minutes or so. Cook until slightly shriveled and browned.

*green beans, broccoli, cauliflower, carrots and sunchokes are fabulous in the oven. Even Romaine hearts can be roasted!

January DB: Light and Easy Tuiles

2 Comments

Compared to last month, this month’s DBers challenge was a breeze. Hands down I will be making these again. Possibly in cigar format with mousse in the middle.

MmmMMmm

_dsc0776

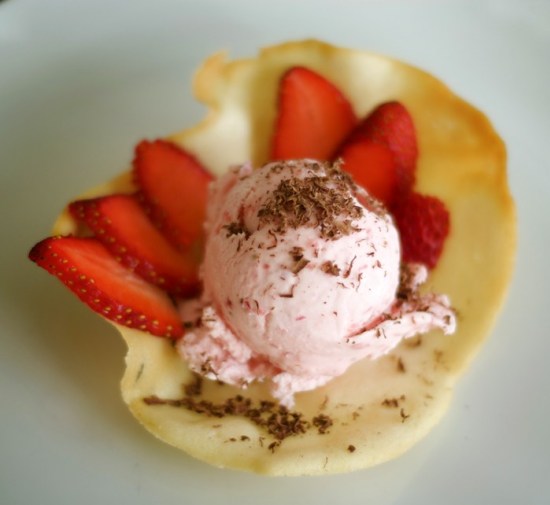
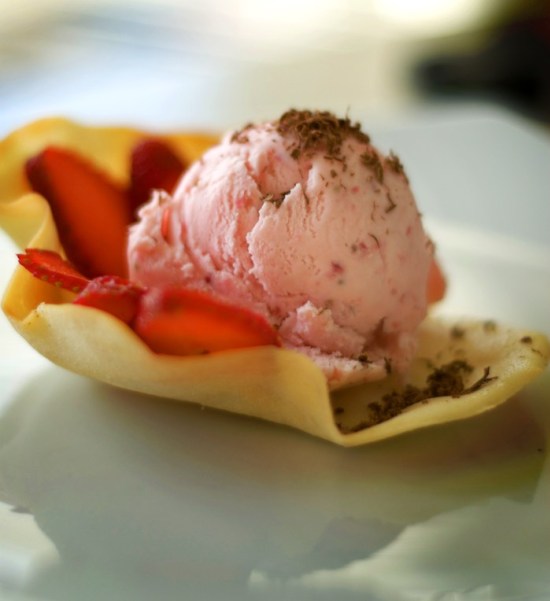
I made these tuiles for some friends and tried my hand at making a sweet little star cup. While the plastic placemat worked perfectly as a pattern, the original star pattern I made was just a little too detailed for the recipe. Now I know what to do next time. Not only was the tuile just downright tasty, the ice cream complimented it nicely.

_dsc0783

Tuile Recipe:

Yields: 20 small butterflies/6 large (butterflies are just an example)
Preparation time batter 10 minutes, waiting time 30 minutes, baking time: 5-10 minutes per batch

¼ cup softened butter (not melted but soft)
½ cup sifted confectioner’s sugar
1 sachet vanilla sugar (7 grams or substitute with a dash of vanilla extract)
2 large egg whites (slightly whisked with a fork)
1/2 cup sifted all purpose flour
1 table spoon cocoa powder/or food coloring of choice
Butter/spray to grease baking sheet

Oven: 350ºF

Using a hand whisk or a stand mixer fitted with the paddle (low speed) and cream butter, sugar and vanilla to a paste. Keep stirring while you gradually add the egg whites. Continue to add the flour in small batches and stir to achieve a homogeneous and smooth batter/paste. Be careful to not overmix.
Cover the bowl with plastic wrap and chill in the fridge for at least 30 minutes to firm up. (This batter will keep in the fridge for up to a week, take it out 30 minutes before you plan to use it).

Line a baking sheet with parchment paper or grease with either butter/spray and chill in the fridge for at least 15 minutes. This will help spread the batter more easily if using a stencil/cardboard template such as the butterfly. Press the stencil on the bakingsheet and use an off sided spatula to spread batter. Leave some room in between your shapes. Mix a small part of the batter with the cocoa and a few drops of warm water until evenly colored. Use this colored batter in a paper piping bag and proceed to pipe decorations on the wings and body of the butterfly.

Bake butterflies in a preheated oven (350ºF) for about 5-10 minutes or until the edges turn golden brown. Immediately release from bakingsheet and proceed to shape/bend the cookies in the desired shape. These cookies have to be shaped when still warm, you might want to bake a small amount at a time or maybe put them in the oven to warm them up again. (Haven’t tried that). Or: place a bakingsheet toward the front of the warm oven, leaving the door half open. The warmth will keep the cookies malleable.

If you don’t want to do stencil shapes, you might want to transfer the batter into a piping bag fitted with a small plain tip. Pipe the desired shapes and bake. Shape immediately after baking using for instance a rolling pin, a broom handle, cups, cones….

This month’s challenge is brought to us by Karen of Bake My Day and Zorra of 1x umruehren bitte aka Kochtopf. They have chosen Tuiles from The Chocolate Book by Angélique Schmeink and Nougatine and Chocolate Tuiles from Michel Roux.

Crazy Cat

0 Comment

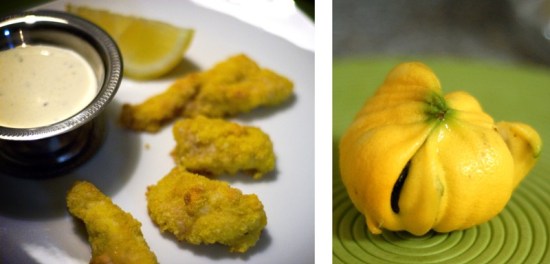
Nothing spices up oven-fried catfish like a deformed lemon. Chris and I make sure to pick all of the weird ones from our tree first, mostly because they’re the tastier ones.

catfish and deformed lemon

A couple of nights ago I made catfish fish sticks from a recipe I found online titled Fishsticks in a Flash. Of course I’m going to make them. If it’s made of few ingredients and takes less than a half hour, I’m all over it. The fish sticks took 20 minutes. BONUS. They tasted just like the large cat we always order at Jonathan’s Fish & Chips. DOUBLE BONUS. And Chris couldn’t stop talking about it. TRIPLE BONUS.

Penelope even had a taste. She was mad we didn’t give her more.

Fish Sticks in a Flash

1/2 cup cornmeal
1/2 cup Parmesan cheese
3/4 teaspoon garlic powder
1/4 teaspoon salt
3 tablespoons canola oil
1 pound U.S. Farm-Raised Catfish fillets, cut into 1-in thick strips

1. Preheat the oven to 475°F.
2. Lightly oil or coat a large baking sheet with nonstick cooking spray and set aside.
3. Combine the cornmeal, cheese, garlic powder and salt in a medium bowl and mix well.
4. Place the oil in a small bowl. Lightly coat each piece of fish in the oil and then roll in the breading until well coated.
5. Arrange the fish on the prepared baking sheet and bake until golden brown, 10 to 12 minutes.

Yule be glad you did it.

7 Comments

Honestly, many thanks to my Mother-in-law for keeping me motivated for this mammoth DBers Challenge. I wouldn’t have been able to do it in 12 hours if it weren’t for her. Overall: I’ll likely never make this again, but it was absolutely delicious.

This month’s challenge is brought to us by the adventurous Hilda from Saffron and Blueberry and Marion from Il en Faut Peu Pour Etre Heureux.
They have chosen a French Yule Log by Flore from Florilege Gourmand.

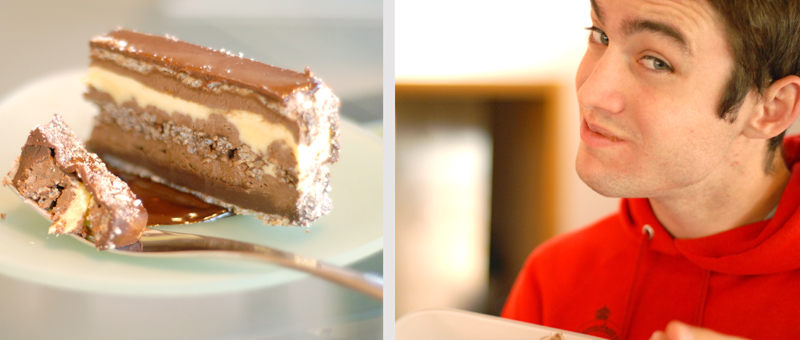
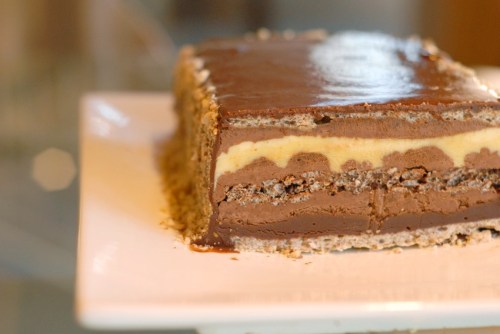
If you want the recipe, go here (it’s 18 pages of hair-pulling, eye-gouging fabulousness) because I don’t want copy down the colossal recipe. Sorry. I will, however, tell you what the layers are. . .

  • Almond Dacquoise
  • Dark Chocolate Mousse
  • Dark Chocolate Ganache
  • Praline Feuillete
  • Vanilla/Nutmeg Creme Brulee
  • Dark Chocolate Icing

It was great to have my mother-in-law’s help, plus her enormously huge kitchen and sweet glass servingware.

Brother-in-law, Eric, seemed to like it.

Also, thanks to Chris and father-in-law, Cordell, for getting me the amazing D200 and 50mm Lens for Christmas. You can almost taste the creaminess of the mousse and the crunchiness of the feiullete through the screen.

mobile site