I think this might be my favorite summer outfit!
- chambray top: swapped
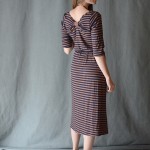
- tank: DownEast basics, $3
- necklace: In Honor of Design, c/o IHOD
- purse: thrifted, $2
- belt: thrifted, $2
- skirt: Ruche, c/o Ruche
- shoes: thrifted, $5
TOTAL: $12


 |
 |


I love how in the last 5-10 years tops are starting to get longer & longer. You no longer have to buy a specialty top in order for it to touch the waistband of your jeans. Thankfully, I don’t think that trend is going anywhere. Let’s be honest, it is more flattering to cover the stomach than to see a muffin top spilling out, no?
Obviously, I was sorely disappointed to see the crop top trend making a come back. The first few outfits I saw were styled images of 75lb models with flawless tummies. Let’s be honest here, that does NOT translate into the real world. I’m on the skinny side, but no one wants to see that business. I was so annoyed to see it coming back. UNTIL. . . I saw Liz refashion one of her brother’s shirts to a crop, she kept it current AND demure. THEN, I went to the swap meet & had the pleasure of meeting Sophia (who’s adorably pregnant) and styled a crop with a maxi dress underneath. I was sold. Crop tops with high waisted bottoms or sheath dresses underneath are cool.

Now that I’ve been conditionally converted to the crop top I am seeing them pop up in shops like Urban Outfitters, Ruche, Forever21 and even Anthropologie; many have been styled with no bare skin showing. Thanks, guys!

So with all that said, here’s what I did with the striped shirt:


It took me a while to see it, but I’m really excited about how it turned out. Just a recap of what I did:

I styled this crop with high(er) wasted jeans & a tucked in undershirt – I’d consider styling crop tops like you would style a trapeze coat, with fitted items underneath. The top is really bold, so I only went for a bold pair of shoes & no jewelry. I like the simple, yet bold statement. I am a little hesitant about the bold stripes on this top, so I’m thinking I’ll be trying out Rit Dye’s color fade to see if I can get it to a more muted tone. The muted tone would also work better transitioning into Fall.
 You wanted to see a picture of my butt today, didn’t you?
Also, the jeans have been tailored. I took in the jeans from the back & boy was it a lot of work. Not so sure it was worth it to do it on cheap $12 Walmart jeans, but what’s done is done. At least the fabric is thin-ish so it wasn’t too terribly annoying to work with the fabric and they fit perfectly on my waist. It’s sort of obvious that these jeans have been altered, but I usually wear them with longer shirts that cover my less-than perfect alteration. Have you altered your jeans before??
Be sure to come back later today, I’ll be announcing the Ruche giveaway winner & starting another giveaway.

(I’m trying to be smiley, but LBH, I’m in a bad mood)
This dress used to be longer (it was an awkward not long enough, not short enough length & I cut it), and I feel like now that it’s shorter, I look more put together. Funny how that works.
TOTAL: $37


I’m actually wearing this button up today, so I thought posting this outfit was fitting.
TOTAL: $12
First off: things have been a little nuts around the Esplin household. I’m working on a bunch of projects that I can’t wait to share with you. They have to wait at least until mid-August, though. You better believe Jill & I are cooking up a batch of killer DIY awesomeness for you!!

the girl in the second drawing totally has a grimace on her face.
I’ve been wanting to make this cover-up for some time, so I’ve been through a lot of design iterations in the process. Above are a couple of rough sketches from my sketchbook. I decided the cover-up would look less “home project-y” with a racerback than with a straight neckline & straps.

This thing took me forever to construct, but I learned a LOT along the way. I drafted this coverup from scratch using sketches, pins & my dress form. I’m really happy with how it turned out, I think I need to dye it an ombre really soon here. Anyone want to have a dyeing party next week? Seriously, next Tuesday night come over to my house with a couple of things to dye & we’ll go to town. Let me know if you’re in.
Above is a little during construction shot. You can see, I started out with straight lines that I cut to the shape I wanted.


I figured out a system to get uniform pintucks without spending too much time on them. That was pretty tedious, but getting the curves on the arm, racerback & necklines took forever. The curve on the bottom took even longer.
The coverup started out 6 inches longer than it ended up. I kept cutting & cutting & cutting in order to get the perfect curve. At the very end I figured out the best way to get a uniform curve all the way along the bottom. Too bad I discovered it 6 inches too late. It’s okay though. It’s a cover up. It doesn’t really need to cover much.
I added pearl snaps to the front which were sort of a pain to put in. My thumbs & fore fingers were throbbing afterward, but at least I didn’t have to sew buttons & button holes. I hate sewing buttons.
I was going to line the inside of the cover-up in order to finish the edges & do a curved hem, but by the time I got the perfect curve along the end, I decided to go with biased tape. It was by far the easiest finishing option. I’ve always hated putting on biased tape, but after reading Diana’s tutorial for sewing biased tape the right way, I don’t mind it much at all.
Swimsuit provided by Lime Ricki Swimwear. Read more about the swimsuit here.