Posts Tagged ‘craft’

DIY: Having Fun with Plain Wrapping Paper

0 Comments

I don’t have giant stashes of gorgeous wrapping paper. I have rolls of white, black and kraft butcher paper. And the occasional roll of gift wrap. But it doesn’t always match my mood or occasion, so here’s a fun little DIY I did to dress up my gifts this year.

melissaesplin-sakura-decorating-gift-wrap-1

Santa doesn’t have this much creativity when it comes to his gift wrap. That would take him way too long.

melissaesplin-sakura-decorating-gift-wrap-6

The key to this whole operation is in the marker. Some time ago Sakura sent me their Pigma Professional brush series. I use them for everything. Heck, they’re even in our brush lettering kits that I send out to all of my beginning brush students. These brushes come in 3 sizes: fine, medium and BOLD. I use the fine brush for small detailed work and little illustrations. I’ll use the medium in cases where my x-height letters are about 3/4″ tall. The bold I’ll use for everything else.

The bold brush is pretty stiff so you still get very fine hairlines even though you can get a ton of drama out of the side of the marker.

melissaesplin-sakura-decorating-gift-wrap-2

And when mine dry out, I’ll use them on textured paper for a more organic look (like above). Want to learn how to make these easy-peasy holly berries? Watch the video below.

Supplies

  • Pigma Professional BB Brush
  • Large sheet of white or kraft paper
  • Sakura Koi red marker (optional)

I love the BB brush, but you can get similar results from even a crayola marker. Granted, if you want this kind of drama to scale, you’ll need to make smaller holly berries and leaves.

Basic jist: get a piece of paper and spread it out on the floor or table. Draw out the berries first in random clusters of 3. Then draw in the center of the leaves, coming out from the berries with a light touch. A fine line helps. Then fill in the remainder of the leaves with two mountains and meeting just beyond the tip of the center line of the leaf. Fill in any awkward blank spaces with leaves. Messy is usually better in this case.

melissaesplin-sakura-decorating-gift-wrap-3

If you want to go for a more ornamental approach, draw out a berry grouping on cardstock. Watercolor paper is going to give your cluster more texture and depth. Punch a hole near the cluster of berries.

melissaesplin-sakura-decorating-gift-wrap-4

With your scissors, cut around the cluster leaving a 1/4″-1/2″ border. Thread through ribbon or string and use as a decoration on your gift.

melissaesplin-sakura-decorating-gift-wrap-5

Easy? Brainless? Awesome? Yes to all three. Happy last-minute gift-giving and wrapping!!

Recycle Week: Leather Booties

5 Comments

This last weekend was nuts. It was full of family events & a big photoshoot. Right after the photoshoot, I uploaded my photos just in time for someone to take the D200 off my hands. PHEW! I’ve now ordered my new camera, so I’m just waiting for it in the mail. I’m sure it would’ve been smarter to order the camera before I sold it, but whatever. It would’ve also been smarter to have the camera shipped to Arizona, which is where I’ll be when it will arrive on my door step. I can totally survive a week and a half without a camera, right?

undefined

Since I’ll be without a camera & going out of town Thursday through most of next week, I’m going to do a recycle series! I’ve been blogging for 4 years this summer, so I thought I’d re-post some oldies you may not have seen before.

undefined

I made & blogged about these booties before Chris bought me my own domain, so you won’t see them on any posts here on melissaesplin.com. I made these back in the summer of ’07 for a friend of mine who has a little girl just 6 months older than Penelope. I used Heather Bailey’s bitty booties pattern with leather I had lying around. I punched & sewed everything by hand, which took forever. It was still worth it.

I made more of these booties in felt & leather that I later blogged about on this blog. I think I should make a pair of these for Felix sometime soon. I think white leather would be a good call.


Hope you had a great Fourth of July weekend!! What did you do?

DIY Leather Bow Cuff

52 Comments

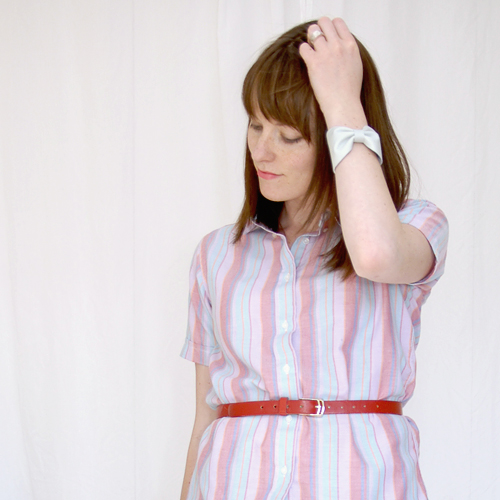
Back in January wen I went thrift shopping with a bunch of awesome ALT ladies, I picked up a really rad bow-inspired belt. I’m not sure why I never included a pic of the belt here because it’s awesome. You can sort of see it in this outfit, but the lighting isn’t great. Anyway, that’s what spurred this cuff. Plus the fact that Chris & I bought a cow & a half worth of leather the other day. We bought a full hide of silky awesome black leather & a half hide of gorgeous grey patent leather. You’re going to be seeing a lot of leather crafts around here in the near future. Beware!

I’m very pleased with the end result of this little project. It’s a simple project that anyone half-decent with scissors could master. It’s another 15 minute craft. Also, I’m totally digging the hard/soft contrast of the button-stud & the bow. For the full outfit, click over to my fashion section.

Now without any further ado, here’s the tutorial. (more…)

My New Favorite Tool + Freebie

49 Comments

This post is brought to you by Silhouette.

If you follow this blog at all you know that I love paper crafts. My friend Heather recently introduced me to a new paper-crafting tool that has blown my mind and opened up a whole range of craft and design possibilities.  It’s called a Silhouette SD.  I’ve seen cutting machines floating around the craft stores for years.  They use expensive cartridges pre-programmed with stock word art.  The Silhouette is entirely different.  It’s a computer peripheral that takes your true type fonts and digital designs and cuts them with PERFECT PRECISION.  Glorious.

Silhouette sent me a machine to test out about two weeks ago. I was in Arizona when it came, so I was more than a little jealous that Chris was home all alone with my new Silhouette SD.  He kept teasing me about all of the fun he was having with “his Silhouette”.  My husband senses gadget lust on my voice and moves quickly to exploit it for his own entertainment. At least he didn’t unbox it while I was gone. That’s not a line that he wants to cross. ;)
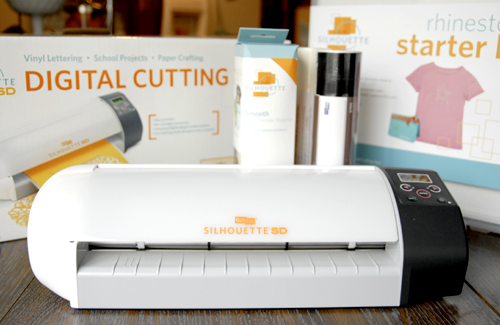
Silhouette machine with heat transfer material, vinyl, and rhinestone starter kit

My first impression was that the packaging is surprisingly clean.  The only other gadgets that I’ve purchased that had this level of attention to detail in the packaging was my Apple iMac and my Wacom tablet. The cutter itself is very light and attractive. The first words out of Chris’s mouth as he lifted it out of the box were, “Wow! It’s so light!”  The only two machines on our office table are the iMac and the Silhouette, and they make excellent desktop friends.

Installation was a tad tricky for a few reasons. First, we don’t have a PC. The silhouette is optimized for Windows, but can be used with Macs. Second, I was connecting the Silhouette through the USB hub on our backup hard drive. You’ll want to connect it directly to your computer to clear up any potential communication issues. Third, I was trying to install the illustrator plug-in for the Silhouette, not the Silhouette SD. There’s a difference. I was in business once I installed the correct software (Cutmaster 2 for CraftRobo 1.61 I have this for CS3, btw) and read this tutorial.

Mac users need Adobe Illustrator to use the Silhouette SD, because Silhouette America has yet to publish a standalone cutting application for the Mac. My contact with Silhouette says that they’ll have a dedicated Macintosh application in the near future.  This is good news for Mac users who don’t already own a copy of Illustrator.
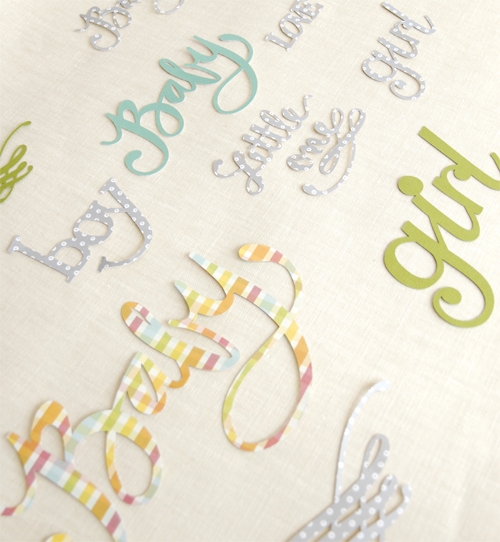
I can’t quite describe how much fun I have watching the Silhouette cut a project. I’m like a little kid waiting for Santa Claus. I hover over the cutter, craning my head all over the place to catch a peek of the cutting blade in action.  It makes this awesome robot noise as the paper jerks in and out and the blade zooms back and forth along its tracks.
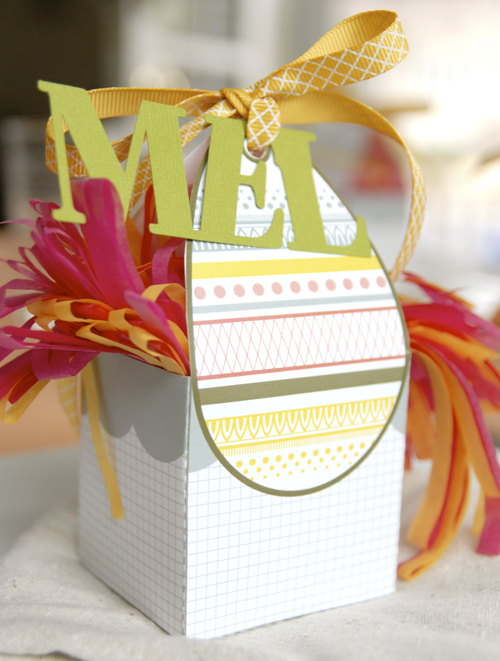
I needed a worthy project fast, and I quickly realized that I needed to cut out everyone’s names for Easter Sunday dinner. I used Bodoni font, squished each letter together and used the pathfinder tool to make each word one shape. The names didn’t take very long, so I whipped out an extra one for my mom and sent it along with a gift box I was prepping for her.
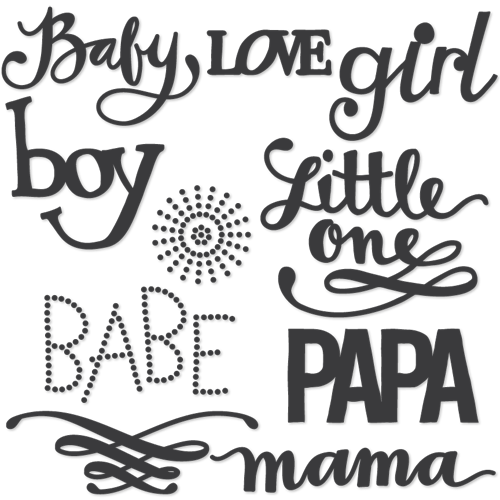
I submitted the above word art to Silhouette, and they’ve decided to offer it for free on the Silhouette online store. Click the “Purchase Online” button within the Silhouette software to view & download these graphics for free! YUP. Free. There are even two 10ss rhinestone graphics, perfect to add a little bling to some baby onesies. Mac users cannot access the Silhouette online store, but don’t feel left out. Just email me and I’ll send you the artwork. ;)

EDIT: Download my baby graphics for free by clicking the download button below! ENJOY!! And, as always, these graphics are free for personal use only. If you would like to use these graphics commercially, please email me. Thanks!


Currently I’m a little obsessed with the “baby” and “girl” graphics. Do I sound a little baby hungry?
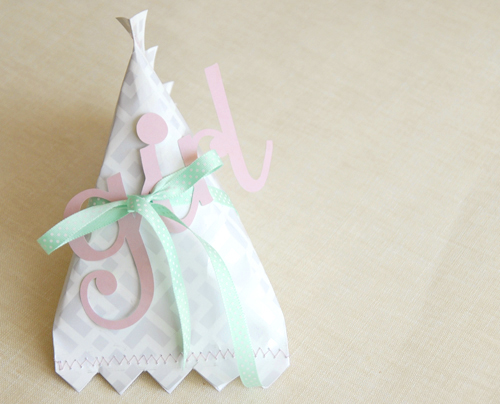
I just wrapped up a little gift for my friend who’s having a girl soon. Doesn’t the girl word art look so cute when tied to the package? Ugh. I’m a woman obsessed.
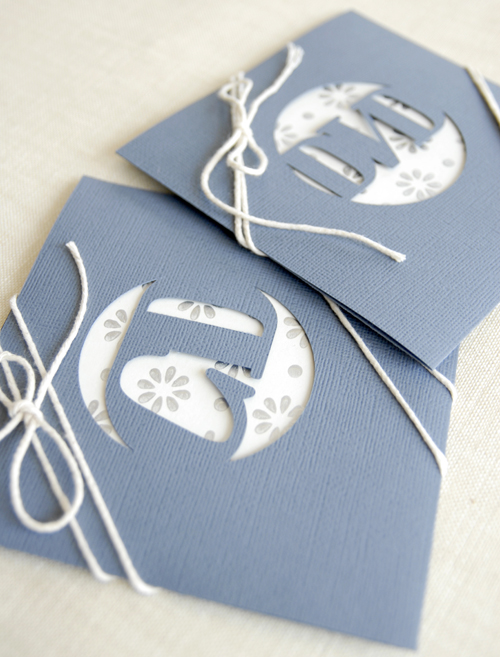
The silhouette isn’t limited to word art. Check out their “What Can It Make?” section for more ideas. Penelope’s grandparents live far away, so we can’t forget to share her photos and videos with them. It’s been a while since I’ve burned them a CD or DVD, so I cut these cases to provide myself with a little motivation.
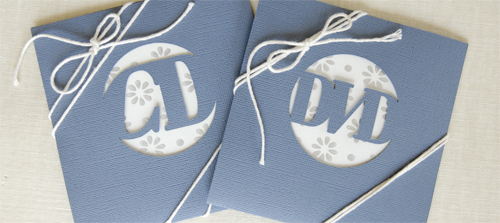
I’ve always printed and cut out my own CD sleeves, but it’s a time-consuming, hand-ache-inducing process.  The digital cutter speeds things up considerably.  I cut the card stock down to size, run it through the Silhouette, fold and glue.  If I’m going to make one, I might as well make ten.  Or twenty!

My contact at Silhouette hooked me up with a huge discount to share with ISLY readers, so this is your chance.  If you find yourself with a healthy combination of papercraft desire and spare change, check out the Silhouette store and make sure to place your order before MAY 8, 2010 to get $50 off a Silhouette machine and 10% off everything else in the Silhouette store. They’ll throw in 10 feet of vinyl, 10 feet of transfer tape, and a hook and scraper to sweeten the deal.

Full Disclosure:  Silhouette sent me a Silhouette SD in exchange for my honest review.  I suspect they knew that I’d love their product.

Silhouette Resources:

Simple Glass Etching Tutorial

43 Comments

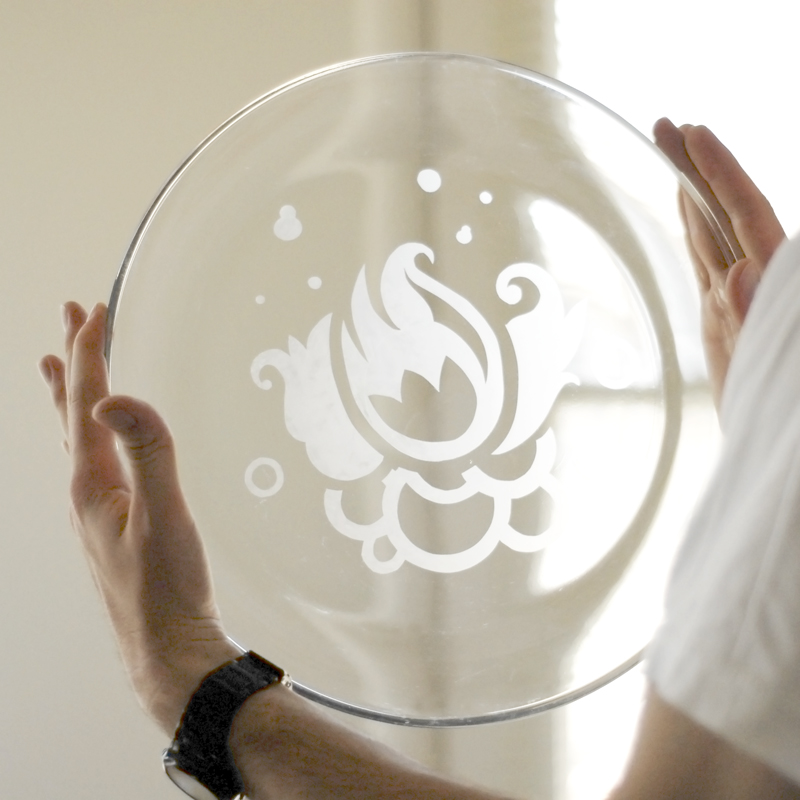
I know there are loads of tutorials around the internets showcasing etching glass, but thought I’d add my own point of view on the matter.

I’ve had this large glass serving platter for 6 months or so, and don’t really have much motivation to use it, mostly because it’s plain and boring. Now it’s a little more exciting, but in an oh-so-subtle way. Glass etching is also very practical for marking your glass serving ware for pot-lucks and parties. You’re less likely to end up sans dishes when they have your name on them.

_dsc2870sm

Click here for the FREE printable glass etching tutorial! or read below for the step-by-step instructions.

Glass Etching Tutorial

Supplies:

  • Roll of Contact Paper
  • Glassware
  • Junk Brush
  • Bonefolder or credit card
  • X-Acto Knife
  • Pencil
  • Armour Etch Acid
  • RUBBER GLOVES!!!!

Clean your glassware and dry thoroughly. Apply contact paper to the outside of the glass. Smooth out bubbles with a bonefolder or credit card.

With a pencil or sharpie marker, make your marks. *If you don’t want to hand draw the image, print out the desired design on regular paper and tape image onto contact paper.

With an X-acto knife or scalpal, cut and remove contact paper for etching.

In a well ventilated room, generously apply armour etch acid with a junk brush. Wait 10-20 minutes for acid to etch the glass.

If you’ve applied a load of etching acid, you can scoop the excess back into the bottle for later. Rinse and wash glass, brush and your hands thoroughly with soap. Remove contact paper, dry and enjoy.

Many thanks to How About Orange and Apartment Therapy for featuring this tutorial!

To print out a template of the above design, click here.

mobile site