Posts Tagged ‘holidays’

Holiday Cards with Mixbook

0 Comments

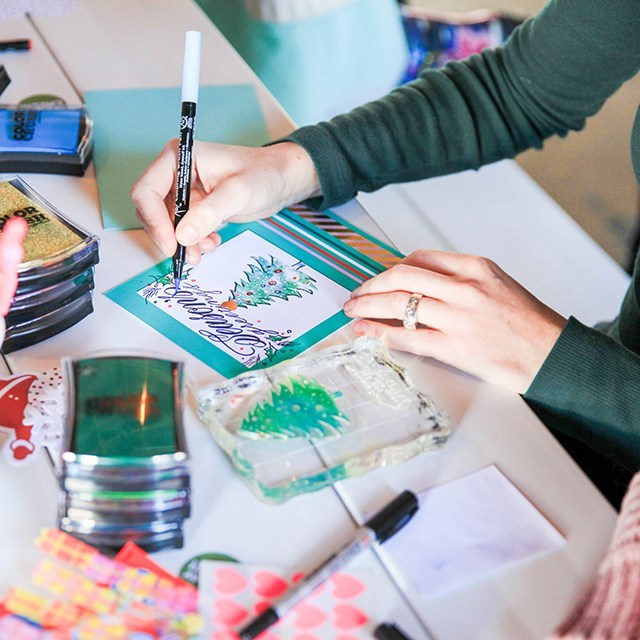
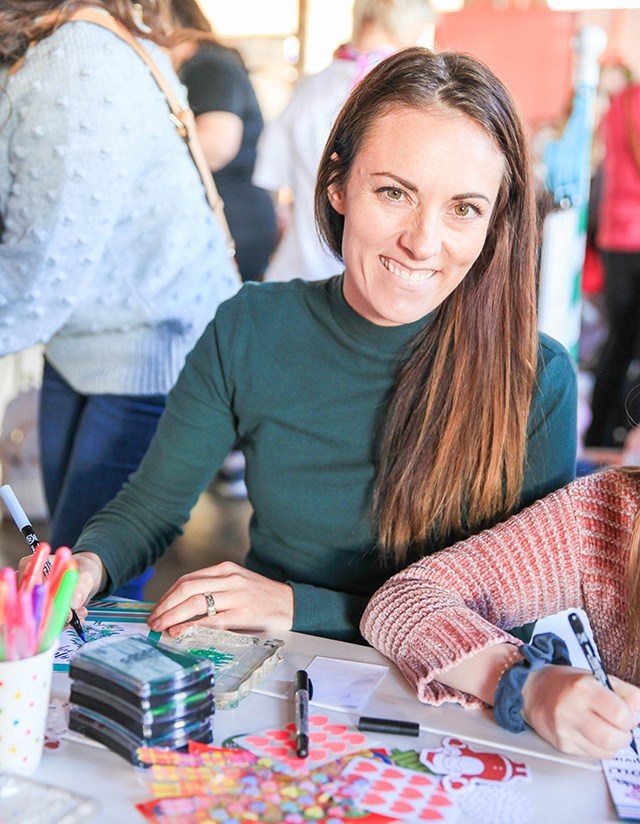
I got to take Penelope to a great event last month with Mixbook. There were all sorts of fun stations for crafting and sending cards. Sending out holiday cards are my absolute favorite part of the Christmas season. I haven’t gotten my cards squared away just yet, but you better believe I’m going to be sending those out soon! 

Penelope didn’t appreciate that I gave her bunny ears. Apparently it means something to elementary school kids that it didn’t mean when I was growing up. lol. 

I’m going to let you in on a not-so-secret secret. I don’t design my own holiday cards. It’s a bit of a waste of time for me since I don’t design cards professionally and I don’t really have anything clever to do. So I buy the pre-designed ones and call it good. I do like adding my own personal touch to the envelopes, and usually there’s an art print slipped into each one, but that’s it. Simplicity and done-ness is my motto. With Mixbook, they have beautiful printing and beautiful designs. So I don’t even have to think about it. I just have to work on getting a family photo… That’s easier said than done. 

I’ve decided that this time of year is about enjoying the good things of the season without putting undue stress on the things we don’t have to do. What about you? You do holiday cards this time of year? Want one of my holiday cards? Fill out the form below if you’d like me to send you one! 


6 Tips for Hosting a Gift Exchange Party

0 Comment

As a last hurrah before we tore up our main floor, I threw a gift exchange party. It was a rather small group of friends, but just perfect. It’s truly such a joy having some of my favorite people under one roof. 

Since Christmas is a hectic time (for business owners and moms, especially), I threw it on the 28th. I also threw the party mid-day and provided childcare so my friends with little ones at home could still enjoy the party. It was easy to find a babysitter since the school kids were out that week, and I just had her party with the kids downstairs and keep them entertained with food and a movie. 

I kept the party festivities rather simple. I used Paperless Post to send out the invites and manage RSVPs, but I think in the future I may try out Evite instead. I’m curious to see which one is better.

I kept the food fairly simple and somewhat dietary-inclusive. My menu: 

  • Quinoa salad (Gluten-free with avocado, cilantro and chopped chicken on the side)
  • Bananas and oranges
  • Kale salad
  • Various herbal teas as a hot drink
  • Chipotle cheddar biscuits
  • Churros

It was a simple spread, but delicious. The churros were definitely the best part of the food situation. 

I teamed up with San Diablo Churros. They catered the event and provided us with mini filled churros. We had dulce de leche, nutella and salted caramel. Each one was made fresh right there. That was the one special thing I wanted about the party. I feel like when it comes to planning a gathering, it’s best to plan one thing you want to be perfect. Everything else is a bonus. Otherwise, I personally spend the whole time focusing on all the things that didn’t go exactly as planned. 


Tips for hosting a simple and fun holiday gift exchange: 

  • Use a digital invitation service
  • Plan it on a day when not a lot is going on (post holidays, is great)
  • Provide childcare during day-time hours so more friends can come
  • Keep the menu simple and ask for help! Get a friend or two to bring a dish, cater what you don’t have time for
  • Introduce everyone, tell everyone your favorite characteristic about each guest (this is especially helpful if you’re inviting friends from different circles)
  • Do White Elephant gift exchange rules. Stealing good gifts from each other is fun!

Have you hosted a holiday gift exchange before? What are your tips for hosting a good one? 

Give Thanks this Christmas

11 Comments

As promised the 2016 “Thank You” printable is here. It just had to stay under wraps until after Thanksgiving. This year I teamed up with Mormon.org to create a printable in-line with their #LIGHTtheWORLD campaign. Scroll to the bottom if you want to just download the freebie. I’m about to talk religion for a hot second.

I’m a Mormon. I keep it incognito most of the time, but I am a practicing member of the Church of Jesus Christ of Latter-Day Saints. We’re Christians, and this time of year I feel so much kinship with other Christian religions as we celebrate the core of our faith: Jesus Christ. This is one of the seasons of year where I readjust my focus and try to be just a little bit better. A little bit kinder. A little more Christ-like. Because, baby steps. right?

melissaesplin-mormon-give-thanks-printable-1

I’m passionate about gratitude. I love writing out Thank You cards to friends and family. I love sending out snail mail!! It’s a favorite of mine. So I’ve created a printable Thank You suite for the whole family.

melissaesplin-mormon-give-thanks-printable-3

The first (from left, see above) is a fold-over card for grown ups and longer sentiments. The middle is a guided card for younger writers, giving them only a little bit of space to write something. Even a couple of words. The third (which could be use for a short Thank You) is designed for emerging writers, encouraging a child to just make a mark. A picture or a scribble allows him/her to take ownership of the sentiment.

melissaesplin-mormon-give-thanks-printable-5

Included in the Thank You set is a printable envelope. Print, cut and tape together. It’s pretty quick. If I have time, I’ll send the Silhouette Studio file here so you can cut it with your Silhouette machine.

melissaesplin-mormon-give-thanks-printable-6
melissaesplin-mormon-give-thanks-printable-8

Last, but not least, I painted and lettered a phrase from D+C 59:7 (some of our modern scripture). I hope that if you’re not of my same faith, you might find this reminder encouraging to get on your knees and give thanks to Him.

melissaesplin-mormon-give-thanks-printable-9

I hope you use this printable!! It’s a real pleasure to make these designs and publish them out to the world. I love seeing them in real-life situations, too. If you use it, tag me (@melissapher) so I can see how you’ve incorporated it into your Christmas.

CLICK HERE TO DOWNLOAD

Want more Thank You’s to print and download? See this list:

Artwork is free for personal use. Distribution and alteration of files without written consent is prohibited. Contact me if you have any questions of the terms of use.

pinterest-melissaesplin-mormon-lighttheworld-printable1

DIY: 3 Ways to Add Gold to Your Envelopes

12 Comments

This post is sponsored by Tiny Prints. They provide excellent quality printing and amazing printing options to make your holiday cards stand out this year.

Gold is such a classic element to add to holiday greetings, but how? What materials do you use? I’ve got a little bit of experience with that and I know just the things to help you make your holiday cards a hit this year.

melissaesplin-gold-envelopes-diy-15

Oh, and I should mention, these tips require no calligraphy experience whatsoever. Neat handwriting helps, and here’s a post to help you with that. Want to learn calligraphy? I do that, too. Sign up for my class right here. Just gonna toot my own horn a bit about the class: it’s hands-on with personal feedback from me and my co-calligrapher (Erika! She’s the raddest!).  Get supplies mailed to your door, personal attention and loads of lifetime content for less than it costs for most in-person modern workshops. Aw, yeah.

This post may contain affiliate links. These are products I’m using constantly. I get a little bit of a kick-back from any  purchases made through these links. Affiliate sales help feed my crafting addiction and supplies used for blog posts. So thank you for your support.

melissaesplin-gold-envelopes-diy-3

Gold Striping

It looks like Finetec Gold is a favorite of mine. It’s looking like it’s out of stock at Paper & Ink arts – you might have luck at John Neal Bookseller or a local art supply store. I love this palette because you can add gold and shimmer to just about anything.

melissaesplin-gold-envelopes-diy-1

Get a large hard-bound book or a block of wood that’s longer than your envelope. Place it an inch below the desired line.

melissaesplin-gold-envelopes-diy-1a

Instead of using a ruler and getting the underside all gunky from running ink, rest the bottom of your hand along the edge of the book or block and pull your arm towards you (see above). You’ll get a nice straight line without even trying hard.

melissaesplin-gold-envelopes-diy-2

Wait for the gold to dry, then letter the address with the recipient’s name above the line and the address below. I like using the lettermate when doing print addresses. It keeps my lines straight and my leading even. If you choose to use a lettermate or something similar, you’ll want to put the gold line inside one of the lines so that the spacing is even. If you put it between two lines, the top two address lines will look inconsistently spaced. I’ll use a white gelly roll or a gold shadow gelly roll. If you’re using a white envelope, you may want to opt for the black gold or the pink gold. Here I used the lavender gold.

melissaesplin-gold-envelopes-diy-6

Foil Gems

I’ve got a little secret in my  arsenal and I’m about to share it with you. EEP!! I’m loving this thing. I’ve had it for about a year, and it’s the perfect way to add gold sparkle to something without waiting for glitter glue to dry. I bought this cheap hot foil pen on New Egg some time ago, so it looks like it’s no longer available. The closest thing in price is the WRM keepers one. At $15 it’s totally an impulse purchase. I’ve seen them around on other sites. Just make sure that when you’re looking for yours you look for “hot foil pen”. That’s pretty much it. Scrapbooking suppliers are going to be your best bet.

melissaesplin-gold-envelopes-diy-4

First, you’ll letter your address. I like to switch up styles with print and script.

melissaesplin-gold-envelopes-diy-5

When you’re done, you’ll heat up the foil pen and do little dots in the negative spaces. You can do single dots or groupings of 3. If you’re doing groupings of 3, you can add little green leaves for holly! Or keep them plain. I opted to go plain.

melissaesplin-gold-envelopes-diy-12

Justified Glitter

  • Glitter
  • Sticky thumb or double-stick tape
  • White gelly roll

melissaesplin-gold-envelopes-diy-7

Mark up your paper with sticky thumb. You can use a glue stick for a more organic line.

melissaesplin-gold-envelopes-diy-8

Sprinkle glitter (mix colors for a fun effect) over the envelope. This is a great activity to do in big batches in a bath tub or large casserole dish.

melissaesplin-gold-envelopes-diy-9

With your finger, rub in the glitter so it sticks. You’ll see that glitter will settle and stop coming off. Shake off excess.

melissaesplin-gold-envelopes-diy-10

Write out the address. If you’re doing the lettermate and a script style of penmanship, you may want to write out everything without the descending strokes (like the ‘y’, ‘g’, ‘f’, ‘z’ etc) and fill those in afterward. Add postage and you’re done!

melissaesplin-gold-envelopes-diy-13

I’m slowly knocking out my list this week and next. So my cards will be more like New Year’s cards, but late is always better than never in my opinion!


melissaesplin-gold-envelopes-diy-14


melissaesplin-gold-envelopes-diy-16

learn-calligraphy-pen

Want to learn calligraphy the right way? Check out my online calligraphy class. It includes lifetime access to materials and content (images, text, animated GIFs) and 30 days of personal instructor feedback. Because we all need help troubleshooting when starting out. ;)

melissaesplin-gold-envelopes-diy-17


Sponsored: 6+ Ways to Address an Envelope

7 Comments

This post is sponsored by Tiny Prints. They provide excellent quality printing and amazing printing options to make your holiday cards stand out this year.

I’ve got 6+ easy ways to embellish your envelopes this year. Don’t get stuck with boring print labels or chicken scratch! Make your snail mail pop with a few tips that require little to no technique. :)

If you want to get some technique under your belt, check out 5 Easy Steps for Improving Your Handwriting, or take my calligraphy class!

melissaesplin-tinyprints-6-ways-to-address-an-envelope-8

Getting fun snail mail is possibly one of my favorite aspects of this time of year. I love getting something other than business offers and bills! Colored envelopes will certainly help make those invites pop.

I went through Tiny Prints for my Christmas cards this year and got one of their laser-cut designs (See all of their offerings here). It’s unique, well designed and I didn’t have to spend a million hours getting it squared away. Major win! I’m dedicated to having enough time to enjoy the holidays this year. No chicken with her head cut off over here, please!

I’m incredibly partial to Kraft envelopes (greengrocer kraft is fabulous). They work well with both light and dark pens and they stand out in a pile of mail. The envelopes featured in this tutorial are from Tiny Prints. I’ve been incredibly impressed how well they handle ink and how easily I can write on them with my super sharp calligraphy nibs.

melissaesplin-tinyprints-6-ways-to-address-an-envelope-7

Next up, gather all random scrapbook supplies you own. Heck, head over to Walmart and browse their crafty section. You’ll find some great stuff for next to nothing.

melissaesplin-tinyprints-6-ways-to-address-an-envelope-6

To do the techniques seen above, you’ll want to collect a few things:

You’ll want a few different patterns of washi tape, and perhaps a few different widths, too. When in doubt, collect all the black, white, gold and silver washi tape you can get your hands on. It goes with practically everything and every season.

You can use any kind of pen for these techniques. I used dip pen and ink for many of these samples, but just use any kind of pen you have. Ballpoint pens, however? NO. Throw all of those out of your house right now. They’re terrible. Shame on you for having them around. :)

Learn how to use a pointed pen with my online calligraphy class: IStillLoveCalligraphy.com. I’m happy to teach you! Side note: our kit makes for the perfect gift. 

So let’s get going, shall we?

melissaesplin-tinyprints-6-ways-to-address-an-envelope-1

When doing your addresses on a straight line, use the chalk pencil and the clear ruler to mark out those lines. Otherwise:

DECORATIVE GUIDELINES

Use washi tape as a decorative way to keep your lines straight.

Tape a vertical and horizontal strip and write in the bottom right section OR use it to slant your baseline. Layer multiple strips of tape for more depth.

melissaesplin-tinyprints-6-ways-to-address-an-envelope-2

RANSOME NOTE

Use alphabet stickers to draw attention to different letters.

For a cursive style, use block letter stickers for the first letter of each name. For block style writing, replace a random letter with a sticker.

I found these stickers at Walmart for about $1-2 each. I’m sure you can find them at just about any craft supply store as well.

melissaesplin-tinyprints-6-ways-to-address-an-envelope-3

AROUND AND AROUND

Use circular sticker labels (I used Avery 2 1/2″ labels) to structure your envelope’s layout.

Print or letter just the address within the label (this is great if you want a hand-lettered touch, but you have LOADS of addresses to do) and write the name outside the sticker.

In the top version, I used the border of the label as a baseline and wrote the name around the diameter. It looked a little empty so I drew a little holly berry illustration on there. You could draw something there, or keep it simple and stick the circle in the center of the envelope.

Wrap the label around the back and write the name on a large scale all the way across the envelope.

melissaesplin-tinyprints-6-ways-to-address-an-envelope-4

GLITTER GLUE DETAILS

Glitter glue is my best friend. It’s all the sparkle of glitter without the mess of loose glitter everywhere (I swear that stuff multiplies). My favorite brand is Stickles. Sparkliest of them all.

Pipe out a wavy line in glitter glue. Use that line as your guide for the baseline of the recipient’s name.

Or Letter out your address and use glitter glue to add accents on hairlines and at the terminals of each line.


melissaesplin-tinyprints-6-ways-to-address-an-envelope-5

LARGE-SCALE NAME

Grab a marker and go to town! Write out the first name as large as the envelope will allow. Cursive styles work best. I used a Tombow dual brush marker here. You can use a casual, grungy style nicely. Then letter the rest of the address in a normal style, save for the ZIP. Make the ZIP huge.

ADD SOME BLING

Letter the address as you would prefer then stick some rhinestones on it. Yup. Simple. But it’s so fun go get in the mail! I like to use PVA glue to fasten them on. It’s a strong glue that dries clear.

melissaesplin-tinyprints-6-ways-to-address-an-envelope-7

I hope you have some fun sending out mail this year!

*This DIY is free for personal use and should not be distributed/republished without my consent. Altering any files is NOT ALLOWED. If you would like to use this freebie for commercial purposes, please email me. Thanks!
learn-calligraphy-pen

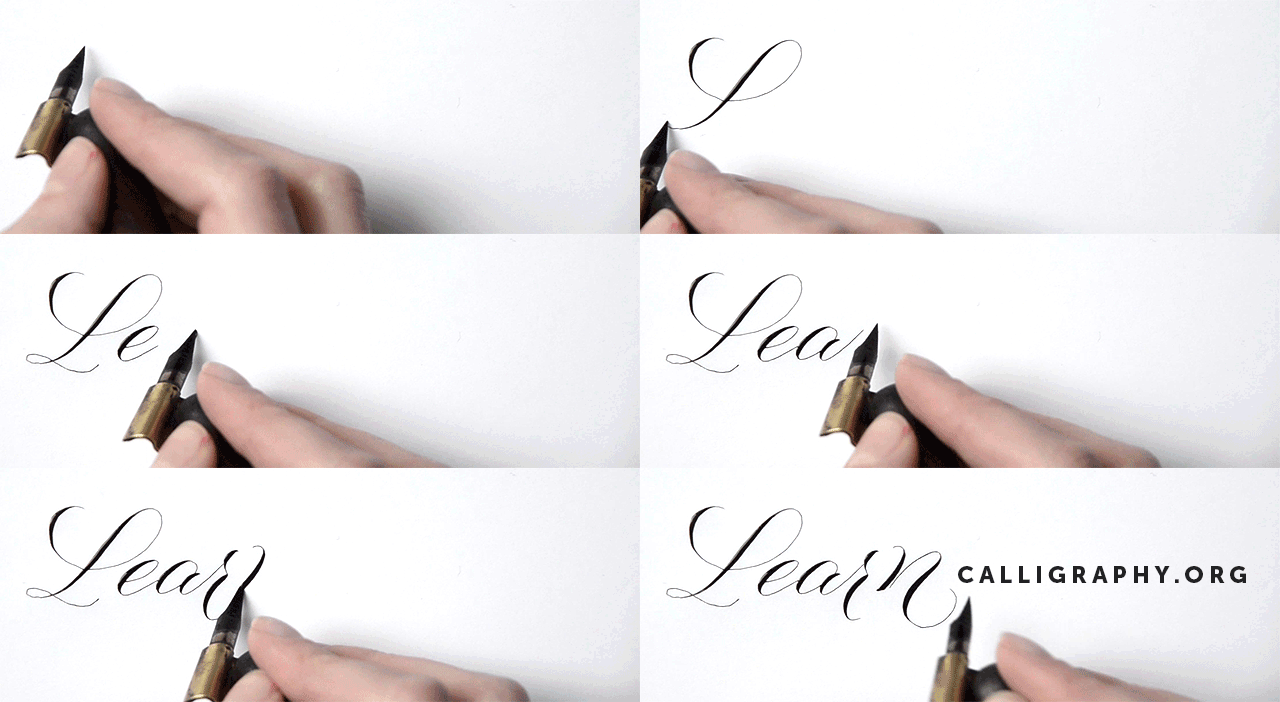
Learn calligraphy online at istilllovecalligraphy.com. You’ll learn the basics of pointed pen, flourishing, addressing envelopes and developing your own style. The course comes complete with a beginner kit of supplies and personal coaching from calligraphy experts Melissa Esplin and Erika Paulsen. Click here to find out more.

mobile site