Posts Tagged ‘tutorial’

Sewing: Leather and Knit Tuxedo Skirt Tutorial

16 Comments

This is the last of the pieces I made for Alt Summit. And sadly enough, I’ve barely used my sewing machines for basic mending since mid January. It’s time to get my rear in gear and sew some more! I’ve got a few great ideas for clothes for Penelope and me. Penelope is finally at a point where she’s not destroying her clothes, so I’m excited to start sewing for her again.

Here was the basic vision that I had for the first day of Alt Summit. It was something simple with the letter lover sweatshirt and skinnies (blogged here), but then kicked up a notch for the evening with a blazer and leather skirt.

wednesday-alt-summit

The outfit pictured below isn’t what I actually wore the evening of the event, but it’s something I’ve been doing a lot lately: mixing neutrals. I’ve been mixing browns and blacks a lot lately. I find that it can be easily done, if browns and blacks are the only “color” introduced into the outfit. It’s much harder to mix neutrals (for me at least) when other colors are introduced into the palette.

melissaesplin-sewing-leather-tuxedo-skirt-tutorial-4

Instead of going for a black leather like I had originally sketched out, I went for an oatmeal/white leather. It breaks up the brick pattern nicely and it’s a little more casual.

melissaesplin-sewing-leather-tuxedo-skirt-tutorial-5

Constructing this skirt after my last leather skirt was a BREEZE. I didn’t insert any invisible zippers on leather. The fact that it’s mostly ponte knit allows for more wiggle room when moving around.

melissaesplin-sewing-leather-tuxedo-skirt-tutorial-6

Between the knit and the yoga waistband, I can wear the skirt lower or higher depending upon how I want the overall look to come across. It’s nice to have flexible, comfortable pieces in the wardrobe.

So I’ve been meaning to write up this post for some time, but the biggest hang-up has been the tutorial. It’s so easy to make your own, I thought I would include a tutorial in the post. Click “read more” below to view the instructions.
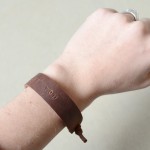
melissaesplin-sewing-leather-tuxedo-skirt-tutorial-9

Outfit Details:

  • earrings: c/o Ardor
  • necklace: Ann Taylor Loft
  • watch: c/o Feral
  • bracelets: handmade, gift
  • top: Forever 21
  • skirt: handmade
  • shoes: c/o Sole Society


Leather and Knit Tuxedo Skirt Tutorial

melissaesplin-sewing-leather-wiggle-skirt-tutorial-01

Supplies:

  • 1 yard ponte knit (heavy knit with 50-65% 4-way stretch, see here)
  • garment weight leather (see measurements below for amount)
  • bulldog clips, or paper clips
  • large paper
  • pencil
  • ruler
  • measuring tape
  • regular sewing machine
  • universal sewing needle

(more…)

5 Easy Ways to Improve Your Handwriting

70 Comments

learn-calligraphy-pen

Learn calligraphy online at calligraphy.org. You’ll learn the basics of pointed pen, flourishing, addressing envelopes and developing your own style. The course comes complete with a beginner kit of supplies and personal coaching from calligraphy experts Melissa Esplin and Erika Paulsen. Click here to find out more.


I was on Studio 5 last week! It’s hard to convey everything I want in a short segment, so in addition to the little video (below), I have great tips on how to improve your handwriting.

As I’ve mentioned before, it’s International Correspondence Month. I’ve made a dent with my box of envelopes, but I still have about 15 letters to go before the end of the month (totally doable, if you ask me!). I make goals like this for myself quite frequently, and I’m excited that this one is sticking! Ideally, I’d love to write this many letters all the time, but it’s a matter of carving out the time. It’s not as quick or convenient as sending an email, but it certainly means more to get something hand-written than a quick 2-liner in your inbox. At least, that’s how I feel.

istillloveyou-tutorial-better-handwriting-6

With the rise of the digital age, good penmanship has gone down the crapper. If I had a quarter for every time I heard the whine “I wish my handwriting looked better”, I’d be living it up in my multi-million dollar dream home. It’s an epidemic of bad handwriting! Most schools aren’t teaching cursive, either! I’m glad to be in a state that still requires cursive as part of the third grade curriculum. Not only does it teach kids a slice of history, but it promotes better literacy (often times kids that don’t learn how to write cursive have issues reading script fonts), better fine-motor skills and concentration. It may be impractical to hand-write everything in this modern age. However, we should shift our perception of handwriting from an archaic means of communication to something meditative, meaningful and personal.

Calligraphy and penmanship have very similar foundations. So let’s talk about 5 ways to make your everyday handwriting better.

(more…)

DIY: Ikea Hack Photography Studio Lighting

30 Comments

Dear professional photographer friends, don’t hate me. I hope we can still be friends even with my ghetto lighting ways.

Sometimes I have to burn the midnight oil in order to get any blog posts up. We’ve been a busy family this fall! It’s nice to finally have a way to take decently lit photos without having to wait until the perfect time of day to shoot. Usually that perfect time of day lands during lunch time or mid-morning when I’m still in pajamas, sans makeup or shower.

istillloveyou-crappy-harem-pants-simplicity1887-1

There are a few things that I do to allow for more photography time. I have the 35mm prime lens which allows for a 1.8 aperature. It’s slightly wider than the 50mm so it allows me to park my tripod only 8 feet away from me for a comfortable head-to-toe shot, without too much distortion. But a 1.8 aperature can only get me so far.

Let’s talk artificial lighting.

I took the above photo at midnight. I boosted up the ISO and lowered the aperature, but the light is still too harsh. That’s where lights come into play. Professional lighting systems can be expensive, so I made a hack to see if a pro lighting system was something that I should invest in. I’ve been asked by a few people what my solution is, so I figure I’d share it for all to see.

istillloveyou-ghetto-ikea-hack-studio-photography-lights-1

I’m using two Ikea LERSTA lamps. They’re cheap, portable and effective. I think I’d get a third lamp or a fourth if I were doing more night-time style shots, but the two lamps are great for small objects and for fill-light when the sun’s not doing what it’s supposed to.

Here’s how to do it:

istillloveyou-ghetto-ikea-hack-studio-photography-lights-2

Step 1

As you’re assembling the lamp, wrap the inner part of the lamp with tin foil. Make sure the foil is sort of crumpled so it will bounce more light around.

Step 2

Buy a daylight fluorescent bulb. They’re on sale at my local Home Depot. We’ve changed nearly all of our indoor lights with these. And they are awesome.

istillloveyou-ghetto-ikea-hack-studio-photography-lights-3

Step 3

Get a large bowl and cut out a circle from some white (like white, white) fabric. I’m using a white quilting cotton.

Step 4

Measure the circumference of your lamp’s opening, cut a length of thin elastic just shy of the circumference.

Step 5

With your sewing machine on zig zag stitch, stretch the elastic as you sew it onto the outer edge of the circle of fabric. It won’t be pretty, but it’ll look sort of like a shower cap.

istillloveyou-ghetto-ikea-hack-studio-photography-lights-4

Fit that over your lamp and done!

istillloveyou-ghetto-ikea-hack-studio-photography-lights-5

Now you can illuminate basically anything.

istillloveyou-sewing-silk-skirt-holiday-dress-3a

I used the two lamps and my room’s overhead light to light up the above outfit. Not bad for a 10:30 pm photoshoot, right? And since you’re using daylight bulbs to illuminate the room, there’s no need to adjust white balance. BOOYAH. Mic drop.

Was this DIY helpful? What will you light up?

Baby’s Firsts Book with Lifestyle Crafts

9 Comments

I’m over on the Lifestyle Crafts blog sharing a couple of tips: how to make a stub book and how to make a leather enclosure!

melissaesplin-leather-tab-baby-book-15-front

I made the above stub book, and I’m so excited to gift it to a new mom. I designed custom plates for this project, but the artwork could be used for any number of things. I definitely plan on using my new plates for cards and envelopes, which I’ll be sure to share.

Print

That being said, I’m offering the above artwork (graphics ganged up for a custom plate and separated for other projects) to you for free, well sort of. The artwork is free for personal use, if you simply follow my blog. You can follow this blog’s RSS (google reader is dying so choose something else), email, facebook, twitter, etc. See the left sidebar, then you can click the button below to download the artwork. If you’d like to license the artwork commercially, email me through the contact form above.

Yes, I’m bribing you to stick around.

download-button-1

melissaesplin-leather-tab-baby-book-17-pocket-firstsb

Click here to read more about how to make your own Baby’s Firsts book.

Tutorial: Rear-View Mirror Love Notes

5 Comments

I made a little hanging white board for Chris’s rear-view mirror. Kinda silly, but I can write him all sorts of fun notes and hang them from his car rear view mirror for a little surprise as he leaves for work.

melissaesplin-rearview-notes-whiteboard-diy-11

There are all sorts of ways you can make mini white boards, but I used all things I had on-hand, plus sheets of washi tape (yes sheets!).

melissaesplin-rearview-notes-whiteboard-diy-1

DIY White Board Supplies

  • glue stick, invisible
  • bone folder
  • string
  • washi sheets
  • thick board
  • white paper
  • transparency paper

These supplies worked for me, but you could easily substitute: a popsicle stick for the bonefolder, paper and glue for the washi sheets, a few layers of cereal boxes or the back of a sketch pad for the thick board and clear plastic packaging for transparency paper.  If you’ve got it on hand, use it!

melissaesplin-rearview-notes-whiteboard-diy-2

Glue up your board and carefully place your white sheet of paper on top.

melissaesplin-rearview-notes-whiteboard-diy-3

Use a bone folder or popsicle stick to smooth out any bubbles.

melissaesplin-rearview-notes-whiteboard-diy-4

Around the outside only, glue down the transparency sheet. Make sure it is firmly in place.

melissaesplin-rearview-notes-whiteboard-diy-5

Cut your washi sheet about 1 1/2 inch larger than the width and height of your board. Remove the backing or evenly coat your paper with glue. Place your paper-covered board in the center of your washi sheet or paper.

melissaesplin-rearview-notes-whiteboard-diy-6

In your hand, turn the board and sheet over and smooth out any bubbles with your bonefolder.

melissaesplin-rearview-notes-whiteboard-diy-7

Clip off the corners, but about 1/8th of an inch away from the corner. This will make your corners look neater. Promise.

melissaesplin-rearview-notes-whiteboard-diy-9

Bend the board, making the tape stick to the sides. Press tape neatly over top the transparency. It might want to buckle in spots.

melissaesplin-rearview-notes-whiteboard-diy-8

Pinch down the excess over those corners. Repeat on bottom and sides until the tape is completely wrapped around the front side of your board.

melissaesplin-rearview-notes-whiteboard-diy-10

Punch holes and thread string through the holes. Secure the string.

melissaesplin-rearview-notes-whiteboard-diy-11

Write your message.

melissaesplin-rearview-notes-whiteboard-diy-12

See how cute the back is? It’s such a simple project, but I could see this being a fun little game within a family or tight group of friends.

Write a little love message or compliment and leave it in their car, bathroom, etc for them to read. They can then erase and pass the love onto someone else. A perfect family activity for the month of February, if you ask me.

Washi tape pages provided by Lifestyle Crafts.


mobile site