Archive for the ‘bookbinding’ Category

Tutorial: Watercolor Poppies Notebook for Journaling and Conference Notes

6 Comments

You new here? WELCOME!! Pop over to Instagram and give me a follow or check out my online calligraphy class!

Over the last few weeks, I’ve made about a dozen or so of these notebooks. I’ve made them for neighbors, family, friends and even a couple for myself. I’ve really enjoyed the freeform aspect of painting the covers as I go. I’ve gotten a few requests for the step-by-step, so here you go!
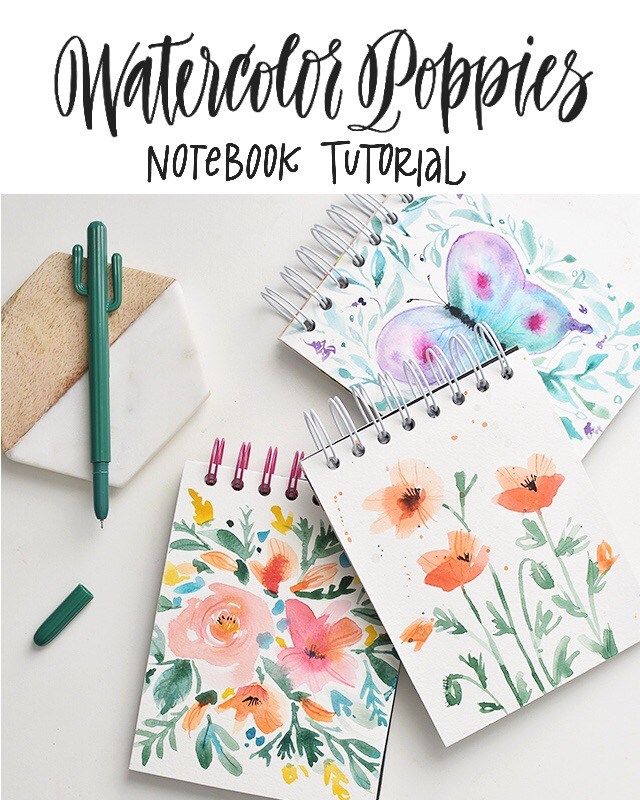
The cover material is Canson Watercolor Artboard. I was given a pad of this artboard and truly have enjoyed the thickness of this paper. It’s actually coldpress watercolor paper that’s mounted on museum board. So you can soak the paper with as much soupy water as you want, it won’t buckle. You may get a slight bow to the board, but it all goes back to its original flat shape once the paint has dried. It’s perfect for book covers!

Shall we make a notebook (or 10) together? Let’s get it going! Affiliate links are used to link to actual materials I own and use. Your support feeds my craft addiction, which feeds more tutorials. So thank you!! 

For supplies, you will need: 

* CLICK HERE TO DOWNLOAD FILLER PAPER FOR GENERAL CONFERENCE FOR THE CHURCH OF JESUS CHRIST OF LATTER-DAY SAINTS (you’ll want to print 5-10 copies of this PDF for one book)

If you’d like to just paint poppies, skip to the bottom. If you’d like to bind a notebook, you’ll want to line the underside of the boards with a decorative paper. You can use wrapping paper (I used Rifle Paper Co wrapping paper) or any kind of scrapbooking paper you choose. 

You can get your favorite paper and cut it into fourths (4.25″x5.5″), or you can download my lined filler paper and have it printed at your nearest print shop. for a .75″ coil bind, you’ll want at least 60 sheets of paper (15 copies, cut in fourths). If you don’t have a good cutter at home, your local print shop can do the cutting for you! 

First, we need to cut down the boards down to size. For a notebook that fills quarter sheets (see here for filler paper download), 4.25″x5.5″, you’ll cut your boards down to 4.5″ x 5.75″. 
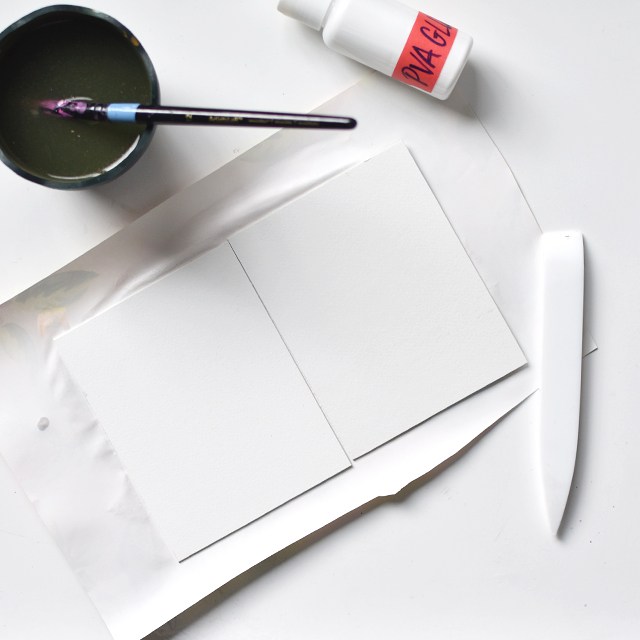
On a larger sheet of decorative paper, apply glue to the backside of the paper. Spread with a watered brush. Press the paper down, be careful to avoid getting glue on the top of your watercolor board or you will have a terrible time painting it. 
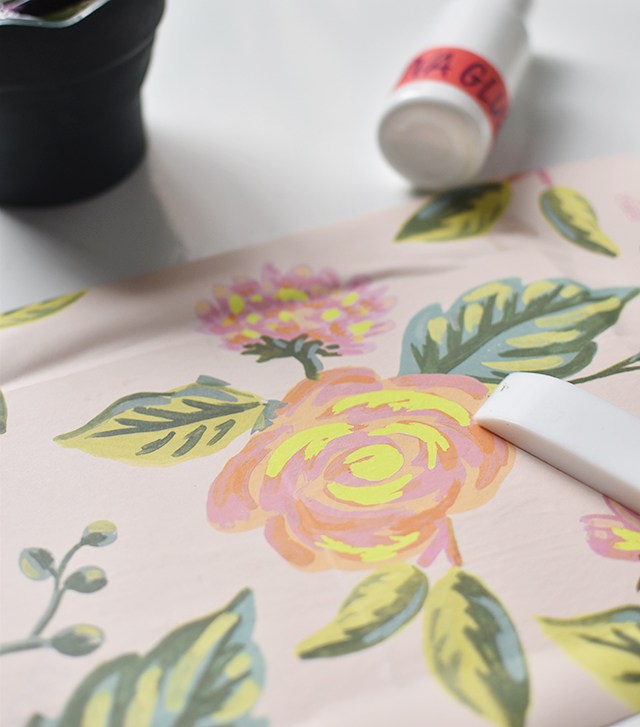
Turn the boards over and with your bone folder, work the bubbles out. 
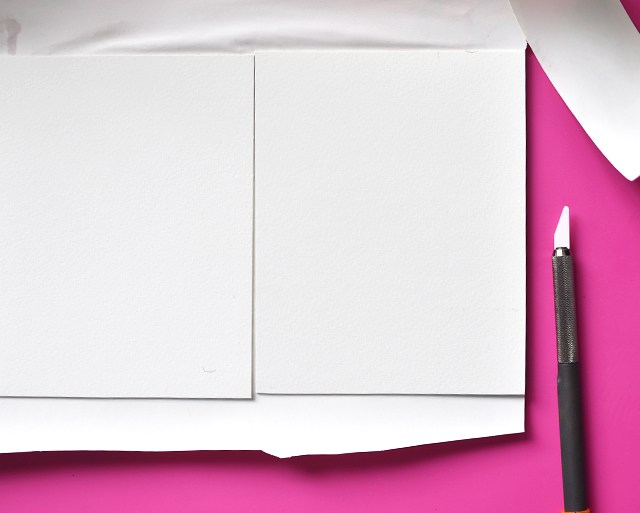
On a protected surface, cut the boards free of the excess paper with a craft knife. I LOVE this craft knife from Slice. It won’t cut skin! See my review of it here.
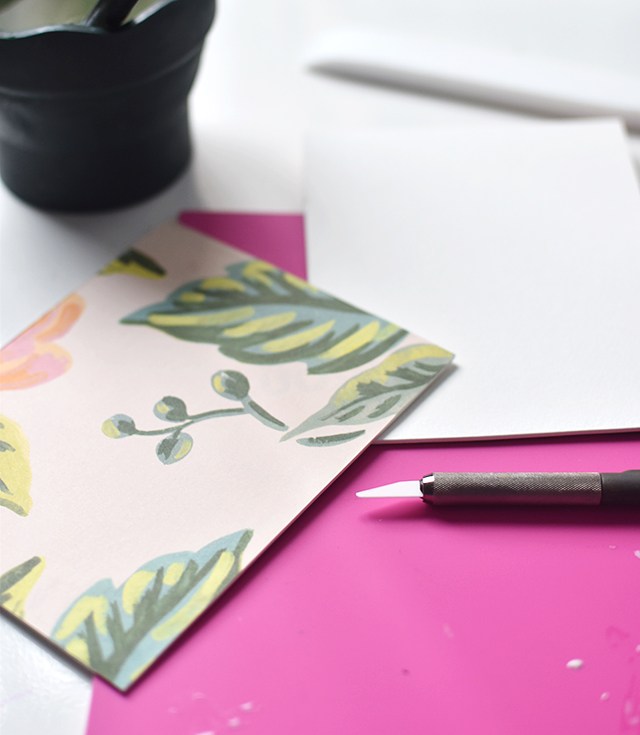
Allow to rest so the glue has time to dry. NOW on to the painting!! 
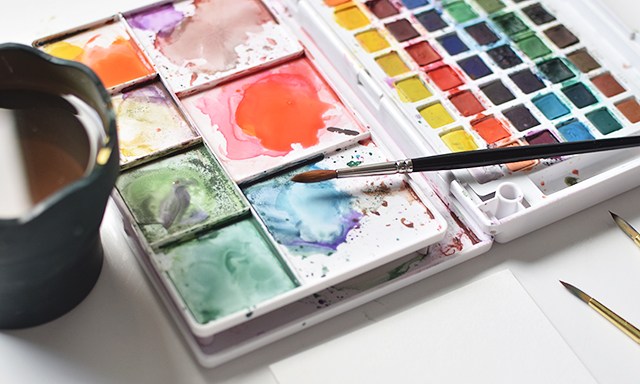
For this portion, I’m using 2 different brushes. I’m using a red sable brush (a soft, natural bristle brush), size 5 round and a synthetic size 0 round for the little details. You can use whatever brushes you have on hand, but I like the flexibility of the sable brush and how it gives me more organic lines. You can get amazing results from just about any brush, but if you’re investing in watercolor, consider purchasing a sable brush. They’re just so fantastic to paint with. 

Start by mixing 2 types of oranges. A true orange and a reddish orange. Make them soupy. You want lots of water in there to work with. 
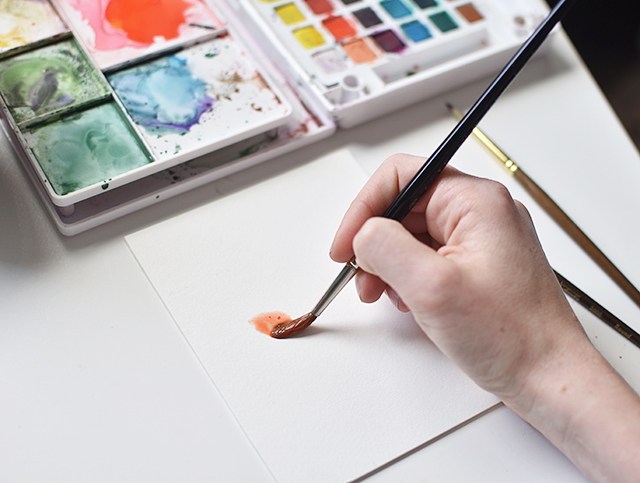
Start by picking up the lighter orange and fill your brush with that pigment. On the middle to top third of the board, I make organic ‘V’ strokes. Start heavy and thick at the top and release pressure so you have a point towards the bottom. It doesn’t matter where you put them. Make about 3. Allow the watercolor to dry. 

If you want an open poppy, scribble a couple of ‘v’s and a rounded bottom. Drop the darker, reddish orange in the wet middle of the open poppy. 
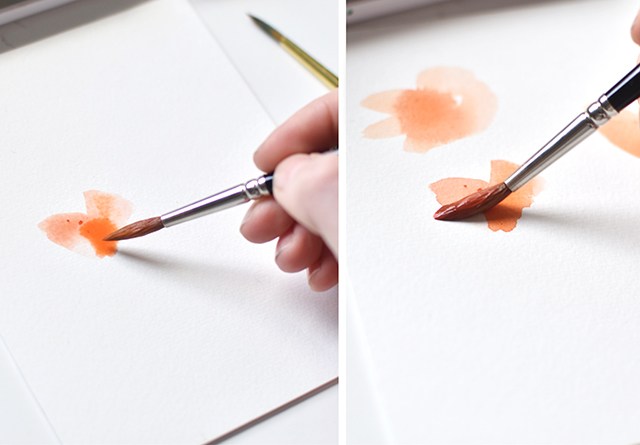
Once the first set of marks have dried, add another ‘V’ stroke, align the bottom of the ‘v’ in the same spot as the lighter pigment, but offset the tops of the ‘v’. 
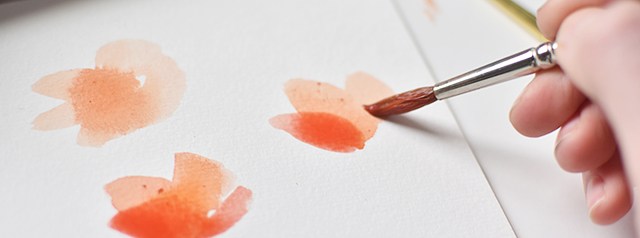
The one on the lower left wasn’t quite dry when I added the darker color, so there isn’t as much of a separation of pigment. That’s totally okay! You can see on the right ‘V’, that there’s more a separation of color. Making them slightly different gives each flower a more organic touch. 
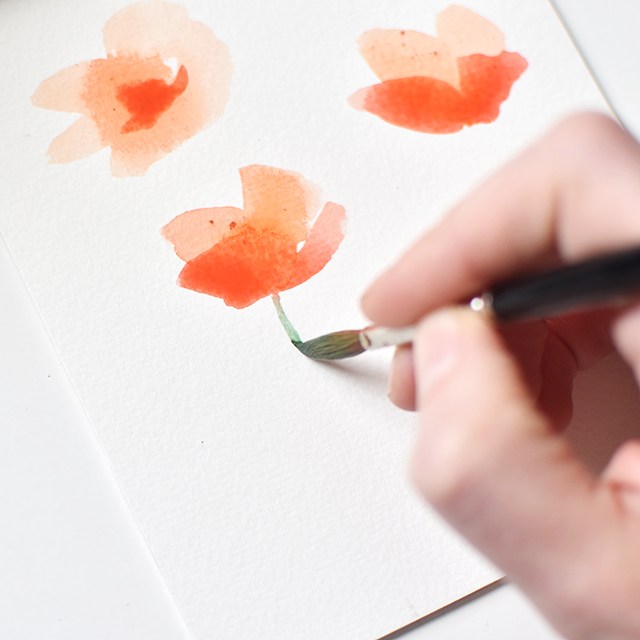
While the bottoms are still a little wet, draw in the stems. I like to create a varied, organic, almost awkward stem. Drop some darker bits of green color in there for some variation. When it comes to mixing the green stems for poppies, I go for a mid-toned, warm green. No jewel-toned greens here, otherwise the orange won’t pop. 
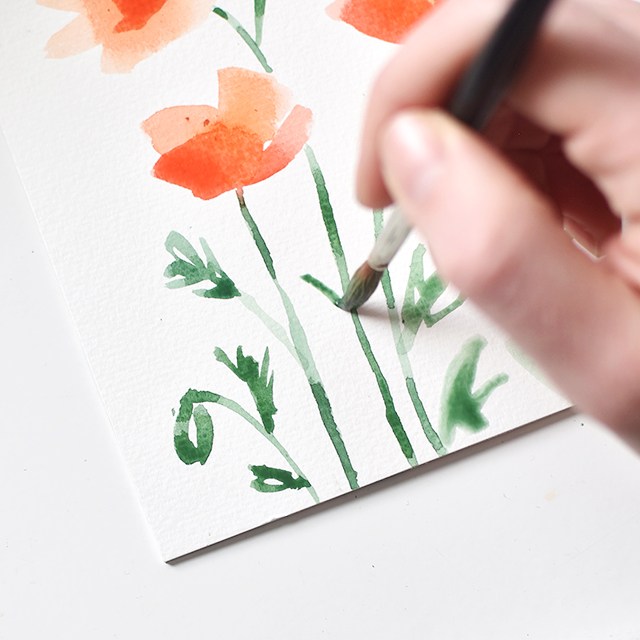
You can leave your painting simple without any leaves and just do the stems, but I love how easy these leaves are. With the tip of your brush, draw little scribbles. Little zig-zags that go into each other for the leaves. I also like including pods, the stems tend to arc downwards and have a cupped ‘c’ shape on either side. You can be quite abstract with those shapes. 
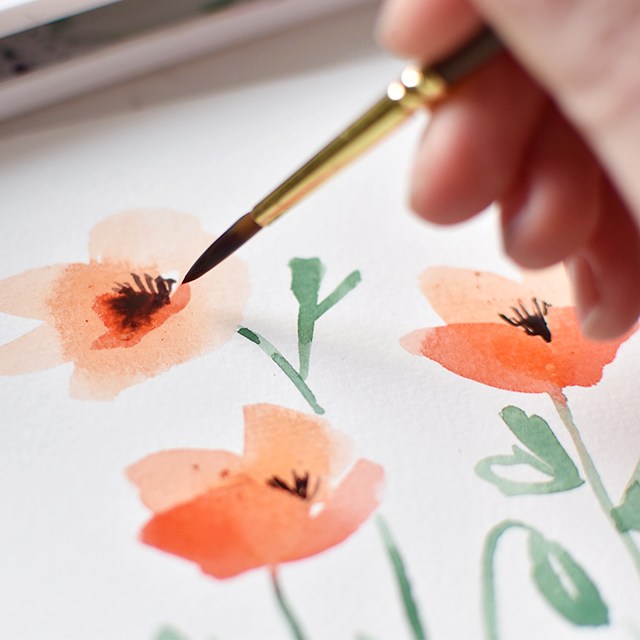
Now that the greenery is done, the poppies are dry enough for the middles. The centers of poppies are black with little bits of yellow pollen. I like getting a muddy blue-ish black to paint the middles. On the open flower, you’ll draw a circular-ish (again, don’t be perfect) shape with black stamens coming out of the black. You can add yellow to the tips. That’s where the pollen lies. For the profile flower, have the stamens coming out between the front ‘V’ shape. 
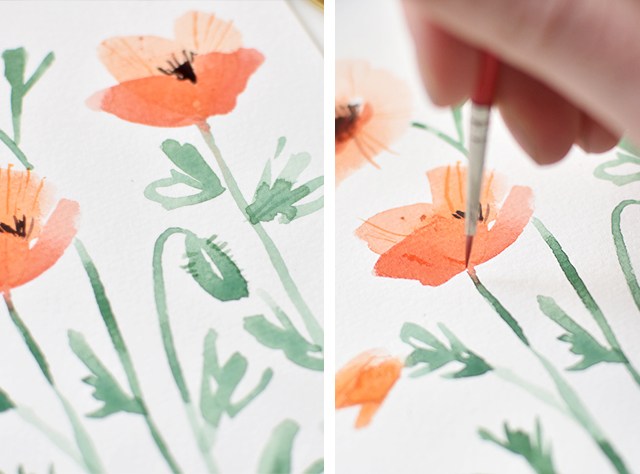
With your #0 brush, grab a yellower orange and make little lines coming out of the ‘V’ shapes. Make them squiggly and imperfect. Then add fuzz in green to the pods. 
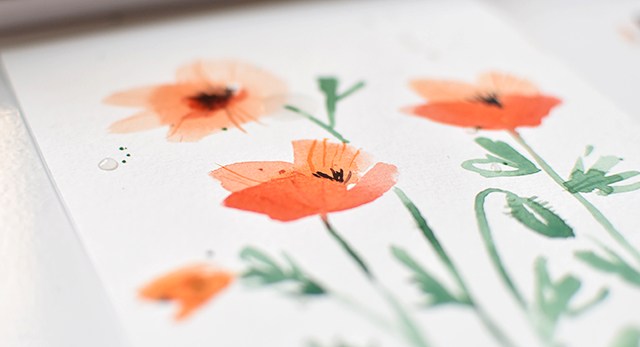
Boom! DONE! So easy, right? I like to add little splatters afterwards. Because it’s fun. 
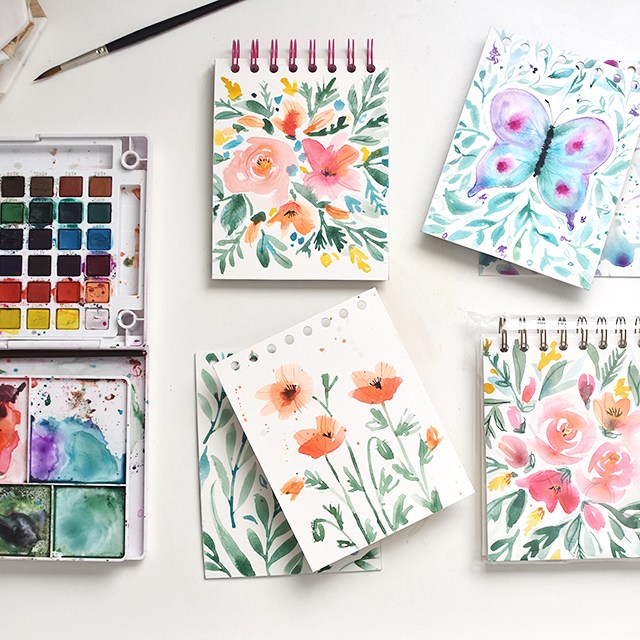
For the back covers, I used complimentary colors and something simple like just leaves or a splatter pattern. Easy, peasy. 

 I used this tutorial from Ink Struck Studio for the butterfly cover and I learned the roses from Natalie Malan.
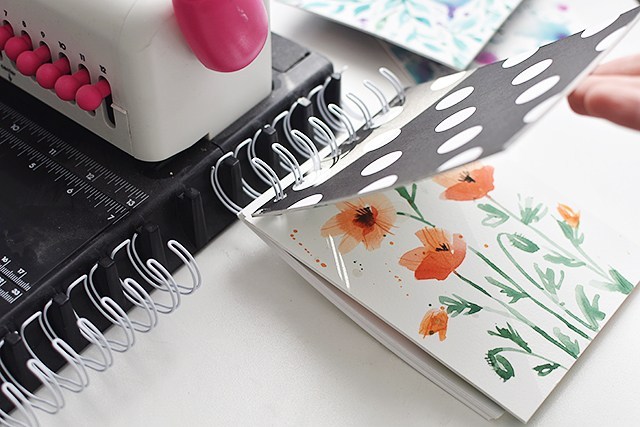
Now for the binding part. You can take the un-bound journals to your local print shop and they’ll do it for you. OR, if you have a tool like the Cinch, punch holes in the covers and filler paper separate. But make sure that the holes are centered. Put the filler paper on the coils, then the front cover, then the back cover (facing the front cover). This will allow the coil edge to be unseen on the inside back cover. Crimp down with your binder tool. 
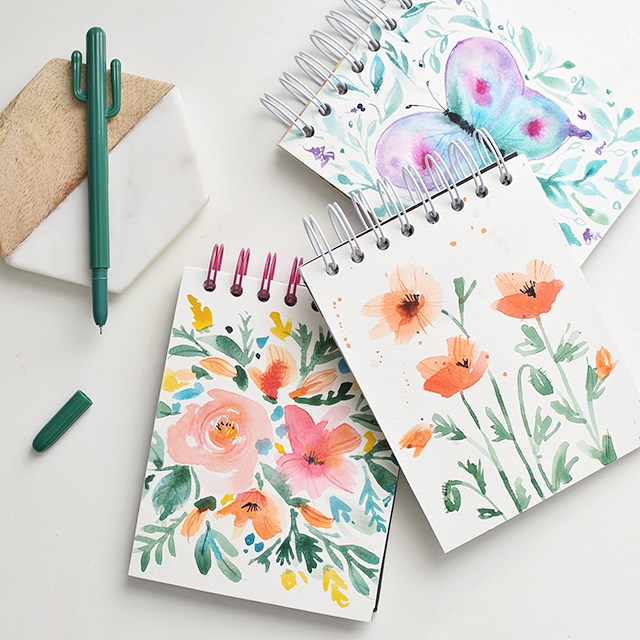
Now they’re ready to gift! Or keep. I like to hoard the things I’m most proud of making. ;)

This tutorial and accompanying printable is free for personal use. 

Sponsored: Symbols of Christmas Printable Book

13 Comments

Disclaimer: I don’t pretend to think that all of you are Christians or even like religion. If you are a Christian, you might really enjoy this post and sharing this printable with friends and family. And I sincerely hope you do! If not, please don’t take offense. This is simply a project that I feel in my heart I’ve needed to make and share here in case others may find it impactful for their holiday celebrations.

If celebrating Christ’s birth at this time of year is not your thing, I would love to hear more about your personal beliefs and traditions for this time of year in the comments below*.

This month has been insane. So many things to do and so little time. I’ve actually had this project completed for weeks, but I haven’t had a chance to photograph and write about it until now. I figure Sunday is the perfect time to publish, since this takes a more spiritual tone.

Unfortunately I haven’t had the chance to do my annual candy box. This project ended up taking its place. I have so many ideas for the candy box, though. I may have to publish a New Year’s or Valentine’s candy box. :)

melissaesplin-christmas-symbols-printable-book-diy-3

At church I’m in charge of the activities for our women’s group. We meet at least quarterly for spiritual, service-oriented, social or creative activities. When we were planning I knew I wanted to make a little keepsake/quiet book for adults and children alike to be reminded of the true purpose in Christmas: Christ’s birth. I’m glad I worked on this project. It’s been a busy time of year with a lot of work (a fabulous problem to have, for that I’m humbly grateful!), so carving out time to research symbols of Christmas and coordinating scripture was a great way to get in the spirit.

This printable by no means includes all of the symbols of Christmas (I realized I left out the wreath – oops), the 7 included simply serve as a prompt for discussion and pondering on the other things around us that remind us of Christ and God.

I wanted it to be something that could be enjoyed by kids and adults alike, so I made little calligraphed illustrations that could be colored and kept the design simple to appeal to adults. It’s all small enough that it can easily fit in a purse to be toted around all season long (even though it’s almost at it’s end).

I printed off a few and plan to give them to my grandparents and parents this year. The ones we made for our women’s group activity were a huge hit. We prepped 30 kits and even though we didn’t have 30 in attendance, all were spoken for! It was a thrill to see women take extras to share with others.

melissaesplin-christmas-symbols-printable-book-diy-5

The book includes symbols on: The evergreen tree, the star of Bethlehem, the candle, the poinsettia, the candy cane, the stocking and holly berries. At the end there are a couple of pages for thoughts so you could use it as a holiday journal or as a way to write your personal thoughts on the season to give to someone else. Or write in some of your favorite holiday traditions/memories.

melissaesplin-christmas-symbols-printable-book-diy-6

Each symbol has a brief explanation and a scripture. Each scripture is taken from the King James version of the Bible. Mostly from the New Testament.

melissaesplin-christmas-symbols-printable-book-diy-4

To assemble, you will need:

  • printed sheets
  • hole punch
  • needle
  • thick thread
  • bone folder
  • 6×9 inch piece of leather or felt**

Download the printable (link at bottom of the post) and print. Print double-sided and DO NOT fit to page (print at 100%). 

Cut the paper in half width-wise so that you have 8.5 x 5.5 sheets. Rearrange your papers so they are in order. I like to go by the odd numbers on the bottom right hand side. Use the blank half sheet on the outside of the title page.

Punch holes in the guides on pages 10-11. Center your pages over the leather, mark the holes on the leather and punch.

Thread your needle and sew the book: Start on the outside front cover in the middle hole. Go to the inside of the book and leave a 4 inch tail. Go through the bottom hole, then thread through the top hole and then back through to the middle hole. Your tails will be coming out of the middle of the book. Tie a knot around the string running up the spine and finish with a bow. Fold in half and crease with a bone folder.

Now you’re finished! If you batch these, you can make 10-20 books in about half an hour. They’re great for gift giving! Enjoy!

CLICK HERE TO DOWNLOAD

This post is sponsored by Mormon.org | check out their video “He Is the Gift“. It so beautifully conveys the nativity with song. All thoughts and opinions are my own.

*This blog is a positive, creative space. Comments that attack any religious faction will not be tolerated or published. 

**Leather provided by Leather Hide Store.

Sponsored: Leather Folio Tutorial

0 Comments

jo-totes

This tutorial is sponsored by Jo Totes. They have a wide selection of fashionable camera bags in both genuine and vegan leather. My favorite of all is the Siena bag – an italian leather bag that ages beautifully. I use it as my every day bag. It fits all of the essentials! The structured body allows me to easily find all of my purse’s contents quickly.

Stay up to date with Jo Totes on Instagram, Pinterest and Facebook.

My purse essentials (beyond baby stuff): my instax camera, a notebook, pen, chapstick and gum.

melissaesplin-leather-notebook-folio-tutorial-1

For a while I had my notebook just floating around my purse naked. The problem with this was that the top page would frequently break off, wrinkle and just get disgusting. To remedy the problem, I hand-bound a folio where I can just insert the notebook I’m using and protect it from the contents of my purse. I’m constantly ripping out pages and tossing them, so it’s nice to have something reusable instead of having to bind a new journal every time I run through my pages.

melissaesplin-leather-notebook-folio-tutorial-2

The original version I bound was a traditional 3/4 rounded back bind with cutouts and pockets. I thought about sharing how to make this, but as I broke down each step, I realized that I had very specific bookbinding tools and the steps would take 5+ hours to photograph and explain. I ditched that idea for a simpler sewn version. It’s not as rigid, but it’s still quite sturdy and can be completed in well under an hour. You could opt out of real leather and use an industrial felt instead. I’m not sure I would recommend a vegan leather as it doesn’t tend to wear well over time.

melissaesplin-leather-notebook-folio-tutorial-3

This would be a great gift for a guy or gal. Christmas gift perhaps? It’s just over 2 months away, so time to start planning! I’ve already taken care of a couple of Christmas gifts already. I feel way more on top of things this year. Don’t worry though, I have plenty of time to procrastinate and get behind on my gift-giving.

So would you like to make one with me? It’ll take you about 20-30 minutes. If you’re making a bunch all at once (which I would totally recommend!) it’d take less than that for each one.

melissaesplin-leather-notebook-folio-tutorial-4

Supplies:

  • ruler
  • rotary cutter (and mat)
  • bulldog clips
  • thread
  • leather needle (or topstitch needle)
  • elastic
  • button
  • hand-sewing needle
  • x-acto knife
  • pen
  • bonefolder
  • leather
  • sturdy canvas or a fabric wallpaper*
  • notebook**

* I used fabric wallpaper for this. I scored some years ago from design centers in SF. Just ask an interior design company if they have any wallpaper samples that are being discontinued that you can have. Alternatively you can fuse any kind of fabric to Ultra Hold Heat ‘n Bond with regular copy paper.

** My favorite paper is the Rhodia pad or Clairefontaine Triomphe paper. They come in plain, grid, dot grid and lined.

Read more for the full tutorial.

(more…)

Recycled: Ostrich Wedding Book

2 Comments

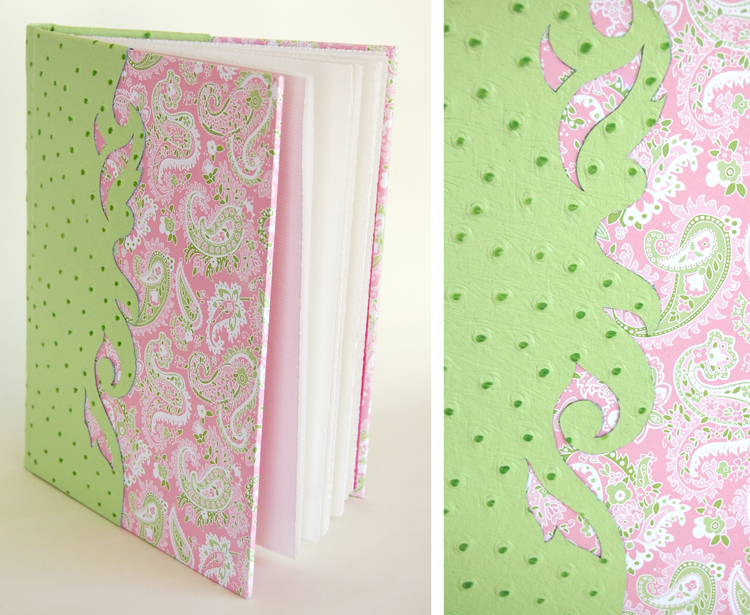
Today’s recycled post comes from a bookbinding project I did in July of 2008. My sister’s friend was getting married & her mom wanted me to bind a wedding sign-in book for the occasion. Her colors were pink & green. Jerre’a sent me the paper & fortunately it matched my green ostrich leather perfectly!

It’s so funny how pictures of previous projects take me back in time. Right about this time 3 years ago, I was taking care of a 3 month old Penelope & teaching bookbinding & watercolor classes for the continuing education program in Redwood City, California. We were living in Menlo Park at the time. Our summer was full of hanging out with friends, kiting, beach going & SF touring. I miss those days, but I’m so happy to be where I am right now.

It’s memories like those that make me realize how happy things are. I’ve been sort of up and down these last couple of days, so these reflections do me the world of good.

Flat Back in a Snap

8 Comments
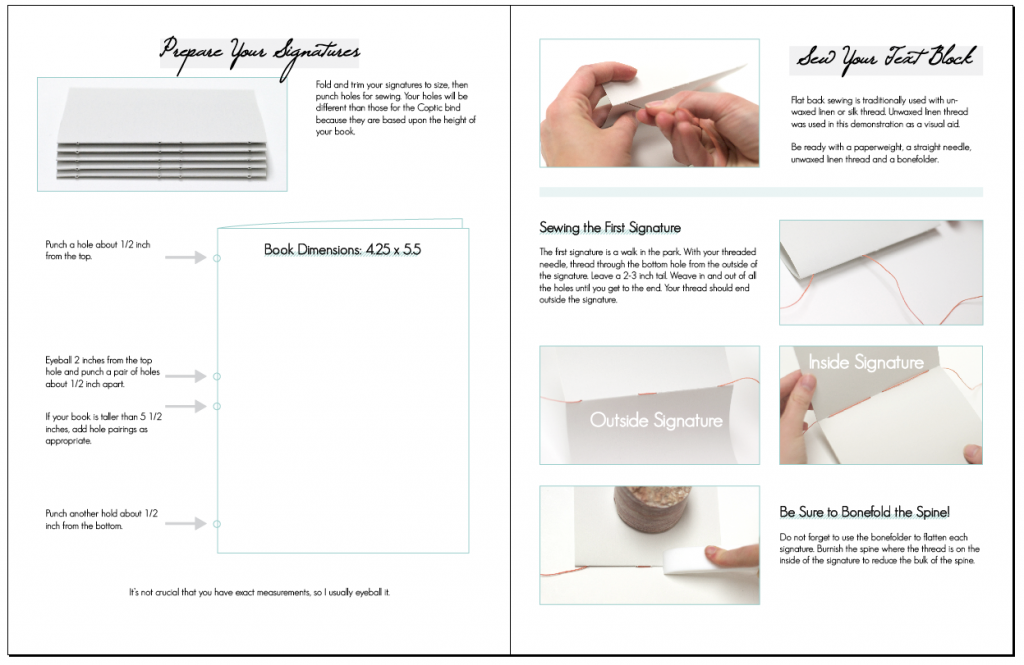
flatback-pageclick on image to enlarge

This little eBook has been in the works for nearly nine months. It’s gestated just like a baby sans the vomiting and weight gain.

See, bookbinding isn’t just for conservators with 2,000 square feet of art space and thousands of dollars in tools. It’s very inclusive, so join the club! Bookbinding requires a desk, some floor space and a few inexpensive supplies that you might already have. So here it is; learn to bind a flatback journal—just like the blank books in the bookstore—at home, using regular crafting tools. Get your copy by making a selection and clicking the button below. If you’re not sure about the tools to buy, add the tools eBook for only $2 more!

PDF Options

mobile site