Archive for the ‘handmade’ Category

Sewing Style: Hawaiian Print Scout Tee Dress

5 Comments

Last night I had a neighborhood meet-up of the artists in the area. I love our neighborhood. There are a surprising amount of creatives and artists. Many of them are young kids. It’s a thrill to see their creativity ignite as they learn new things.

melissaesplin-sam-kocsis-scout-tee-dress-variation-7

This is my neighbor Sam. She’s got the raddest style. She’s had such an independent style since I started working with the youth when she was 14. A month or so ago, she approached me to see if I could help her sew a variation of this dress she spied on Urban Outfitters.

melissaesplin-sam-kocsis-scout-tee-dress-variation-2

The inspiration dress was made out of a knit. She had in mind using this cotton woven she picked up from Hawaii recently. The print is amazing. Ultimately she wanted a bold version with sleeves and the tunic-style slits.

melissaesplin-sam-kocsis-scout-tee-dress-variation-3

We had just about a yard of fabric to work with, so getting the prints to match up was nothing short of magical. They don’t match up exactly, but there’s great horizontal continuity with the seam matching.

melissaesplin-sam-kocsis-scout-tee-dress-variation-4

I loved doing the color blocked sleeves. It was a happy accident, really. She had mentioned she wanted a longer sleeve, but I forgot when we were cutting out the sleeve. OOPS! After realizing this, we brain stormed a little and decided to color block instead of cut out new sleeves. I love happy accidents like those.

melissaesplin-sam-kocsis-scout-tee-dress-variation-6
melissaesplin-sam-kocsis-scout-tee-dress-variation-8

melissaesplin-sam-kocsis-scout-tee-dress-variation-10

I love how this turned out. The best part was that she really owned the project. I helped her pick out the pattern (Scout tee), size the pattern, make slight adjustments, but then it was all her. I made her do all the sewing, and she rocked it! I did the neckline for her, since that’s a little difficult dealing with biased tape, but other than that, she did it all.

I’m so proud.


Sewing Style: Holiday Plaid

0 Comment

I’ve been dying to get my hands on some plaid lately. It’s been huge since last year and I’ve loved the come-back. I’m not sure it ever really went out of style, but I’m glad to have been reminded of how awesome plaid is once more.

melissaesplin-lulus-plaid-christmas-outfit-1

Plaid is great for the holidays. I remember decorating our tree in my youth with wrapped boxes of raisins in plaid wrapping paper. We used those boxes for 15 years at least. We never took the raisins out of the boxes, so I chuckle at the thought of 15 year old raisins. Now that I think about it, I wish I could find that cool plaid wrapping paper again. It had a linen texture to it which was really neat.

melissaesplin-lulus-plaid-christmas-outfit-3

This is the exact outfit I will be wearing to my Grandparents’ Christmas party. It’s a casual party, but we still like to get dressed up. No need for a dress, but nice slacks will do. These rayon trousers from Lulu*s are absolutely perfect. I look dressed up, but I feel like I’m wearing pajamas. The rayon is dreamy.

melissaesplin-lulus-plaid-christmas-outfit-4

melissaesplin-lulus-plaid-christmas-outfit-2

I made the top to go with. I did a v-neck variation of the simple woven blouse (here). I was going to make a little collar, but as I was putting it together, it looked terrible. I ended up just putting a bow in its place to dress it up and keep it from looking like a scrubs top.

melissaesplin-lulus-plaid-christmas-outfit-5

I’m happy with how it turned out, but I’m excited to switch back to knits for my next project. I have it all cut out and everything. I can’t wait.

melissaesplin-lulus-plaid-christmas-outfit-6

What will you wear to your Holiday parties this year?

Outfit details:


Handmade: Letterpress Business Cards + Motivators

8 Comments

I had the opportunity to participate in this year’s summer Alt Summit, and boy did it sneak up on me! I barely had the chance to recover from January’s conference.

melissaesplin-business-cards-calligraphy-letterpress-8

I wanted to do something completely different for this session’s business cards, but I ended up doing everything last-minute. And by last-minute, literally making business cards the night before the conference.

melissaesplin-business-cards-calligraphy-letterpress-9

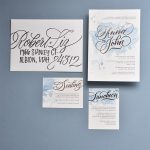
The cards have the same general vibe as they did previously, with a little motivator and acrylic stand, but I approached the printing and calligraphy differently.

melissaesplin-business-cards-calligraphy-letterpress-10

Instead of doing one kind of motivator (“You are awesomesauce”), I decided to switch things up and write out different adjectives. The monoline style is quite different from last time, too. I used watercolor paper and a sumi ink to create moody washes on the backs of all the papers to create a moody texture. Then lettered with white ink overtop. The texture of the black wash gives the card more depth, in my opinion.

melissaesplin-letterpress-business-cards-2

The printing was a little different as I was using a watercolor paper and not a thick letterpress paper. There’s still a deboss from the printing process, but it’s not as stark. I went with the watercolor so that the lettering on the back would be easier to create. Last time I had a heck of a time lettering on that soft letterpress paper.

melissaesplin-letterpress-business-cards-3

I also had a problem with the ink in the letterpress printing bleeding, making the hairlines a tad garbled. Above, you can see different experimentations on printing. The top right is using regular letterpress ink, you can’t tell a whole lot from the image, but it’s feathering a little bit on the paper. Then I tried various blind-deboss printing techniques, then applying ink afterward. That didn’t work quite like I had envisioned. Then the top left is when I discovered inking up my letterpress plates with a stamp pad. The stamp pad from Silhouette’s stamp kit is quite tacky and worked perfectly for inking up the plates. The printing was more crisp and the clean-up was a million times easier with the water-soluble ink. Major win! I’ll be using this method for printing with the L-Letterpress in the future.
Sewing: Chiffon Top

23 Comments


Friday’s Alt Summit ensemble took on a different look as well. The skirt I started to make totally bombed. Instead of freaking out at the last minute, I simply adjusted my expectations. Chris was so proud! I grabbed my floor-length chiffon skirt and kept on going.

friday-altsummit-outfits

The floor length skirt paired with the light pink fabric I had planned for the top top ended up looking horrible under natural and artificial light. They were just the wrong pinks that they just vibrated against each other. More expectations adjusted. I wasn’t about to go out and buy more fabric to match, so I looked to my stash to see what I could work with.

istillloveyou-melissaesplin-floral-chiffon-top-1

Et voila. I didn’t add any leather details on the shoulders as planned. In fact, I don’t know why I didn’t! I think I was in such a rush to finish something that I just forgot that plan altogether. I modified my basic tee pattern to include very drapey sleeves.

istillloveyou-melissaesplin-floral-chiffon-top-2

I think the overall vision worked great.

15-secretgardenparty-2

It’s not necessarily my “style”, but it was exactly the piece I needed to bring the whole ensemble (live floral crown included) together. It also worked perfectly with the vision I had of our Secret Garden Party.

istillloveyou-melissaesplin-floral-chiffon-top-3

Now I can’t quite tell if I still like the top or not. I LOVE the print, but I’m not entirely sure the colorway is flattering on me. Sometimes I feel like there’s not enough contrast between my skin tone and the fabric so I look semi-amorphous while wearing it. It’s also sheer, which means I have to wear layers underneath. I don’t like wearing layers if I don’t have to.

istillloveyou-melissaesplin-floral-chiffon-top-4

I need to give this top a chance. But I may end up just giving it to someone who will wear it more than I will.

istillloveyou-melissaesplin-floral-chiffon-top-5

I LOVE the fit, though. The flutter sleeves are so fun to wear. I have plans to sew more tops like this in the future. Maybe a dress like this would be fun in the summer months? I can’t think about summer now. We just got about 3 inches of sloshy snow. And I think it’s going to keep coming. Must. Make. More. Winter. Clothes!

istillloveyou-melissaesplin-floral-chiffon-top-6

Outfit details:


Sewing: Alt Summit Emerald Outfit

12 Comments

Thursday night’s look came together almost exactly how I envisioned.

draw-it-sew-it-melissaesplin

altsummit-thursday-looks

The only difference is that I opted for cobalt beaded detailing instead of gold chain detailing around the shoulders. The beading took more time than sewing on metal chain. I started laying out my idea in chain, but it started looking cheap.

istillloveyou-sewing-style-beaded-wiggle-dress-1

The green and blue combo is the new pink and orange. I love these colors together. istillloveyou-sewing-style-beaded-wiggle-dress-2

The outfit was a bit understated, but the beading made it something special. The bodycon silhouette is classic, too.

istillloveyou-sewing-style-beaded-wiggle-dress-3

istillloveyou-sewing-style-beaded-wiggle-dress-5

Sewing up this piece was easy. I sewed a fitted version of the Renfrew tee and connected it with my wiggle skirt block. No zippers. No buttons. Easy peasy. The beading, however took the longest. Thankfully that could all be done while vegging out to Brooklyn Nine-Nine with Chris. It’s our new favorite show. Go forth and watch it if you haven’t already!

istillloveyou-sewing-style-beaded-wiggle-dress-4

Beading around the neckline was hardest. I had to use two needles and thread. One for stringing beads, the other for attaching the thread between the beads to the neckline. The neckline is barely big enough to fit over my head, but I still have to be careful when pulling it on and taking it off to avoid busting threads. I’ve broken threads twice already. It’s a 20 minute set-back whenever I break threads. UGH! Still, so worth it, though.

Utah photographer

Image by Justin Hackworth

The night of the emerald party, I paired my dress with a bold metal lace statement necklace from Tai Pan. That along with doing my hair in a low chignon made the dress shine.

istillloveyou-sewing-style-beaded-wiggle-dress-6

Outfit Details:


istillloveyou-sewing-style-beaded-wiggle-dress-7

mobile site