Sometimes I feel like I ride on the coattails of creative people.
Back in January as I was surfing my favorite blogs, I came across
this post on Ultra Vroom about cardigans and fabric necklaces. I instantly fell in love and had to have a fabric necklace for my very own. I week or so later I remembered the large stash of white jersey hanging around the basement and hap-hazardly made my own version of
Annie's fabric necklace.
If I remember correctly, I wore that necklace for 4 days in a row. I didn't really take it off until Penelope bumped her mouth on the table and bled all over me (Penelope is ok, BTW). It was with much sorrow that I parted with the necklace long enough to launder it.

I love my necklace so much, I've been wanting to share it with you for sometime, but haven't worked on the tutorial until just now. Here it is! I hope you like it.

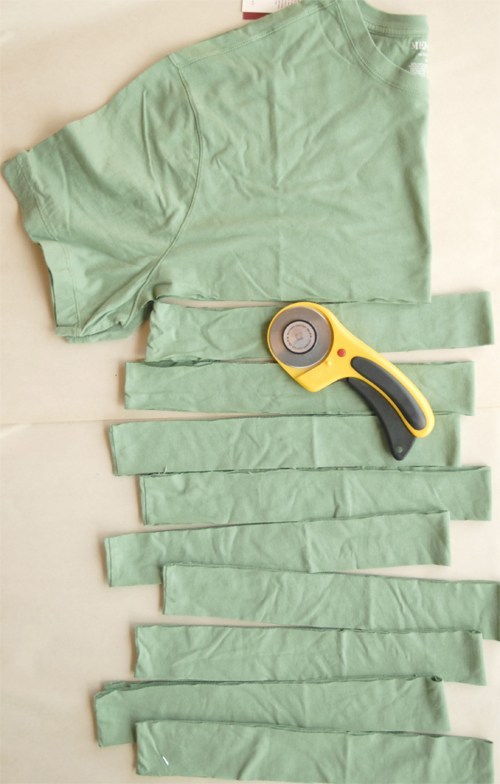 Materials:
- 1 XXL or XXXL men's t-shirt
- Scissors and/or rotary cutter
- Sewing machine and or needle & thread
Cut off the bottom hem of the shirt. Cut 9 2-inch strips out of the shirt.

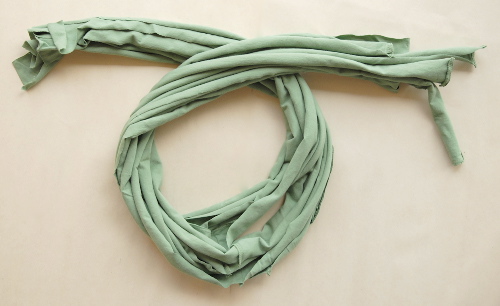

Cut open one end of each strip. Stretch the jersey through your hands to allow the fabric to curl inside itself. Group strips into threes.

Sew coiled ends together. Secure the end to a stationary object (like a couch) with a safety pin. Start braiding. I find that a tight braid looks nice, but avoid pulling and stretching the fabric.

Once finished braiding, sew ends together to make three separate rings of fabric.
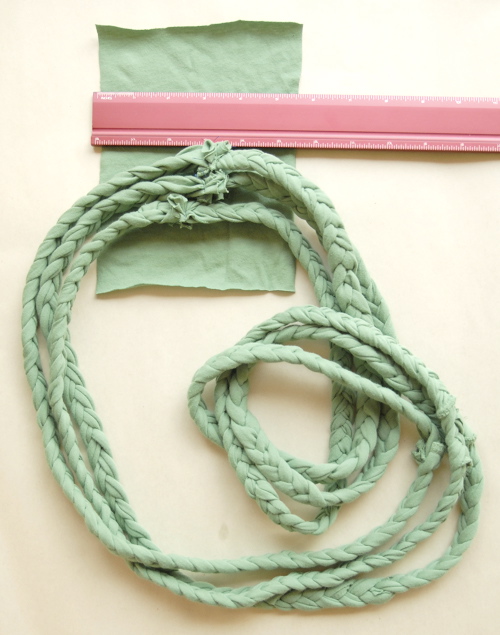
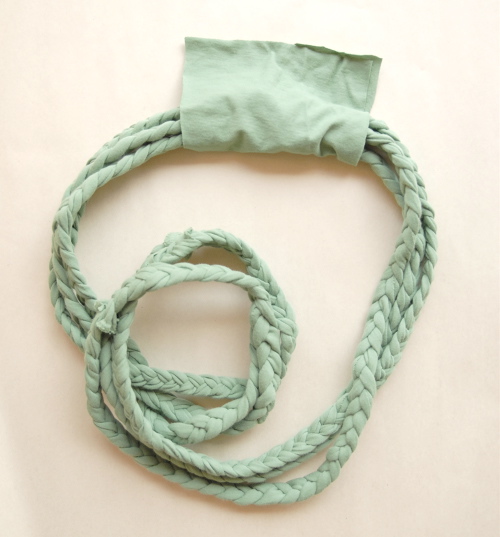
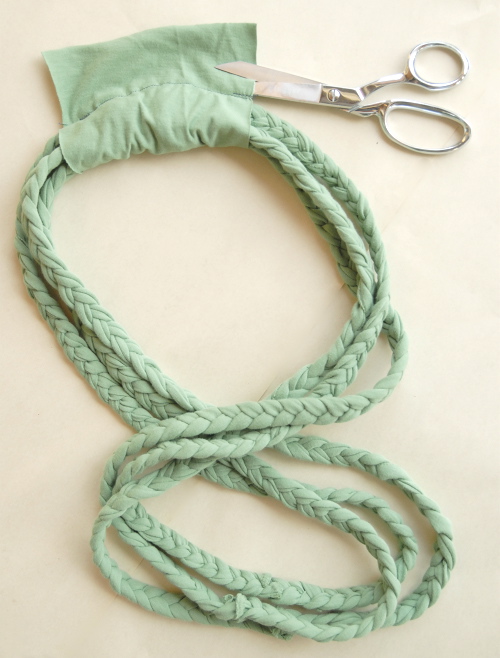

Cut a 5 x 7 inch square of fabric from the remainder of the shirt, fold it over the three braids and sew. Sew the tube as close to the braids as possible for a snug fit. Trim excess fabric. Turn right side out.

Voila! Your necklace is complete. Twist, and double over and you're ready to rock and roll!

If you twist the loop twice before doubling over, the necklace looks like this (above).
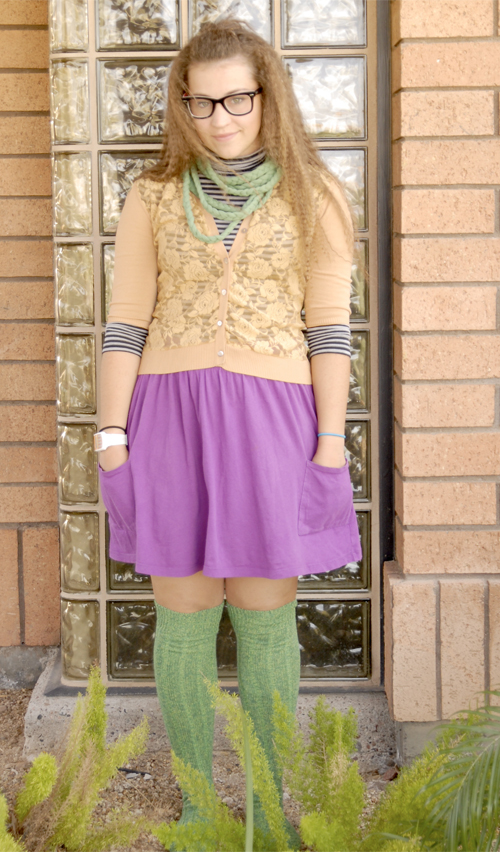
Twist the necklace once before doubling over and pull some loops longer to have a cowl neckline (above).
So there you have it, in less than 15 minutes you can have a really rad fabric necklace 'round your neck. Hope you give it a try! Happy Weekend, All!
P.S. You might want to check out Annie's etsy shoppe:
Annily Green. I love my necklace so much, I've been wanting to share it with you for sometime, but haven't worked on the tutorial until just now. Here it is! I hope you like it.

 Materials:


 Cut open one end of each strip. Stretch the jersey through your hands to allow the fabric to curl inside itself. Group strips into threes.
 Sew coiled ends together. Secure the end to a stationary object (like a couch) with a safety pin. Start braiding. I find that a tight braid looks nice, but avoid pulling and stretching the fabric.
 Once finished braiding, sew ends together to make three separate rings of fabric.


 Cut a 5 x 7 inch square of fabric from the remainder of the shirt, fold it over the three braids and sew. Sew the tube as close to the braids as possible for a snug fit. Trim excess fabric. Turn right side out.
 Voila! Your necklace is complete. Twist, and double over and you're ready to rock and roll!
 If you twist the loop twice before doubling over, the necklace looks like this (above).
 Twist the necklace once before doubling over and pull some loops longer to have a cowl neckline (above).
So there you have it, in less than 15 minutes you can have a really rad fabric necklace 'round your neck. Hope you give it a try! Happy Weekend, All!
P.S. You might want to check out Annie's etsy shoppe: Annily Green.