Posts Tagged ‘decor’

In the Home: Protecting the Table

19 Comments

My head is still spinning from Alt Summit this last weekend, so I’ll probably put something up tomorrow sharing all of the awesome people I met & the cool things I learned while there. In the mean time, I had a fantastic idea that I wanted to share with you:

We just bit the bullet recently & bought a grown-up table! It’s our 7th (and hopefully final) table in the last 5 1/2 years. Now that we have a nice table made out of beautiful solid wood, we need to take care of it. This means no naked glasses on the wood! I was grocery shopping the other day & thought I’d see if I could find some cooler place mats than we have currently & had a brilliant brain wave. I also had to pick up some envelopes in the office supply section & came across bulletin board tiles. They were about the right size, a fantastic color/texture & a lot cheaper than the placemats I had been eyeing earlier. BOOM. there you go. We have cork boards for place mats.

I think this idea connected partially because we had placemats growing up that had cork on the bottom, to keep from scratching the table top. I loved those placemats! They had pretty illustrations of the English countryside. I wonder if my parents still have them.

So, do you use placemats for mealtime? What are your favorite ones? Link to resources in the comments below!

Thrifty & Chic: Christmas Details

0 Comment

It’s been some time since I’ve done a Thrifty & Chic feature, no? As you know, I’m not a big Christmas (or any holiday) decorator. Next year will be so different, I tell myself. I’m going to go all out.

Like I’ve mentioned before, It’s so hard to invest in Christmas decorations when you don’t know where you’ll be in the next year or you have little room for storage. Despite that, I found this adorable Martha Stewart table cloth at the thrift store a couple years ago for something like $2. I like that it’s not your typical red & green decor and it seems to go with the other two Christmas decorations we own, too.

Also, I just had to mention that I planted the above succulent arrangement a few months ago & never got around to posting about it. I had the base on hand for some time & got all of the succulents from Ikea. I LOVE IKEA. My mom would be so proud that this thing has survived not only four months, but four months & a move. Chris boxed up all of our plants a week before our actual move and a few of our plants haven’t quite recovered.

How are the holidays done around your house? Have you scored any vintage/thrifted Christmas details for your home? Share links in the comments! I’d love to see!

Dresser Before & After by Guest

12 Comments

Until I get my studio set up at our new place, I’ll be posting mostly thrifty finds, ideas & guest posts. 

This guest post comes from Laura, my thrifting sister. Seriously, she finds the raddest things! I love this dresser she rehabbed! It’s giving me the motivation to finally finish the dresser I started to rehab 8 months ago!

• • •

Hi I’m Laura from You Are My New Dream.

Today I’d like to share with you my most recent diy undertaking. I am so proud to have finally found my much sought after mid century dresser purchased for $39 at the Salvation Army Thrift store. When I first laid eyes on this piece it looked like this:

I wasn’t feeling the sloppy burgundy paint job or the jacked up drawers. It looked pitiful in the store and none of the drawers fit right. It had already been marked down from $60. I thought to myself what a shame that the drawers are messed up. I really fell in love with the mid century shape and I could tell the dresser was solid wood construction with no veneer. I made myself at home on the floor of the thrift store and I played musical drawers until all 6 drawers fit perfectly. Then I walked ran to the register and bought it.

Now let me back up and say that I had never refinished furniture before. (There was that one time I sanded the finish off of a jenny lind bed with sandpaper and spray painted it –not recommended.) I knew what supplies were necessary because I had seen my husband do it before. This was the dresser of my dreams and I knew that there was no way I could paint over that ugliness. It would have to be stripped down to the wood and I would have to figure it out myself. So whats a girl to do? Google. A lot of googling!

I used:

  • Chemical proof gloves (trust me, paint stripper will burn your skin)
  • Goggles
  • Paint stripper (Jasco premium)
  • Small metal bucket to hold the stripper
  • Scrubby paint remover pads
  • Metal bristle mini brushes
  • A scraper
  • Mineral spirits/paint thinner
  • Drop Cloth
  • Wood putty
  • Sandpaper medium and fine grade (do not use a belt sander if you are a beginner)
  • Latex interior/exterior primer (Kilz)
  • Latex semi gloss pain (Valspar from Lowes)
  • Foam roller
  • Clear coat or lacquer to seal the deal (Rustoleum clear lacquer spray)

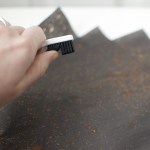
I put the dresser over a dropcloth & outside beneath a carport because it can be quite messy & smelly. Armored with my chemical proof gloves I used a large old paint brush to brush on a thick coat of the paint stripper. I let it sit for 10-15 minutes before trying to scrape it off.

If you’re doing this – you may have to repeat this step a few times depending on the layers of paint or varnish. You can use the scrubby stripping pads, or the bristle brushes for intricate detailed areas. DO NOT get paint stripper on your skin! It will burn horribly. If this happens wash the area with soap and warm water immediately.

Luckily I was working with a lot of straight lines -all except for the sculptural wood drawer pulls. It’s really not as difficult as it sounds! I was very apprehensive at the beginning of this project but once I started, it was surprisingly easy. After I stripped as much paint as I could, I used an old rag to wipe it down with mineral spirits(not soaked) to clean up any of the paint stripper residue. After it dried, I used medium grit sandpaper to remove the remaining paint.

From there I used fine grit sandpaper to sand the wood until it was smooth and even. I discovered two sizable gauges on the top of the dresser so I filled those areas with wood putty which I sanded after it was dry. After brushing off the dresser, I wiped it again with mineral spirits to catch any dust that was left behind. I let it sit for a day so it would dry out completely.

Then I began priming with a brush. I used two THIN coats of interior/exterior primer but a mysterious and stubborn stain kept bleeding through on the top. Thin coats are best! Sand between each coat & use Kilz for stains that bleed through. One light sanding after painting the last coat will do for helping your final paint stick.

I let it sit for about 2 days to let the primer dry thoroughly. Then I painted a thin coat of my color on. I let that dry for about 24 hours then painted another thin coat on all surfaces. I used a foam roller to give the top of the dresser a nice, even final coat. Again, I let this dry for another day or so before spraying it down with Rustoleum clear spray lacquer to protect the surface.

I am very pleased with how this project turned out. This dresser is for my 3 year old daughter Sophie and she loves the happy color. You can see more of Sophie’s room here.

3 Don’t Miss Sales

6 Comments

Until I get my studio set up at our new place, I’ll be posting mostly thrifty finds, ideas & guest posts. If you’re interested in guest posting here, please email submissions (photos at least 500px wide) to melissa at melissaesplin dot com.

If you live in Utah’s Wasatch front, I’ve got two sales you don’t want to miss! First one, my sister-in-law Shelley, and her sophomore Industrial Design class at BYU made lamps & they’re selling them to the public. These lamps are killer! Hello, bottom left lamp! You’re going to be mine. All lamps are $20. Seriously, you can’t pass this up. Be sure to spread the word along to friends & family that might be interested. I believe they’re only offering 15 of each design. You can find them selling the lamps outside at the Gateway Mall – at the main intersection by the parking garage by Gap, J.Crew & Abercrombie.

The second sale is American Craft’s annual Scrapbooking sale. I like hitting this up every year for gifts for my mom & for packaging for Christmas. I went yesterday & found some fantastic deals on ribbons, trims & paper bows for giftwrapping! If you’re thinking about buying the CUTUP, they have a few available at half the price. You’ll want to get in on that if you’ve been thinking about it. Directions and details in the image below.


. . . And there’s one more I almost forgot!! The Bijou Market is this weekend, too! I’ll definitely be stopping by to check out the goods from 5th & HazelAnnily GreenAshmaeLivy Love Designs and more!


Well, as you can tell, progress on moving in is much slower than I had anticipated. Last night Chris set up the big computer, so I’ll actually be able to get some design work done. This place is fantastic, but the studio is going to be a giant project as it is in the unfinished basement. I’ll be posting videos of my progress periodically.

59 Great Finds for the Home + H&M

14 Comments

Until I get my studio set up at our new place, I’ll be posting mostly thrifty finds & ideas. If you’re interested in guest posting here, please email submissions (photos at least 500px wide) to melissa at melissaesplin dot com.

I’ve been a contributing guest blogger at Houzz for the last 3 monts and it’s high time I share my latest ideabooks with you!

12345 

If you’re not familiar with Houzz.com, it’s a comprehensive home decor site. There you can find home tours, the latest in home designs, trends & ideabooks featuring places where you can buy fantastic home items. I contribute to the latter. I scour the web for inspiring items for the home & I’ve had so much fun doing so. Here’s a little description of the ideabooks I’ve compiled thus far:

20 Art Prints for Under $100  – having art in the home is SO important! Pat yourself on the back if you have invested in originals. If you’re on a tight budget & want to get started collecting some fantastic art, you’ll definitely want to see this ideabook. I’ve aggregated 20 prints worth purchasing, all under $100. Most are under $50. I have quite a few of these in my own home.

19 Decorative Toys – Toys don’t have to be an eye sore or ridiculously expensive. Here’s a list of 19 design-friendly, kid-friendly toys that I wouldn’t mind displaying in my home.

20 Great Big-Box Finds – With my budget, I typically look to Ikea or vintage shops to find unique, but in this ideabook you’ll find 20 fabulous design finds for the home available online or at your local big-box store.

All of my ideabooks include items that I would consider buying myself, so you’ll find that most of the items published there are affordable. I hope you take a look around (especially at the art one – many of those items are made by independent artists)!

top: H&M, leggings: Thief + Bandit kids, socks: Children’s place, shoes: H&M

Also, last night I spent about 4 hours at H&M’s pre-opening party. It was fantastic! I spent a load of money & outfitted (mostly) our family for winter. I’ll say, the best about that shopping experience was that the place was SO organized & there was a sales associate at every turn. Sadly, though, I missed out on the skirt that I planned on getting: Hot Pink Pleated Skirt. I found what I thought was my size, but it turned out it was too small! Oh curses, reverse muffin top!! Anyone near an H&M with that skirt in stock?

mobile site