Posts Tagged ‘painting’

How to Paint Ranunculus Watercolor

2 Comments

Another YouTube video coming at you this week! It’s taken me forever to get this post out, the end of school stuff just took so much out of my week last week. So here we are posting late. If you want to stay up-to-date on new videos, subscribe over on YouTube! I’d love to see you over there. You can expect to see product reviews, art tutorials and time-lapse/real-time calligraphy work. 

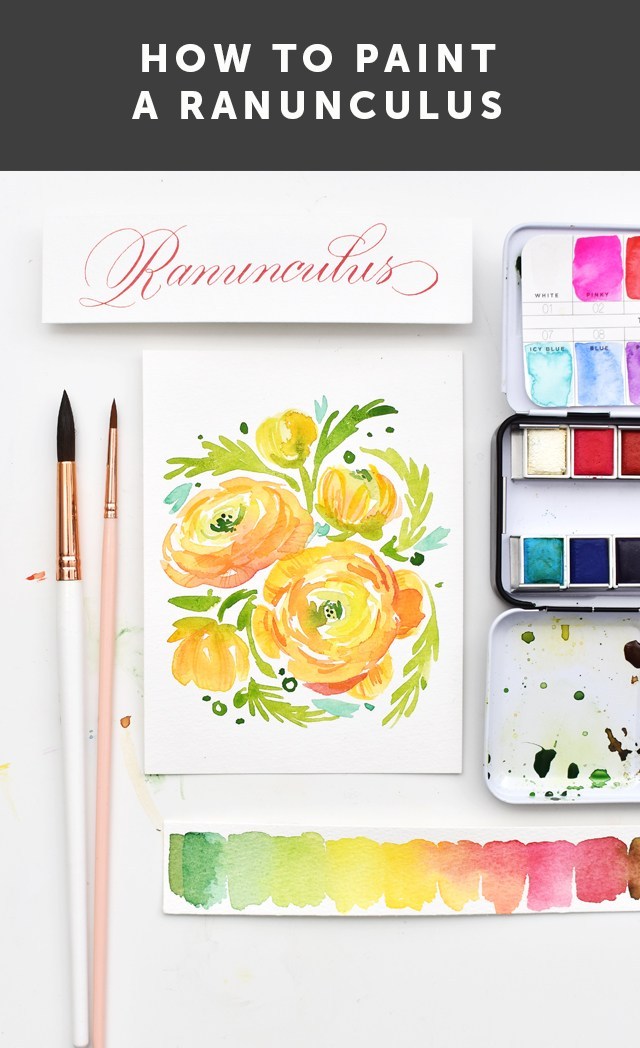
I’m giving you a peek into my process with my 100 days project (follow along here!). It’s a fun but crazy challenge to attack so many of these flowers. And ultimately I’ve come to grips with the fact that I won’t be able to finish them all in 100 days. I’m so far behind. But I’m determined to see this series through, no matter how long it takes!! Here’s what you’ll need (these are the exact materials I used): 

HEY!! Use code Melissa15% at myprimaplace.com for 15% off your order. I tried the Prima Watercolor Confections for the first time with this flower set and I’m loving how the colors blend, lay down, dry and mix. They’re just lovely. And aren’t these little tins just the cutest things ever?!? 

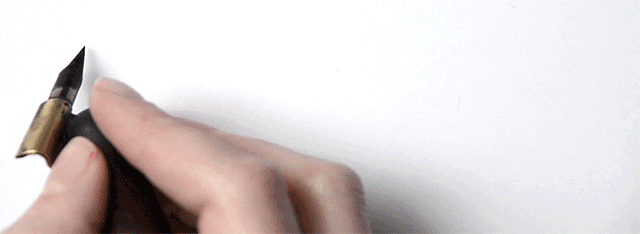
Here are the steps broken down. But I HIGHLY recommend watching the video. I give far more detail in the video. To do: 

  • Start by using your largest brush and mix a light yellow green, bright yellow, and yellow orange. You’ll want all three colors mixed before you start. 
  • Lay down brush marks in a circle with the light yellow green. As you make a larger circle (keep it uneven), start picking up the yellows, then as you get to the outside of the flower, move on to the yellow orange. 
  • Allow the colors to melt into each other creating a subtle gradation from green to yellow to orange. 
  • Let your flower dry fully
  • Next, use the size 6 brush and a darker version of your orange to create smaller concentric circles around, creating the shadows. 
  • While you’re waiting for the flower to dry, add the foliage. Work and frame your flower by branching the foliage back into the flower. 
  • Now get the liner brush with the same color, or just slightly darker (not by much) and add the details to the petals and darken up the concentric lines and the greenery in the middle. 
  • Add any other decorative bits and you’re done!


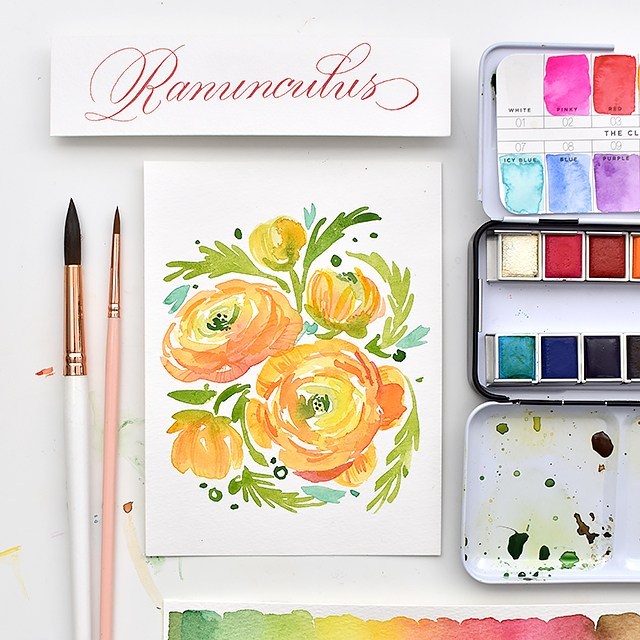
Try changing up your perspective for a full bouquet of ranunculus! I hope you give this tutorial a try. I’d love to see your work if you do! Tag me (@melissapher) on Instagram or message me here if you end up trying this technique out!

This tutorial is free for personal use. Affiliate links are used to products I actually use and have. Your support here makes more content possible. Thank you!

Watercolor Pencil Ranunculus Tutorial

0 Comments

I’ve had this thing in the queue too long! It’s no secret that I’m a materials hoarder. When I got the chance to score a set of General’s Kimberly Watercolor Pencils, I jumped at the chance. I tried watercolor pencils a long, long time ago (before I really even knew a thing about watercolor painting in general), and didn’t really do well with them. I needed to make up for lost time. 

I really loved how these watercolor pencils turned out. They’re smooth, vibrant, juicy, and blendable. BUT… they aren’t watercolor paints! There’s a real distinction between the two… See? 

I love how I can get very gestural strokes with the watercolor pencils. It adds a lot of movement to the paper. I filmed a quick little tutorial on how to make your own ranunculus in the video below. I do hope you enjoy! 


Add your own calligraphy to your florals, and you’ve got a VA-VA-VOOM piece that your friends and family will love! Don’t know calligraphy yet? Consider taking my online class. It’s THE BEST (if I do say so myself. ;)). 

Watercolor Poppies Video

0 Comments

After publishing the tutorial here, I figured a video would be helpful. I hope you enjoy painting poppies this spring! 


Let me know if you end up painting some. I’d love to see how yours turn out!

Review: Sakura Koi Water Color Set

4 Comments

I’ve spent about 3 weeks with Sakura’s newest product, the 48 pan watercolor set (it’s currently sold out on Amazon). It’s fabulous. I’m loving the color and texture quality. LOVING. 

See my review below and enter to win a 36 pan set on Instagram RIGHT HERE.

If you want to learn more about how to watercolor, check out the work of Natalie Malan

Sign Painting Inspired Photo Backdrop

3 Comments

Sometimes I enthusiastically say, “Yes!” to a project before understanding the scale. It’s a problem I get myself into constantly. As much as these decisions cost me in time, I benefit in learning new things: new methods, techniques and at the very least when I should say, “no.”

melissaesplin-sign-painting-backdrop-1

AlixMegan and I were asked to head up a photo booth for Alt Summit this year. After mulling through several ideas, our theme was b&w pre-internet, we settled on some typographic backdrop for the photo booth for Alt Summit (summer 2015). It took until the 11th hour to think of what words to use.

I’m no copy editor. Coming up with copy is difficult for me. I can make it beautiful, but figuring out what to write can be like pulling teeth for me. It took several conversations as a team and an hour long phone call with my mom. I figured it would make the most sense to do onomatopoeias. Since it’s B&W pre-internet (which I thought was kind of vague) I started with the sounds you would hear from pre-internet technology like the “click and clack” from a typewriter. Then it grew from there to include any onomatopoeia that I could think of. I didn’t want to repeat the words too many times.

melissaesplin-sign-painting-backdrop-5

Initially I had thought about inspirational words or phrases, but we didn’t want readability to be an issue. The short words turned out to be great.

melissaesplin-sign-painting-backdrop-3

This sign ended up being roughly 9′ wide and 4′ tall. Doing something this large isn’t typical of my day-to-day work. Also, sign painting and lettering isn’t something that I do often. I was more than a bit out of my comfort zone here. Between that and the fact that the only space I could complete the sign was the kitchen area, stress levels were at an all-time high. My stress always sky-rockets around Alt Summit. So Chris knew he needed to steer clear. The kids quickly learned that lesson after an embarrassing amount of yelling, “GET OUT!! I can’t have you touching the paper!!”

I don’t want my kids to grow up thinking they live in a mausoleum, but I also can’t have their sticky otter pop hands anywhere close to the paper. My paranoia mounted the further along I got. Stakes were escalating, I couldn’t start over!

melissaesplin-sign-painting-backdrop-10

In my efforts to keep Pen and Felix out of trouble and my precious paper out of harm’s way, I barricaded the kitchen off with various chairs and a car seat. Chris got a kick out of it. That buffer saved my bacon a couple of times by keeping Felix from barreling through the room on his way outside.

At one point Alix came over to help fill in words with her two littles in tow. 5 kids under the age of 7 made for some interesting work time. Her kids were so good at staying clear of the paper and paint. Mine, not so much.

melissaesplin-sign-painting-backdrop-2

melissaesplin-sign-painting-backdrop-4

melissaesplin-sign-painting-backdrop-8

The event went well, but as we were setting up for the backdrop I noticed that we had an awkward blank space on the top left corner of the backdrop. I made it a point to have my art supplies with me so that I could letter names for people (that was so fun!). So it was no big deal to whip out the white paint and brush and get to work on a couple extra pieces to fill out the negative space.

melissaesplin-sign-painting-backdrop-7

If you look carefully, you’ll see that the “alt.” logo, arrow and “BAM” are a slightly different white. I had a different white, a teeny brush and I had to do it while the backdrop was hanging so I didn’t have a hard surface to work on. It certainly wasn’t my best work, but I was able to fill in the blank and make it look like it was supposed to be there.

I may be biased, but we rocked the photobooth. I’m glad I said yes to this project and got out of my comfort zone.

Project materials:

mobile site