Posts Tagged ‘tools’

A Few Of My Favorite Calligraphy Things

3 Comments

We have had our fair share of travels these days. Between partying in Vegas with Calligraphy friends, Disneyland with the kids and a Phoenix Calligraphy workshop I’m happy to be home. And I’m tired. One of the many reasons why I haven’t updated this blog in some time.

I hate the silence! Let’s fix that. :)

melissaesplin-learn-calligraphy-envelopes-2

A couple things I’ve come to obsess with over the last couple of months:

melissaesplin-learn-calligraphy-envelopes-4

In the above image I used Jacquard’s Lumiere Halo blue gold for the “Local Calligraphy Workshop” lettering. It’s one ink and the golds and blue swirl around to create this fun dance with color.

In the envelope below, I did an ombré with dioxazine purple and turquoise blue gouache. It’s more obvious in person, but the gradation is fun. And I also used the lettermate for writing guides on that envelope.

melissaesplin-learn-calligraphy-envelopes-3

You can subtly see the clear glitter gelly roll pen on the above card. It gives things the subtle hint of shimmer. I like to do swirls, but I don’t worry if they’re perfectly balanced or executed, because you really can’t see them that close when you’re looking at it in person.

In the ‘thank you’ I’m using that jacquard lumiere ink. It’s got to be diluted with water a fair amount. Mix regularly and apply with a brush, but it’s great.

I’m also using little bits of glitter glue for little dots of sparkle. I have one in every color except orange. That needs to change soon. I need ALL the colors!

melissaesplin-learn-calligraphy-envelopes-1

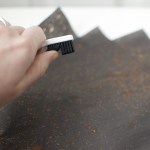
Here I’m using Jacquard’s Pearlex super bronze powder. It’s hard to convey through a picture alone how bright the metallic is. It’s mirror-like in some lights! I love it! Mix with gum arabic and water to make a useable ink.

melissaesplin-learn-calligraphy-envelopes-2

I’m using the Lettermate directly on the envelope to write the above envelopes. The top one I letter without ascenders or descenders then I take off the template and pen them in afterward.

With the Scratch envelope I wrote Franky Scratch by hand, let it dry then used the Lettermate for the address below. I added an excessive amount of flourishes between each line when I finished.

What are your favorite calligraphy things right now?

If you have no idea what I’m talking about and would like to get into calligraphy, take my class! I teach year-round at istilllovecalligraphy.com. Purchase the class and starter kit right here.

This post contains affiliate links for products I own and love. Using these links help support my craft habits. Thank you!

White Balance Lens Cap Review

11 Comments

I’ve got some exciting stuff to share with you soon: A ginormous giveaway & the big reveal of Penelope’s & Felix’s room. Their room is coming along quite nicely (well, that is if Penelope will ever stop destroying it long enough for me to clean it up & take pics of it). I’m also excited to share with you my new toy: White BAlens Lens Cap. This (besides my wireless remote), might be my favorite camera gadget so far.

I took 5 minutes to find this white balance in Kelvin. BAlens did it in 10 seconds.

I’ve never been happy with the white balance presets that any of my Nikons have had to offer & the auto can get so frustrating when in mid-shoot you have different color corrections. It’s especially annoying when batching photos to find the colors all over the map! Seriously, I’ve spent hours editing poorly exposed/balanced photos before. It’s misery.

Almost exactly two years ago I took Nicole’s table top class, where she emphasized heavily on shooting in manual & mentioned manual white balance. Since then, I’ve gone completely manual when shooting and I’ve been using my Kelvin setting for white balance. I’ve been using that for the last 1+ years and it’s MUCH more consistent than relying on presets. I’m sort of getting the hang of it, but I’m nowhere near consistent enough; especially when in dark situations with multiple light sources.

I forgot to adjust my white balance from earlier in the day. BAlens fixed that.

 This little lens cap has seriously solved all of my problems. Not kidding. You can see a huge difference in these photos, right? I sure do. No matter what, the BAlens is going to be consistent. EVERY. SINGLE. TIME. Unlike a greycard. It’s also pretty seamless to use this while capturing fleeting moments.

The lens cap is always with you – as long as you have your lens that you bought the cap for, at least . You just turn on your camera, follow your white balance preset instructions & take a picture with your cap on. Then you take the cap off & shoot away. It’s genius.

This is close, but still too orange/red.

I love that I don’t have to worry or guess anymore to find the correct color balance in low/artificial light settings. No matter the light source, this thing helps my camera properly adjust for the lighting & gives me perfect skin tones every time. That’s huge. I hate it when my pictures make me look like Snooky.

Since using the BAlens cap, I’ve cut down on  my photoshop time by 90%. No joke. SO worth the $45-65 price. This is the least amount of time I’ve spent in photoshop since I started blogging. I have better things to do with my time – like nap with my kids. Or actually do the laundry. What’s your favorite photography gadget?

BAlens provided by Photojojo – THANK YOU, THANK YOU, THANK YOU!!!

Flash!

8 Comments

I bought a Nikon SB-600 flash unit for my camera nearly a month ago. I’m loving it. I feel like a free woman now that I can take decent photos in low-light situations. When I say low-light, I mean practically pitch black. Really.

Can I brag about it for a minute? I love this thing. Let me show you how awesome this thing is:

I took these photos at my cousin’s house at midnight. Each photo was taken from the same spot on the couch using the same settings. The above shot was taken without a flash of any kind. So sad.

This shot was taken using my pop-up flash. It’s not horrible, but it looks pretty bad. Right? It’s still really dark.

Now this is what I’m talking about!!! The above image was taken using my new flash pointed at the ceiling with a diffuser cap. WOW. Isn’t it nuts the difference between this and the rest of the photos? I love my new toy, I just have to start working out my arms so I can better handle my giant camera/lens/flash set-up.

mobile site