Archive for the ‘tutorials’ Category

Tutorial: Watercolor Poppies Notebook for Journaling and Conference Notes

6 Comments

You new here? WELCOME!! Pop over to Instagram and give me a follow or check out my online calligraphy class!

Over the last few weeks, I’ve made about a dozen or so of these notebooks. I’ve made them for neighbors, family, friends and even a couple for myself. I’ve really enjoyed the freeform aspect of painting the covers as I go. I’ve gotten a few requests for the step-by-step, so here you go!
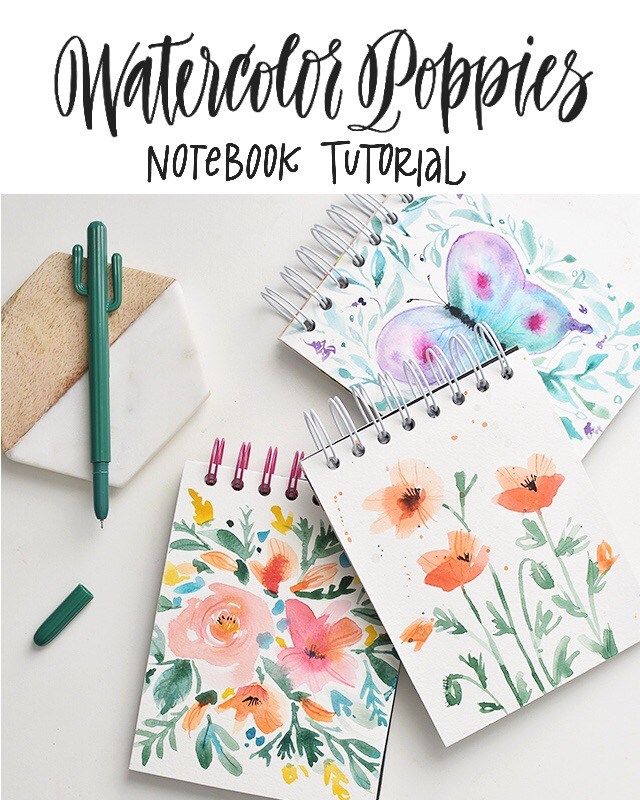
The cover material is Canson Watercolor Artboard. I was given a pad of this artboard and truly have enjoyed the thickness of this paper. It’s actually coldpress watercolor paper that’s mounted on museum board. So you can soak the paper with as much soupy water as you want, it won’t buckle. You may get a slight bow to the board, but it all goes back to its original flat shape once the paint has dried. It’s perfect for book covers!

Shall we make a notebook (or 10) together? Let’s get it going! Affiliate links are used to link to actual materials I own and use. Your support feeds my craft addiction, which feeds more tutorials. So thank you!! 

For supplies, you will need: 

* CLICK HERE TO DOWNLOAD FILLER PAPER FOR GENERAL CONFERENCE FOR THE CHURCH OF JESUS CHRIST OF LATTER-DAY SAINTS (you’ll want to print 5-10 copies of this PDF for one book)

If you’d like to just paint poppies, skip to the bottom. If you’d like to bind a notebook, you’ll want to line the underside of the boards with a decorative paper. You can use wrapping paper (I used Rifle Paper Co wrapping paper) or any kind of scrapbooking paper you choose. 

You can get your favorite paper and cut it into fourths (4.25″x5.5″), or you can download my lined filler paper and have it printed at your nearest print shop. for a .75″ coil bind, you’ll want at least 60 sheets of paper (15 copies, cut in fourths). If you don’t have a good cutter at home, your local print shop can do the cutting for you! 

First, we need to cut down the boards down to size. For a notebook that fills quarter sheets (see here for filler paper download), 4.25″x5.5″, you’ll cut your boards down to 4.5″ x 5.75″. 
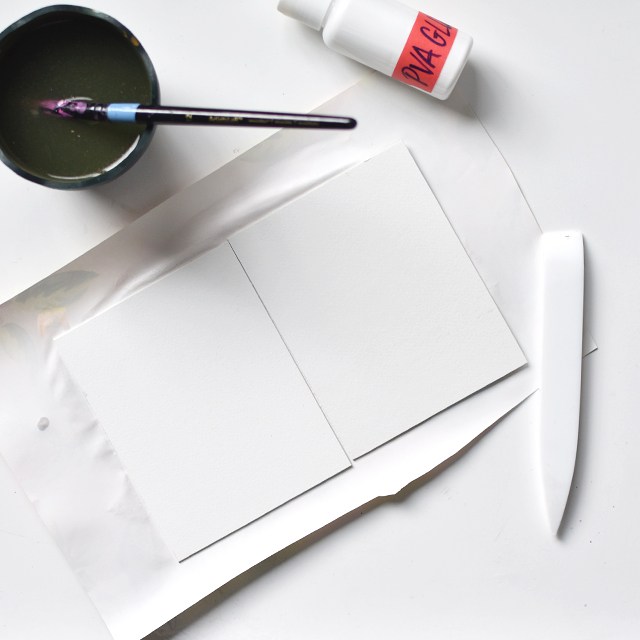
On a larger sheet of decorative paper, apply glue to the backside of the paper. Spread with a watered brush. Press the paper down, be careful to avoid getting glue on the top of your watercolor board or you will have a terrible time painting it. 
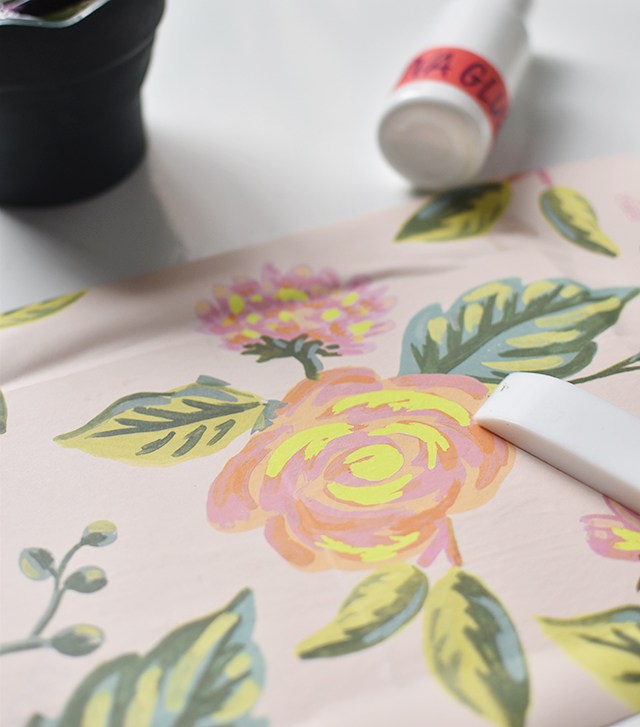
Turn the boards over and with your bone folder, work the bubbles out. 
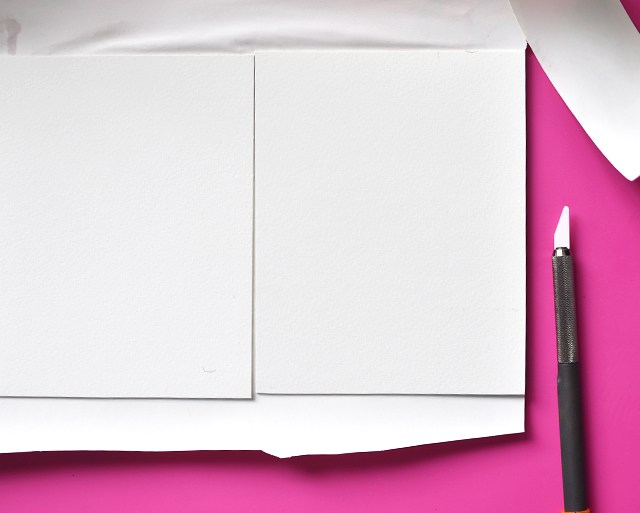
On a protected surface, cut the boards free of the excess paper with a craft knife. I LOVE this craft knife from Slice. It won’t cut skin! See my review of it here.
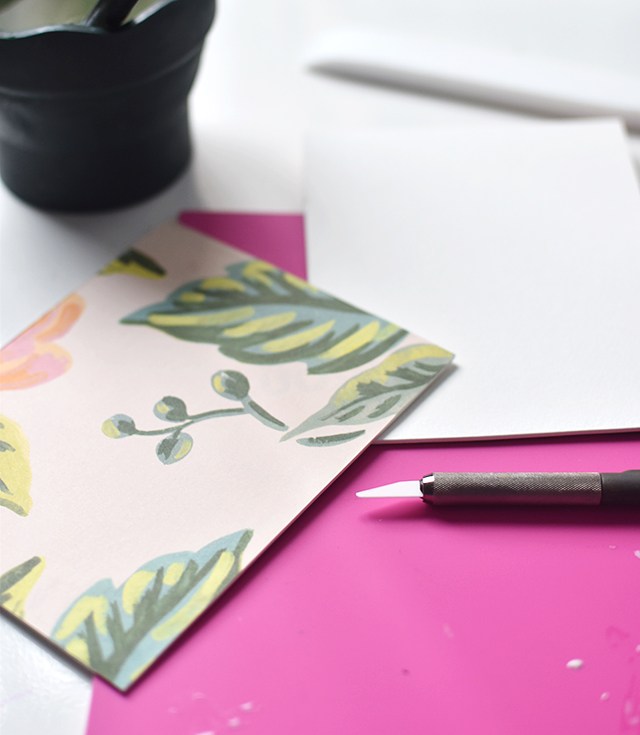
Allow to rest so the glue has time to dry. NOW on to the painting!! 
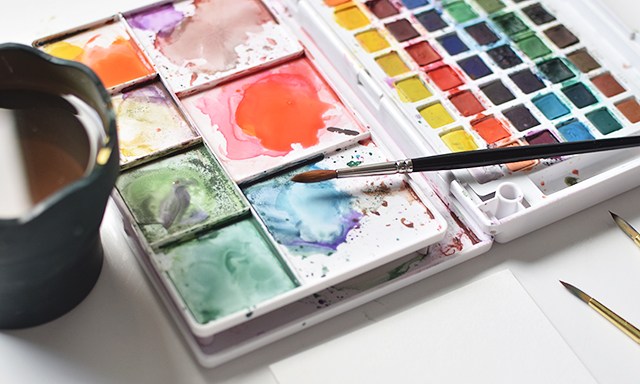
For this portion, I’m using 2 different brushes. I’m using a red sable brush (a soft, natural bristle brush), size 5 round and a synthetic size 0 round for the little details. You can use whatever brushes you have on hand, but I like the flexibility of the sable brush and how it gives me more organic lines. You can get amazing results from just about any brush, but if you’re investing in watercolor, consider purchasing a sable brush. They’re just so fantastic to paint with. 

Start by mixing 2 types of oranges. A true orange and a reddish orange. Make them soupy. You want lots of water in there to work with. 
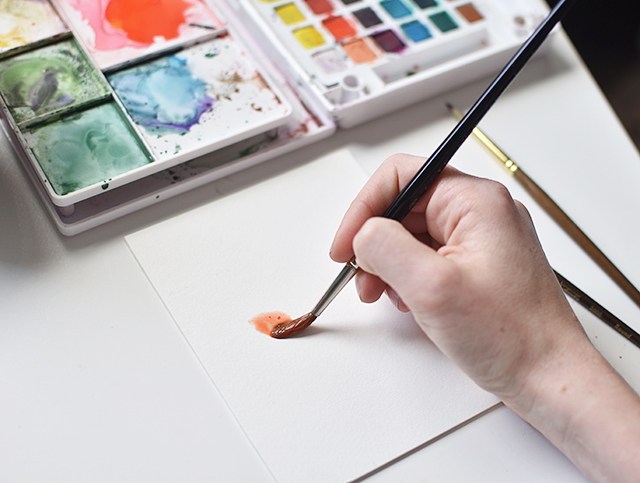
Start by picking up the lighter orange and fill your brush with that pigment. On the middle to top third of the board, I make organic ‘V’ strokes. Start heavy and thick at the top and release pressure so you have a point towards the bottom. It doesn’t matter where you put them. Make about 3. Allow the watercolor to dry. 

If you want an open poppy, scribble a couple of ‘v’s and a rounded bottom. Drop the darker, reddish orange in the wet middle of the open poppy. 
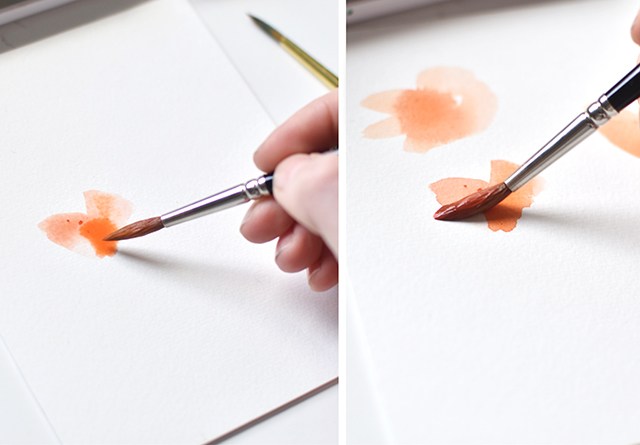
Once the first set of marks have dried, add another ‘V’ stroke, align the bottom of the ‘v’ in the same spot as the lighter pigment, but offset the tops of the ‘v’. 
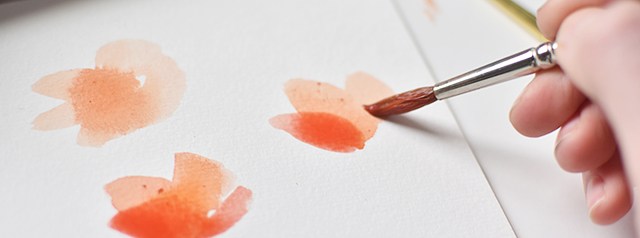
The one on the lower left wasn’t quite dry when I added the darker color, so there isn’t as much of a separation of pigment. That’s totally okay! You can see on the right ‘V’, that there’s more a separation of color. Making them slightly different gives each flower a more organic touch. 
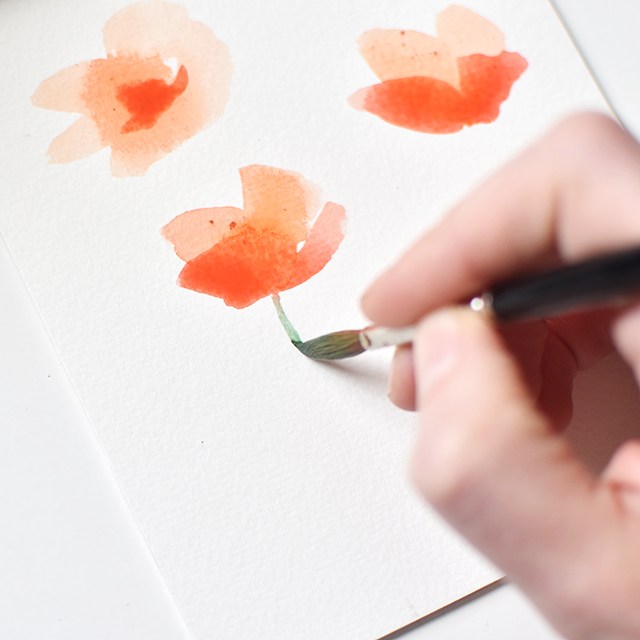
While the bottoms are still a little wet, draw in the stems. I like to create a varied, organic, almost awkward stem. Drop some darker bits of green color in there for some variation. When it comes to mixing the green stems for poppies, I go for a mid-toned, warm green. No jewel-toned greens here, otherwise the orange won’t pop. 
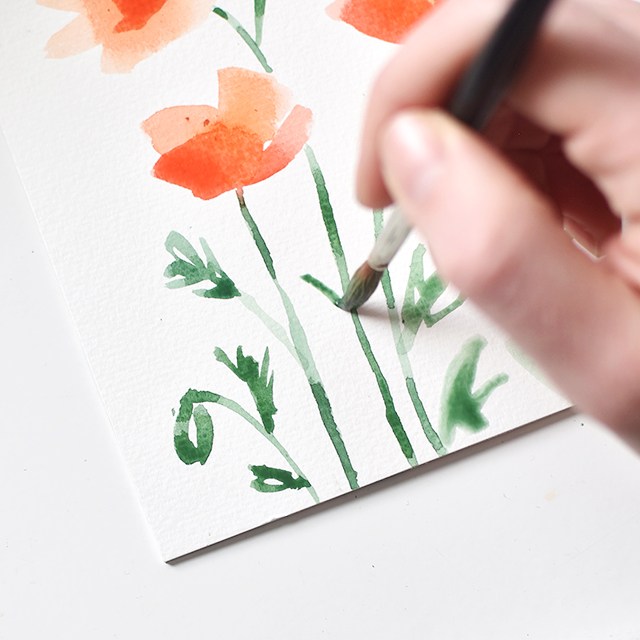
You can leave your painting simple without any leaves and just do the stems, but I love how easy these leaves are. With the tip of your brush, draw little scribbles. Little zig-zags that go into each other for the leaves. I also like including pods, the stems tend to arc downwards and have a cupped ‘c’ shape on either side. You can be quite abstract with those shapes. 
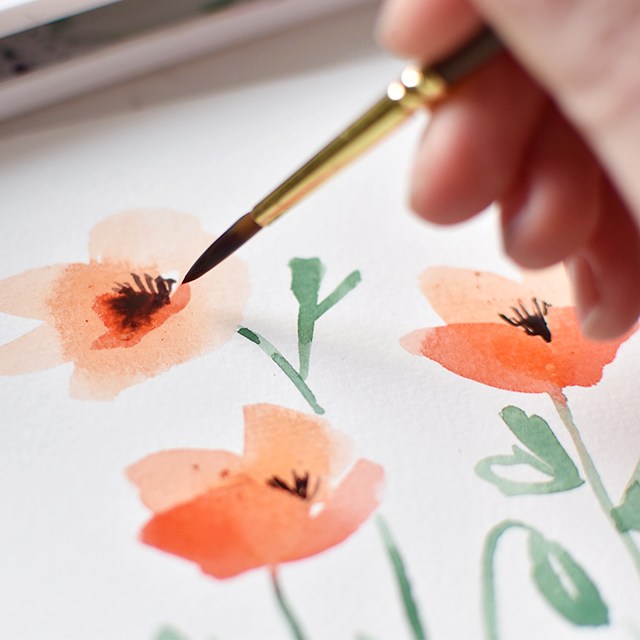
Now that the greenery is done, the poppies are dry enough for the middles. The centers of poppies are black with little bits of yellow pollen. I like getting a muddy blue-ish black to paint the middles. On the open flower, you’ll draw a circular-ish (again, don’t be perfect) shape with black stamens coming out of the black. You can add yellow to the tips. That’s where the pollen lies. For the profile flower, have the stamens coming out between the front ‘V’ shape. 
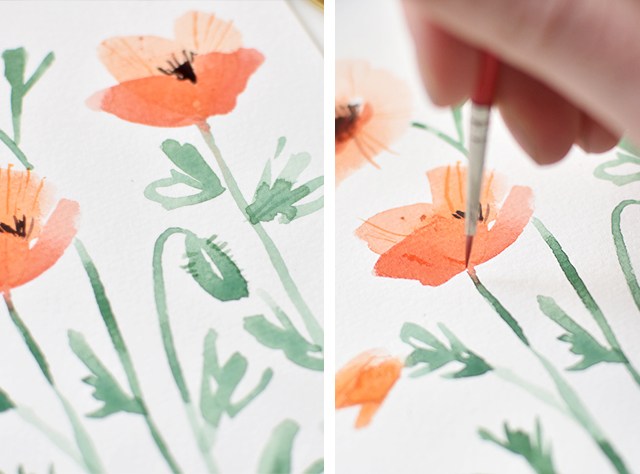
With your #0 brush, grab a yellower orange and make little lines coming out of the ‘V’ shapes. Make them squiggly and imperfect. Then add fuzz in green to the pods. 
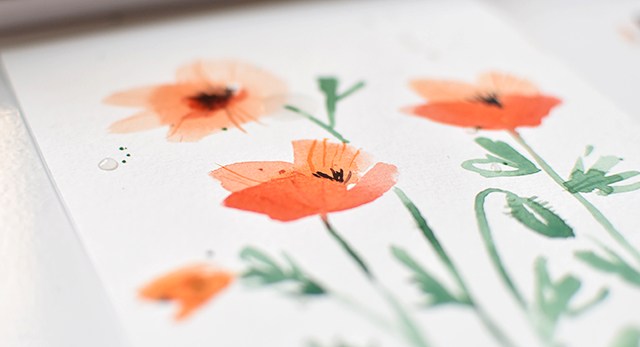
Boom! DONE! So easy, right? I like to add little splatters afterwards. Because it’s fun. 
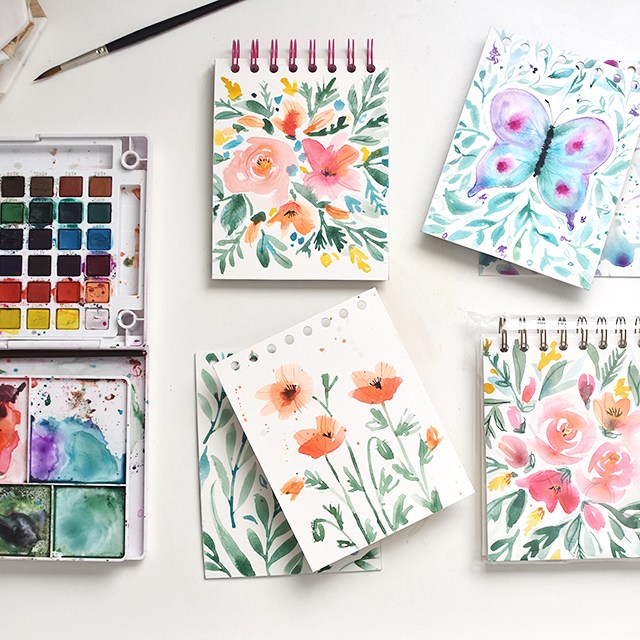
For the back covers, I used complimentary colors and something simple like just leaves or a splatter pattern. Easy, peasy. 

 I used this tutorial from Ink Struck Studio for the butterfly cover and I learned the roses from Natalie Malan.
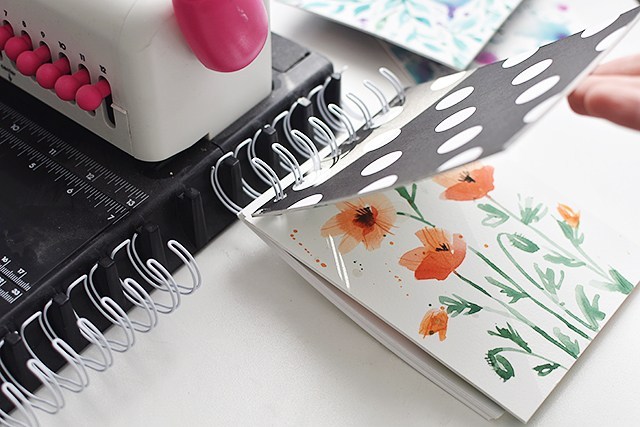
Now for the binding part. You can take the un-bound journals to your local print shop and they’ll do it for you. OR, if you have a tool like the Cinch, punch holes in the covers and filler paper separate. But make sure that the holes are centered. Put the filler paper on the coils, then the front cover, then the back cover (facing the front cover). This will allow the coil edge to be unseen on the inside back cover. Crimp down with your binder tool. 
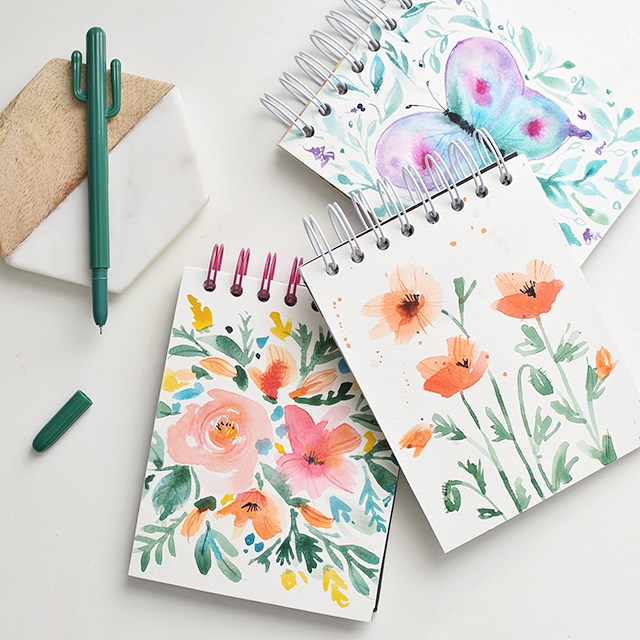
Now they’re ready to gift! Or keep. I like to hoard the things I’m most proud of making. ;)

This tutorial and accompanying printable is free for personal use. 

Tutorial: Coffee Filter Flowers

0 Comment

Hello friends! If you’re here from Studio 5, welcome! I hope you take a look around at my printables and tutorials. If you’d like to sign up for one of my local workshops, click here (or the image below). If you’d like to take calligraphy online, check out my offerings here.

On to the tutorial, shall we? 

Many months ago, I made these versatile coffee filter flowers with friends. Elsa brought all the supplies and we made tons. I made enough to decorate Penelope’s birthday party and my Christmas tree. With very little effort. I believe in all, my collection of flowers took 4-5 hours to make. When you batch it with friends, you can make even more! The great thing about these is once they’re made, they last forever and you can use them for just about any occasion. Add some fresh foliage from the yard and you’re good to go! 

Or stick them in a pot with succulents for a little added color. Here’s how you do it: 

Coffee Filter Paper Flowers DIY

First, let’s grab materials to dye the coffee filters. Since you’re not really laundering the flowers, you can dye them with anything. Dye with Rit, watercolor, heck I’m sure you could use food coloring. I like how permanent my results with Rit were. If you want more granulation and variation in the dye, use powdered dye. 

SUPPLIES for DYEING: 

I love using those hospital bed pans. They’re easy to come by and it doesn’t matter if you stain them with your dye. Also, the hotter the water, the faster the dye process. 

Fill the basin about 1-2″ deep, you don’t need it super deep, with the hottest water you can get from the tap. Add dye. If you want a muted color, add about 1 tablespoon of dye. If you want it more saturated, add more! Pull off a section of 20 or so coffee filters. If you want more color variation, use larger chunks of filters in the dye bath. Dip in and pull out. The longer you soak them, the more consistent the color will be from filter to filter. So I like to pull them after soaking for about a minute. Separate filters and place on a towel to try. For quicker dry times, you can put them on your heater vents (if it’s winter), or out in the sun (if it’s summer). 

Now to make the flowers, you need: 


Fold your filters in half. Then in half. Then in half. THEN in half again! Cut a round or pointy end. Then halfway down, do it again. These two pieces will be for flower steps 1 and 2.

Cut the second filter the same way. Add feathering if you’d like with multiple cuts on one or all of the pieces. More feathering, more volume it will have. Cut to the center on one side.

Grab the smallest piece and add glue to one side of the slit. Roll it around your wire stem and hold in place. Bring the rest of the petals around and glue securely.

Grab the second largest piece and glue one edge. Hold in place to allow glue to set. You’ll gather and pinch the bottoms of this layer together as you glue to add more fullness to the flower.

See the difference between the steps? It progressively gets more full. IF you want more volume, add even more layers! 

For the last step, complete like the first. Add glue to the center portion of the coffee filter along the slit. Attach to the flower and wrap around. Glue as you go to secure in place. 

Fluff out and add glue drops to the edges for dew drops!

Here’s a video detailing each of the glue steps:

There you go! Enjoy! 

*This tutorial is free for personal use and should not be distributed/republished without my consent. If you would like to use this tutorial for commercial purposes, please email me. Thanks!

The Right Calligraphy Materials

0 Comments

One of the many draws to calligraphy as a hobby is that it’s a desktop craft. It can take up as much space as a simple shoe box. Or it can take up several rooms. But the shoebox is where it starts. It’s not like skiing where you have to get the skis, and the boots and the bindings, and the pants and the jacket and the gloves and the poles and the goggles and… and… and…

learn-calligraphy-pen

Getting into calligraphy can be as simple and cheap or as expensive and elaborate as your budget allows. There are fabulous materials in every price range. Let’s break it down into 3 price ranges, shall we? This post has been created with affiliate links, but I strongly recommend ordering through Paper & Ink Arts regardless. They have fabulous customer service and tons of amazing calligraphy-related products.

ON THE CHEAP

You really can get great materials without spending a pretty penny. But there are a couple of caveats that go with going bargain-basement. Once you understand the limitations, you can better enjoy the cheap-o supplies.


Ticonderoga pencils are smooth and cheap. Easy to find as well. But you have to sharpen them by hand. That’s a bit of a bummer.

The bargain nibs listed are wonderful! However, one or all may not be ideal for your particular style or touch (nibs are like boyfriends, you might not like some and that’s okay). These nibs listed are guaranteed to be easily found at most art stores and will fit your Speedball Universal Holder. The Zebra G, Nikko G and Tachikawa G are great beginner nibs, but do not fit in the universal holder. You may be able to make it sort of work, but the orientation isn’t going to give you stable results.

I use the lacquered straight holder quite frequently. It’s great, but DO NOT get wet or the wood will split. The pen is still functional after the wood has split, it’s just less comfortable.

Higgins Eternal is a great ink! The consistency right out of the bottle is easy to work with and it’s not terribly corrosive to the nibs (just a teeny bit corrosive). The bottle is prone to leaking (don’t let the bottle freeze or it definitely will leak) and the ink doesn’t work on all paper types.

You may see some feathering and bleeding with Higgins on the Hammermill paper. You can still get great practice in regardless of the feathering ink, but if you see yourself being bothered by the feathering, try a different paper (see other paper options below). The Hammermill paper is great for beginners as you can easily print out guidelines directly on top of the paper and you can buy in reams for those heaps and heaps of initial practice.

melissaesplin-waterproof-calligraphy-inks-2

Mid-range investment

If you’re in a spot to splurge a little more, get the mid-range materials and the bargain basement materials (like the nibs, ink and paper).

Canson Marker Layout Paper is semi-transparent and handles ink well. I like to print out my guidelines and slip them underneath the paper. It handles all inks well.

Using a mechanical pencil is convenient since you don’t have to sharpen the lead, it’s great for practicing in pencil and laying out compositions.

Peerless oblique holders are a little more expensive than the Speedball Oblique, but you can get them fitted to the larger nibs listed above. Those larger nibs are great for beginners and heavier hands, with the exception of the Leonardt Principal, it’s just a great nib to try.

The straight holder is going to be a little more water/ink resistant since it’s made with a slightly harder wood.

Sumi ink is super black, so you get nice stark lines. It takes forever to dry so I like to mix it with water, Higgins Eternal or Walnut Ink to dilute it.

melissaesplin-christmas-calligraphy-workshop-online-learning-3

 Highish-end Investment

I say highish-end because this isn’t the highest end. If you want to go all-out, you’re getting everything on all these lists list, gold inks, a custom turned holder and on and on. The sky is truly the limit on what you can spend on calligraphy materials. But that’s a different post (here is a gift guide for splurging) for a different time. But when it comes to just starting out, these materials listed are going to get you there with the least amount of frustration. But you may notice, there’s not a huge difference price-wise between the cost of materials in the budget end and the highish-end.

Rhodia paper handles all kinds of inks. I use gridded paper because guidelines are already printed on there. The walnut ink is silky and smooth (it also ships well because it comes in crystal form that you dilute with water) and gives you just a little bit of transparency and fast drying times.

The copperplate sampler is a wide range of nibs you can try out every one and see what suits you best. The adjustable oblique will fit any of those nibs. The mahogany straight holder is made out of a hard wood (obviously) that does well for pointed pen work. It’s also gorgeous.

So there you have it. You want to get started with calligraphy? Stock up on any of these things.

Want it all done for you? Purchase the Calligraphy.org kit. And heck! While you’re at it get the calligraphy class, too. The class includes lifetime access to the content (which gets new content annually) along with 30 days of instructor feedback. And it’s not just “great job” or “awesome”. We tell you what’s working well, what you can improve and give you bonus materials to help you keep going and troubleshoot.


DIY: The Lazy Girl’s Pillow Case

5 Comments

My in-laws have this oxford shirting sheet set that had me thinking that I (a) need that sheet set and (b) I could probably whip up a pillow to match asap with an old oxford shirt.

melissaesplin-sewing-buttonup-pillow-1

I haven’t taken the plunge for the sheet set (our kids are so gross, I’m sure it’d be stained with licorice goo or something within the first five minutes), but it’s on my radar. The pillow was a no-brainer. And took the equivalent in time to make (and photograph for this easy-peasy tutorial).

melissaesplin-sewing-buttonup-pillow-2

Grab a pillow, if you have an old cover you’re replacing, use that as your guide. If I don’t have to bust out the rulers, it’s a win in my opinion. Rulers just slow these Edward-scissorhands digits down. ;)

Materials:

  • A large old Oxford shirt (I found mine at a local thrift store)
  • Pillow form
  • Old pillow cover as a template (or a ruler)
  • Oversized washers
  • Scissors/rotary cutter
  • Cutting mat
  • Sewing machine

melissaesplin-sewing-buttonup-pillow-3

Be sure to wash and iron the shirt beforehand for best results.

Lay the shirt on your cutting mat. Flatten out any pleats so you get two flat layers. Pin the old pillowcase down with washers. If you don’t have an old cover to work from, Measure a 19″ square with your ruler for a standard 18″ pillow.

Place the cover off-centered over the front buttons. By placing it off-center, you have less puckering/bulging at the opening. And it looks cool.

melissaesplin-sewing-buttonup-pillow-4

Cut out your square, leaving about a 1/2″ seam allowance on all sides. Eyeballing is a-okay.

melissaesplin-sewing-buttonup-pillow-5

melissaesplin-sewing-buttonup-pillow-6

Turn right sides towards each other, pin and sew all four sides together.

melissaesplin-sewing-buttonup-pillow-7

Un-do the buttons and turn right-side out. Iron out the corners.

melissaesplin-sewing-buttonup-pillow-8

Place the pillow form inside, fluff and done!

melissaesplin-sewing-buttonup-pillow-9

Super easy. No worries about enclosures, no hemming, nothing. This is the easiest thing you’ll do all week. Promise.
 

DIY: Having Fun with Plain Wrapping Paper

0 Comments

I don’t have giant stashes of gorgeous wrapping paper. I have rolls of white, black and kraft butcher paper. And the occasional roll of gift wrap. But it doesn’t always match my mood or occasion, so here’s a fun little DIY I did to dress up my gifts this year.

melissaesplin-sakura-decorating-gift-wrap-1

Santa doesn’t have this much creativity when it comes to his gift wrap. That would take him way too long.

melissaesplin-sakura-decorating-gift-wrap-6

The key to this whole operation is in the marker. Some time ago Sakura sent me their Pigma Professional brush series. I use them for everything. Heck, they’re even in our brush lettering kits that I send out to all of my beginning brush students. These brushes come in 3 sizes: fine, medium and BOLD. I use the fine brush for small detailed work and little illustrations. I’ll use the medium in cases where my x-height letters are about 3/4″ tall. The bold I’ll use for everything else.
The bold brush is pretty stiff so you still get very fine hairlines even though you can get a ton of drama out of the side of the marker.
melissaesplin-sakura-decorating-gift-wrap-2

And when mine dry out, I’ll use them on textured paper for a more organic look (like above). Want to learn how to make these easy-peasy holly berries? Watch the video below.

Supplies

  • Pigma Professional BB Brush
  • Large sheet of white or kraft paper
  • Sakura Koi red marker (optional)

I love the BB brush, but you can get similar results from even a crayola marker. Granted, if you want this kind of drama to scale, you’ll need to make smaller holly berries and leaves.

Basic jist: get a piece of paper and spread it out on the floor or table. Draw out the berries first in random clusters of 3. Then draw in the center of the leaves, coming out from the berries with a light touch. A fine line helps. Then fill in the remainder of the leaves with two mountains and meeting just beyond the tip of the center line of the leaf. Fill in any awkward blank spaces with leaves. Messy is usually better in this case.

melissaesplin-sakura-decorating-gift-wrap-3

If you want to go for a more ornamental approach, draw out a berry grouping on cardstock. Watercolor paper is going to give your cluster more texture and depth. Punch a hole near the cluster of berries.

melissaesplin-sakura-decorating-gift-wrap-4

With your scissors, cut around the cluster leaving a 1/4″-1/2″ border. Thread through ribbon or string and use as a decoration on your gift.

melissaesplin-sakura-decorating-gift-wrap-5

Easy? Brainless? Awesome? Yes to all three. Happy last-minute gift-giving and wrapping!!

mobile site