Posts Tagged ‘thrifted’

Refashioned: Geometric Sweatshirt

16 Comments

Last night was the storm of the year. We woke up to about 3 inches of pure ice. So today I decided to refashion something that I was thinking about saving until next fall/winter. With all this cold, wet weather I know this will get a lot of use.

melissaesplin-refashion-sweater-1-before

Some great friends of ours gave this sweatshirt to Chris. It’s AMAZING. I love the geometric shape. Chris got some use out of it, then he started working out and gained a bunch of weight. The man is a beast, so I stole this from him.

It’s pretty big on me. Mostly the pits and upper arms are the biggest. It’s also too long in the sleeves.

melissaesplin-refashion-sweater-3-after

So, I grabbed my favorite sweater and used it as a template for taking in the sides and shortening the sleeves. Once I pinned and marked the sides, it was a 20 minute fix. It made all the difference in the world.

melissaesplin-refashion-sweater-5-after

I’m pretty stoked about this new sweater, the geometric lines are amazing.

melissaesplin-refashion-sweater-6-after

Outfit details:

  • sweater: hand-me-down, thrifted
  • pants: Anthropologie, refashioned
  • shoes: Eddie Bauer, hand-me-down


Sewing: Granny Sweater

11 Comments

My dermatologist says I need to wear long sleeves more often. And by more often, he means all the time. That’s right. A little nuts perhaps? Maybe. But if it can make my skin look awesome when I’m 40, I’m going to give it a try.

Over the last 6 or 7 years, I’ve started taking better care of my skin. I should’ve started doing it 13 years ago before I went tanning in a tanning booth for the first time, but late is better than never. I’ve really come to embrace the pasty skin I was born with.

melissaesplin-sewing-granny-circle-sweater-1

With that in mind, I’ve been on the look out for fun light-weight sweater knits. I found this funky grandma-esque sweater knit (similar here) and knew I wanted to make something with some serious length in the back. Last night as I got started, I thought I should really make a test muslin first but the part of me that was looking for instant gratification won out. I had to make it now, I could alter the fit later.

melissaesplin-sewing-granny-circle-sweater-2

I used an old sweater of mine as the “base”, and sort of winged the details. Miracle of miracles, the sleeves were perfect as was my pattern matching. This project couldn’t have gone any smoother. Really.

I also wanted it to be loose, but still have some shape to it, so I sewed a leather “belt” of sorts on the back. I think it’s a nice detail.

melissaesplin-sewing-granny-circle-sweater-3

The odd thing about this fabric was that the most stretch occured opposite of what you would assume. I liked the horizontal chevron more than a vertical zig zag, so I just ignored where the stretch went. It’s a slight issue at the sleeves, as I wanted a tighter fit, on the arms, but not that noticeable.

melissaesplin-sewing-granny-circle-sweater-4

Originally I had front hemline at a point with the high-low, but it looked funny, so I rounded off the bottoms. I think it drapes better this way. I also wish the colors in here were less subdued, but they’re still lovely. I love the coral in there. And browns look pretty good on me. I think. Now that I have a pattern I know that works, I really want to make more of these. Making this cardigan (drafting the pattern, included) was just over 3 hours. I’m sure I could whip one up much faster now.

melissaesplin-sewing-granny-circle-sweater-5

Outfit details:

melissaesplin-sewing-granny-circle-sweater-6

Sweater knit provided by Fashion Fabrics Club.


Refashioned: Bright Green Outerwear

10 Comments
glassescom-logo-1This post has been brought to you by Glasses.com – your online retailer for outdoor eyewear. Shop our selection of designer eyeglasses, sunglasses, and rx sunglasses and receive free shipping on your order.
For more information, check us out on Facebook!

post-separator

I’ve had this jacket for ages. It’s part of a skirt suit hand-me-down from my mom. Totally 80s, right? It’s amazing, but it was (until now) much too big. Well, sort of. I’m about the same size my mom was when I was her age, minus the chest and hips. And considering that the style of jacket in the 80s was boxy around the shoulders and roomy around the arms, this did not flatter my frame as much as it did my mom’s. I remember seeing my mom wear this on Sundays and thinking, I have the prettiest mom in the chapel. Every child is biased, but I was still right.

melissaesplin-refashion-tailor-sewing-jacket-lining-1

I actually used to wear this jacket out in high school and college on a semi-regular basis and always on St. Patty’s day. Little known fact – I really wish I had had a fashion blog through my college days, particularly my freshman year. My goal was to never go a day wearing just a tee-shirt and jeans. And I never did. I often work skirts and suits to school and work, and rarely did I ever not wear heels. I was always dressed to the nines with layers and accessories. Often times I wish I could remember all those crazy outfits. So despite me wearing this on a regular basis, I have no photos of me wearing this before my alteration. And I have no idea what happened to the before pictures that I took, either. It’s a real shame.

melissaesplin-refashion-tailor-sewing-jacket-lining-2

Taking in this jacket was about as complicated as taking in this rain coat. When I took in that coat, I just removed the lining and never reattached. This time I wanted to keep the lining intact and proper. I separated the lining where it counted, turned it inside out (it looked like an undescipherable mess) and zipped up the sides. It was easy enough, but I quickly realized that I couldn’t take in any at the armpit because it would either look wonky or I would have to completely deconstruct the coat to take anything in at that point. So I tapered off at the pits. It’s a good thing, too, because it seems to fit perfectly that way anyway.

melissaesplin-refashion-tailor-sewing-jacket-lining-3

You can see my small frame much better with this jacket now than before. Oh did I mention I took out the 3 inch thick shoulder pads? Those pads were beastly! Thank you, 80s.

melissaesplin-refashion-tailor-sewing-jacket-lining-4

It’s a little more kelly green than the pantone of the year, but I’d say it still counts as being on trend for 2013. I’m very happy with my “new” jacket. I’ll be getting even more use out of it now.

Have you ever altered anything with a lining? What kinds of tips can you offer if you have?

Outfit details:

  • scarf: Soel Boutique
  • earrings: H&M
  • top: Kohl’s
  • jacket: hand-me-down
  • jeans: PacSun, refashioned
  • shoes: thrifted

Sewing: Silk is A Pretty Beast

11 Comments

One of my favorite new aspects of the Alt Summit conference was that the bulk of sponsors did not give out swag at the conference. They mailed it to our doorstep the months leading up to the big week. Brilliant. I can devote one-on-one attention to some very neat, hand-picked brands and I don’t have to lug anything home. This was probably the most effective and tasteful brand-placement I’ve seen at any conference I’ve attended. Good Job Alt peeps. Good job.

melissaesplin-sewing-with-silk-kollabora-1

Kollabora sent us special gift codes that went towards a purchase on their site. Of course, I used my gift code for fabric. Their other supplies were tempting, but look at this silk! I’ve bought silk before, but I haven’t really worked with it until now. Not from scratch, anyway. I wanted to make sure that I did everything right with this yardage, so I did a little (not a lot, mind you) research. Here are a few tips that definitely came in handy:

Use a pattern that’s a winner. Silk is so tricky to work with, you don’t want to be altering anything afterwards, so either make something that’s a winner or draft up a muslin before-hand. I drafted this skirt pattern from scratch, but I had made it before (here) and it was a real winner. The drape of the fabric was a perfect fit with this particular pattern.

melissaesplin-sewing-with-silk-kollabora-2

Pretreat. If you plan on dry cleaning the silk in the future, no need to do this, but pre-wash the yardage beforehand if you plan on laundering the garment yourself. I just threw the yardage in with my regular wash, but I’ll definitely be hand-washing this now that it’s made. I don’t want my 35 year old top-loader to rip it to shreds! It’s nice to have the option, though. If you’re not sure about how the silk will wash cut a small swatch and see how that does in the laundry first. I’d hate for you to mess up some $80 a yard fabric because of my previous success with laundering silk!

Cut carefully and cut once. My pattern pieces were all on heavy paper, so I trued up the grain on my fabric, carefully laid out the pattern pieces, weighed them down with weights and cut each piece out with a rotary cutter. Jen has a fabulous tutorial on how to cut silk (or slippery threads) with scissors.

melissaesplin-sewing-with-silk-kollabora-3

Finish all seams. If you have a serger, use that. If you don’t, you’ll want to encase all of your seams with binding or French seams. You don’t want any raw edges showing.

Use a silk needle. Use the sharpest needle possible. I used microtex with great success.

Pin twice, sew once. Go slowly if you have to, but try to get your seams done right the first time. It’s fine if you have to unpick the silk, but you’ll still be able to see those old holes from the previous seam.

Iron carefully. Use the silk setting on your iron and/or use a presser cloth. I just have a sheet of white quilting cotton that I use. I can use my highest setting, and as long as I’m using that cloth over my precious fabric, nothing will go wrong. Nothing should, anyway.

melissaesplin-sewing-with-silk-kollabora-5

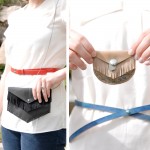
I think this goes without saying, but I love my new skirt. The fabric drapes and flows so nicely as I walk, and it’s so silky and soft. Probably the nicest fabric I’ve worked with ever.

So have you worked with silk before? Am I the only one who trembles behind the knees at the thought of working with something so nice?

Outfit details:

  • top: H&M
  • bow tie: handmade
  • bracelet: thrifted
  • skirt: handmade
  • tights: H&M
  • shoes: thrifted

Fabric was provided by Kollabora, this is not a sponsored post.


Sewing: Banksia Cape Top

10 Comments

I’ve been sewing like crazy these days. My goal is to have at least one handmade item on my person at Alt. Considering there will be four day looks and three evening looks, it’s a heck of a lot of stuff. Fortunately, I think I may have over prepared! I think. We’ll see how the next skirt turns out.

I’ve had the below fabric in my stash for a few months, knowing exactly what I wanted to make with it. I wanted to make a high-low cape top (kinda like Penelope’s). Something that flowed nicely in the back, but wasn’t too muumuu-ish.

I took one of my favorite shirt patterns (this is really the second time I’ve made a banksia top, but I wear my first one practically every other day), and altered it in the back to fit my style. I made room for the yoke and back pleat. I also had to take in the front piece a little (ditched the darts, too) to keep it looking form-flattering.

You can see the back is constructed of two pieces. I sorta wish I had made the back with a more pronounced pleat, but I like it all the same.

It’s a pretty dramatic high-low here, but I like that I can wear it with my leggings and it’ll cover my bum. Chris and Eric (brother-in-law who’s living with us right now) call it the CYA shirt . . . you know, cover your ___. I’m not sure Chris is as jazzed about the style of this shirt as I am, but that’s okay. I only dress to impress my girlfriends these days anyway.

I like how I can pair this top with a belt or leave it loose. I’m still trying to decide how I’ll style it for alt (likely there will be a sweater in the mix).

Outfit Details:

  • top: handmade
  • belt: vintage
  • pants: Target
  • shoes: thrifted

Have you been sewing much lately?

mobile site