Posts Tagged ‘guest post’

Guest Post + Printable by Carrie of Bedtime Tales

33 Comments

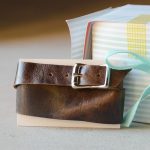
Thanks everyone for all of the well-wishes here & on twitter! Your kind words have made my week. Felix & I are doing well (he’s currently asleep on my chest), I’ll give a full update on Monday. Also, a huge thanks to Carrie of Bedtime Tales for offering her talents with a guest post and a printable! I’ve known Carrie since my college days in ’06. She’s such a kind, creative person. Penelope & I will definitely be doing this project soon.

•  •  •

Since Melissa introduced me to blogging, I began to explore the “blog world” a little deeper and I found that it is a wonderful thing to share beautiful, personal art online.  So, once my artsy sister, Becka, started her own blog, I jumped aboard with both feet. Now, after almost a year of craft-blogging, I can say that I find the free-sharing of creative ideas and projects more satisfying than ever!

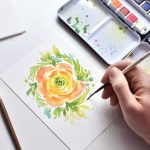
My sister and I run a blog that fits well into the “creative living” category, posting about family recipes or DIY projects.  However, our personal specialties are found in bedtime toys and tales (hence our blog title, Made by Bedtime tales).  Becka likes to create cuddly, homemade stuffed animals and dolls.  I love to capitalize on original stories and illustrations for my kids.

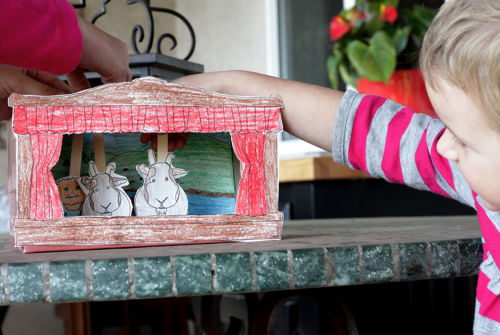
Our dream is to one day sell handmade, ornate, small wooden puppet stages that you can share with your children at bedtime.  Until Becka and I get that dream up and running, however, we’d like to share with you a small, printable puppet stage pattern!

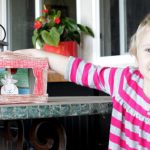
I’ve seen a number of online patterns for “green” doll houses made out of recycled cardboard boxes.  Well, this is a similar idea here, only we’ve designed a way to make a puppet stage out of an old, empty kleenex box and some cardstock.  This pattern comes with some printable puppets that attach to popsicle sticks and a funky ad-libs script for your own fun, family-night puppet show.

So, please enjoy the FREE printable pattern ;)

And thank you, Melissa, for all the years of free printables, tutorials and fun DIY projects!

-CK

IF YOU HAVE TROUBLES OPENING FILES, I’M SORRY FOR THE INCONVENIENCE. I DIDN’T MAKE THE FILE SO I CAN’T PROVIDE SUPPORT FOR THE DOWNLOAD 

download-button-1

This printable is free for personal use & should NOT be distributed or republished without consent. Altering files is NOT ALLOWED. If you’d like to use this for commercial purposes, please email Carrie.


Proudest DIY Moment by Guest Summer & Matty

9 Comments

We’re Summer & Matty, and we’re honored to guest post on ISLY, a never-ending source for creative inspiration! We started Domestic Nest just about a year ago. We have two etsy shops, one for our leather goods, and one for other handmade wares. The Domestic Nest Blog is where we write about our home, our business, and whatever else strikes our fancy.

Every month in 2010, we’ve made a specific nesting resolution to improve the aesthetics or function of our home. One of our favorite projects has been the makeover of our entryway. It’s a large space that deserves a grander purpose than simply passing through. In addition to our $7.50 fireplace facelift, we created a workspace. The crowning glory of the room is Matty’s proudest DIY moment. The desk!

The desk is made from scrap wood left over from building our fence, and is the perfect size and height for its purpose. It’s eco, sturdy and good lookin’.  We had plans to cover the top with glass, but we decided against it. With time and a bit of sanding, the wood texture feels just fine. We’ll see what else is born from the fence scraps. We’re working on some custom frames and market displays. The challenge of using scraps or thrift finds in DIY projects fuels our creativity. The best part is tackling the job together!

Thanks, Melissa, for inviting us over. We’ve really enjoyed seeing everyone else’s proudest DIY moments. What fun!

Proudest DIY Moment by Guest Tiffany

10 Comments

Hello IS•LY readers. I’m Tiffany from Simply Modern Mom. And I am excited to be here to share with you my proudest DIY moments. Going through my list of tutorials, I had a hard time deciding which one was my favorite. They all had a special meaning to me at one time or another. After contemplating it for a few days, I decided to go with my pillowcase dresses — the pleated bow pillowcase dress and the retro ruffle pillowcase dress.

The reason why these are my proudest DIY moments is because they were the first dresses I designed all on my own. The ideas popped into my head then I sketched out the idea, figured out the measurements and how to piece it all together. I also used pillowcases I found from the thrift store for 50 cents each. It was no big deal if the dresses didn’t turn out. But since they did turn out, I made my daughter two new dresses for 50 cents each!

This pleated bow pillowcase dress turned out differently than I had sketched in my book. Originally it had pleated sleeves and just pleats in the front. Once I started making it, I forgot the sleeves and added the bow because I thought the pleats alone looked a little plain. And the white trim at the bottom of the skirt was a last minute idea. I had scraps leftover from the pillowcase and didn’t want it to go to waste.

Next, the retro ruffle pillowcase dress was actually my first pillowcase dress design. I found the pillowcase first and loved the pattern and colors. I knew I wanted to make a dress out of it and give it a retro style. This dress turned out great except I made the collar a little too big. It didn’t turn out to be a huge deal because I could tighten by shortening the ribbon on the back of the dress. I love little girls in blue dresses, don’t you?

If you want to make these dresses, go to Simply Modern Mom for the full tutorials.

Happy sewing!

Tiffany {Simply Modern Mom}

Proudest DIY Moment By Guest Madeline

17 Comments

Hi, I’m Madeline. I love all things pretty, and blog about budget style & fashion over at Über Chic for Cheap. I got to know Melissa when we bunked (yep, I said bunked) together at EVO. It was ridiculously fun and Melissa is ridiculously awesome, but you all know that.

Sometimes I see something lovely and expensive and I fall in love with it. The next days and weeks are spent feverishly plotting ways to get that something for myself – without breaking the bank. My proudest DIY moment came about from one of these times. I started coveting this Anthropologie Hidden Hummingbird Tank the second I saw it.

Isn’t it gorgeous?

As soon as I saw the $78 price tag I started plotting ways to make one of my own. Then I remembered this ridiculously awesome fabric that has been in my mother’s fabric stash since about 1991.


It’s a single side floral printed fleece. My mom said she bought it to make my little first grade self a sweat suit. So awesome. I cut the flowers and leaves out to use in my design. I also cut leaf shapes out of the solid blue portion of the fabric.

I laid out the pieces on my scoop neck tee, pinned them in place and hand sewed them on. I added the contrast stitching around the edges while sewing. Then, I added beading to the flowers.

Here’s the finished product:

Looking back, I would have ironed fusible interfacing on the inside of the applique, because the fabric rolls a bit. I also would never put this in the washing machine, and obviously not the dryer.

Other than that, I am really happy with how it turned out. 5 months later I am still completely in love with it.

Proudest DIY Moment by Guest Melanie

7 Comments

Well hello, hello. I’m Melanie  author of You Are My Fave and a general fan of all things awesome. That does not include when people misuse the word ironic. I met Melissa in college where we worked together so I’ve beheld her thrifty chicness and talent in person.  I feel as if I get some sort of bragging rights for that.

I’ll tell you what was not my proudest DIY moment. The day in seventh grade life skills class where I sewed the two sides of my mini duffle bag together then cried in the closet while my teacher unstitched it. I learned then and there that I’m not cut out for sewing and I needed to explore other DIY territories. The art of the party entered the scene when I took on the challenge of crafting centerpieces for our prom and decided that staying up to finish them was more important then getting sleep the night before I took the ACT. Those tragic Mardi Gras themed centerpieces were the beginning and this handcrafted pinwheel party is the present.

Hollys_bday_2010 - 046

IMG_1961

Hollys_bday_2010 - 044

Every detail was handmade and although pinwheels are on the easy end of things, it was still a proud DIY moment for me. Mostly because it turned out like the picture in my head and that’s a rare, rare thing. Just ask my husband about his birthday cake this year.

mobile site