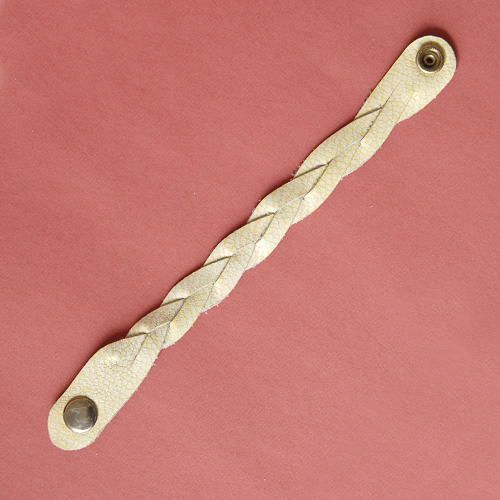
• M A G I C • B R A I D E D • L E A T H E R •

(of course the pattern pieces above aren't the same, I was just too lazy to take a supplies pic that was practically the same as this one. hope you'll forgive me.)
• S U P P L I E S •
- hammer
- scissors
- hole punch
- tape
- button-stud/snap & setter
- 1-2 oz leather/felt
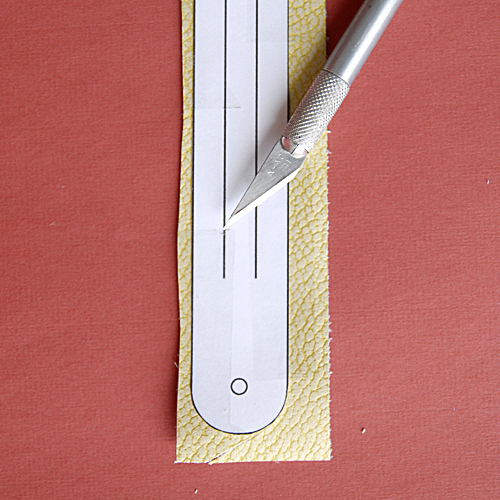 Print and cut out pattern pieces. Tape onto leather. Carefully cut two inside slits with an X-acto knife & ruler. Punch holes then cut out perimeter of the pattern.
 Tape your leather to a sturdy surface, like a desk or slab of wood. Start a tight braid with the farthest right strand & count each time you cross a strand.
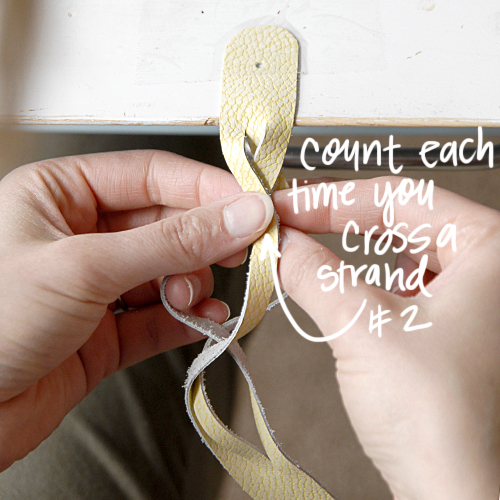
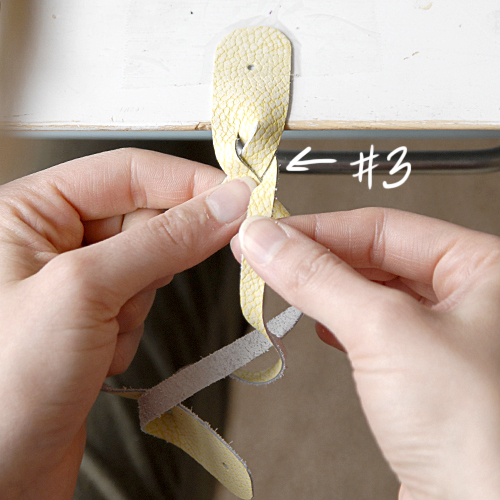
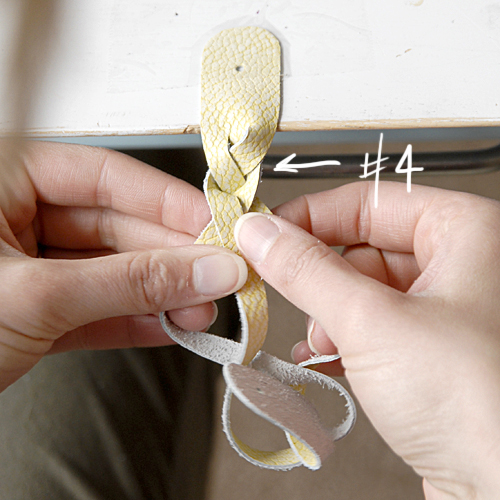
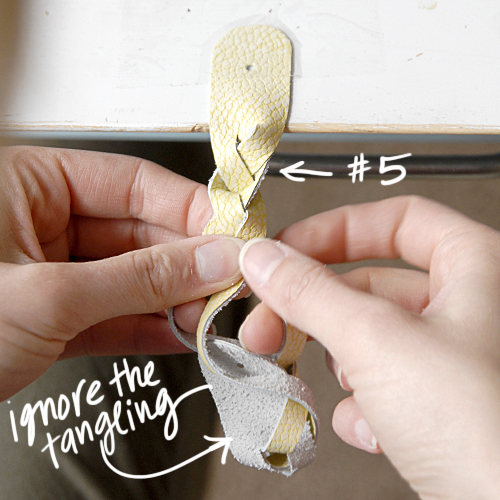
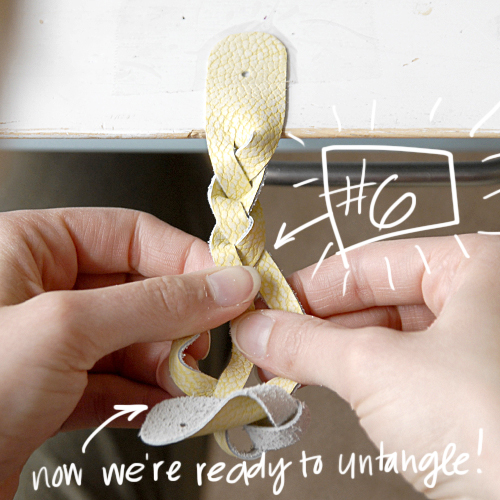 Ignoring the bottom part as you go, count up to 6. Once you get to six, start untangling.
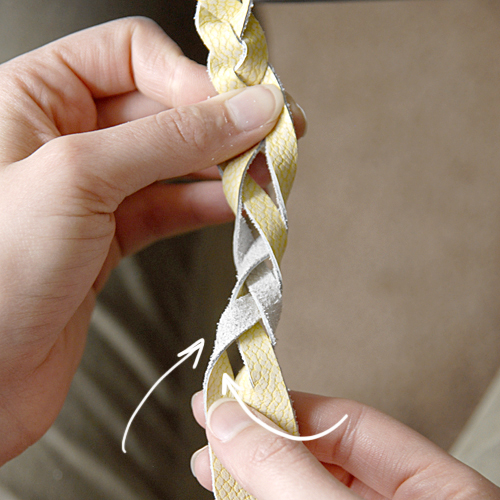 Look at the bottom part, the strand that’s on top should go through the hole. Follow the strand with the end of the bracelet.
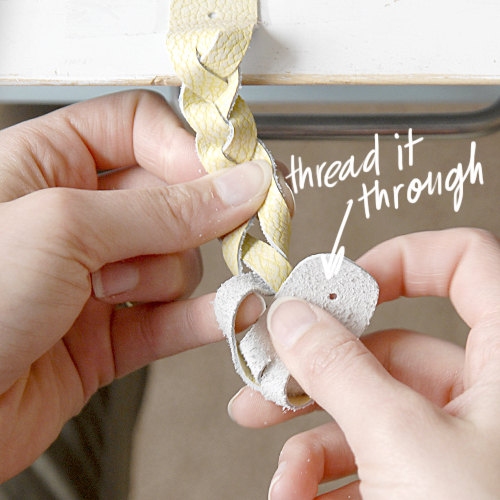
 Once you’ve followed through that end, your ends should look like this. Take the right strand & smooth it out. the end will want to go in between the right & middle strands. Once you’ve untangled that, start your second set of 6. You might need to untangle as you go as you run out of room. The bracelet pattern uses two sets of braids.
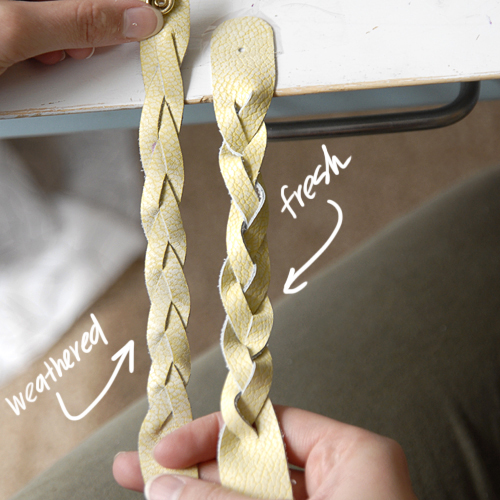 Once you're done braiding, your bracelet will look a little lumpy. Don't worry. Just give it some time & it'll break in nicely.
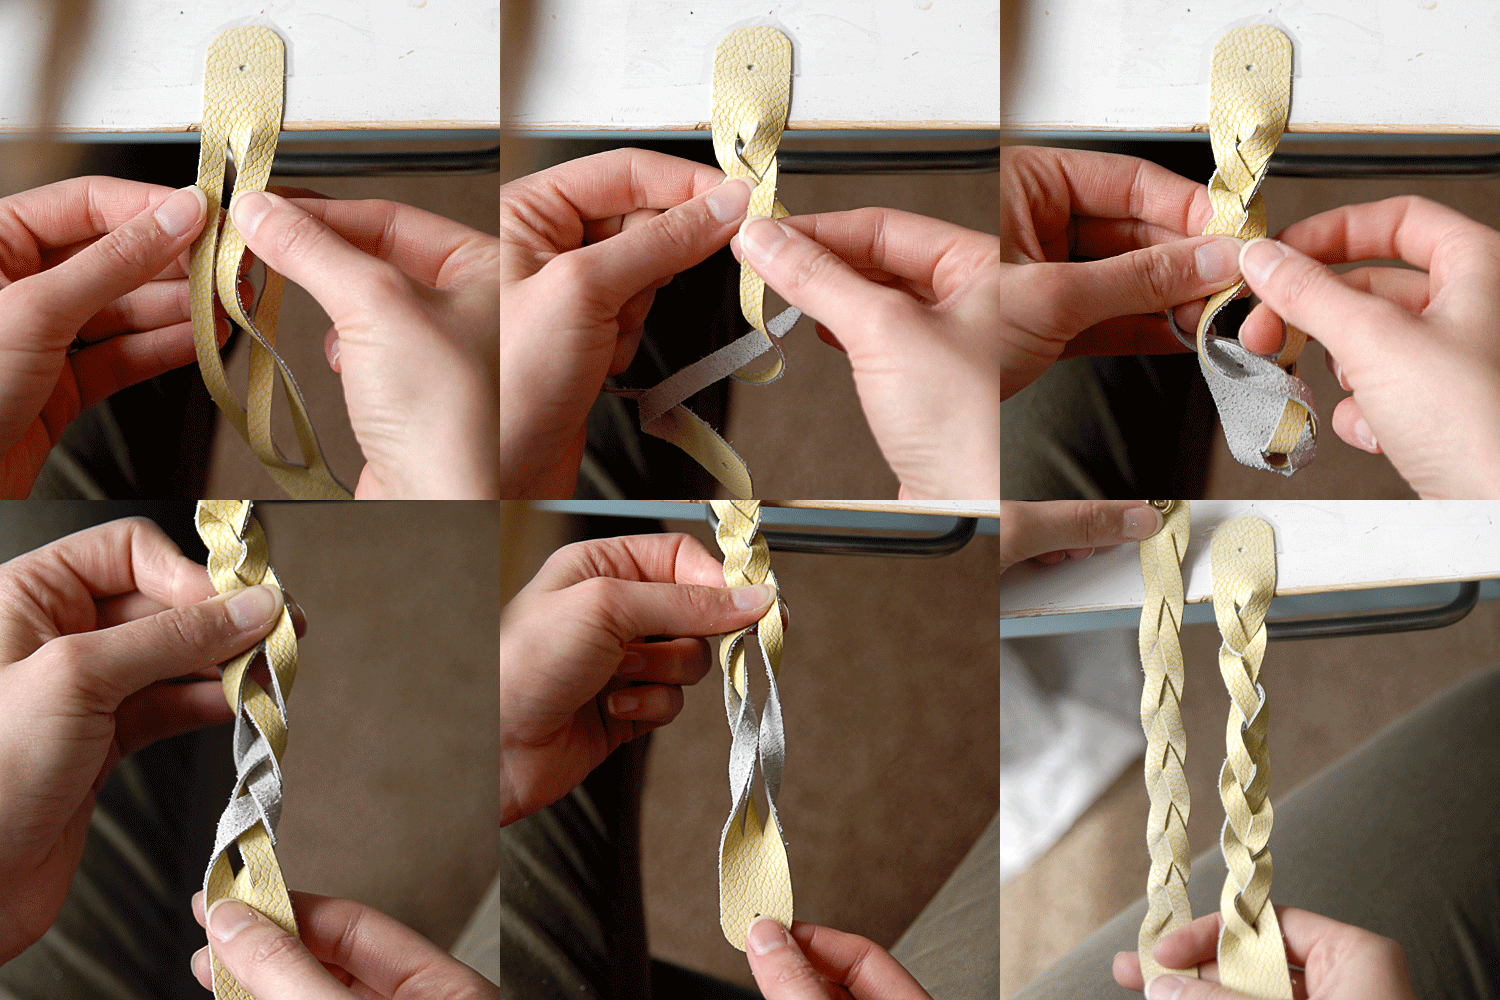
Here are the photos animated so you get a better idea of how it goes.
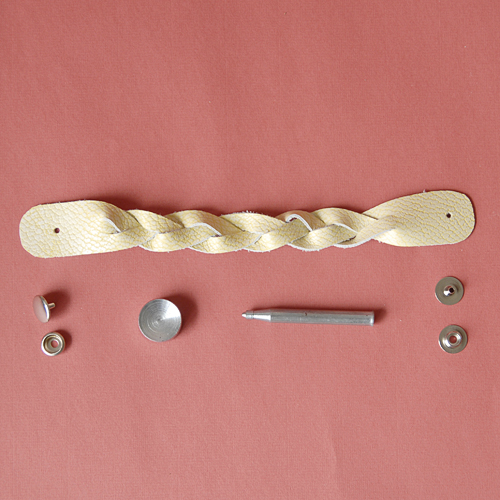 Once you're finished braiding, you'll attach snaps or button-studs.
 Wear on your wrist for a couple of days to break it in. Be sure to get it wet if you'd like for the braids to lie flat. ENJOY!!
• O P T I O N A L •
Use this technique for purse handles! Click the button below to download the printer-friendly version of this tutorial & for the pattern pieces. I’d love to see how you make this tutorial yours! Email me pics or link to your pics in the comments. This tutorial is free for personal use and should not be distributed/republished without my consent. Altering the file NOT ALLOWED. If you would like to use this tutorial for commercial purposes, please email me. Thanks! Don't be totally confused. It looks tricky, but it's really quite simple! Check out the video tutorial below for additional clarification: